

Using Face ID to Open Apps

Long press on any app. Press and hold on the app until your phone vibrates and opens a menu. Enabling Face ID to open and sign in to apps is a feature introduced in iOS 18. If you haven't updated your iPhone or iPad to iOS 18 or later, you'll need to do that first.
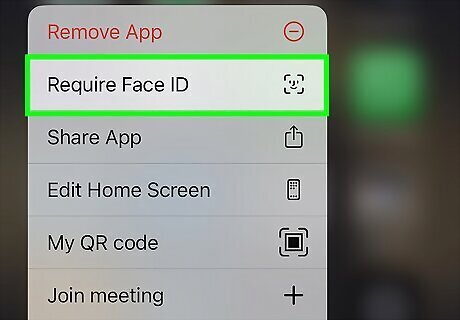
Tap Require Face ID. It's near the bottom of the menu, with a Face ID icon. If you're on an older version of iOS or using an older iPhone model that doesn't support Face ID or using Face ID on apps, you will not see this option.
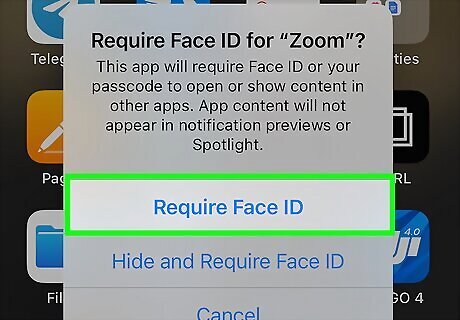
Tap Require Face ID or Hide and Require Face ID. If you only want to require Face ID to open the app, tap Require Face ID. This will ensure the app will not open unless it detects your face. If you also want to hide the app so it's not visible in your App Library, choose Hide and Require Face ID. You can also unlock your device with your passcode. Simply hold the phone so it can't see your face, then wait for it to prompt you for your passcode. There's no way to make your passcode the default method to unlock the app. If you hide the app, it won't be visible in your App Library. If you want to use that app, you will need to open your App Library, tap the Hidden folder, and use Face ID to unlock it. You'll find the hidden app there. To remove Face ID, long press on the app again and tap Don't require Face ID.
Using Face ID to Log In to Apps
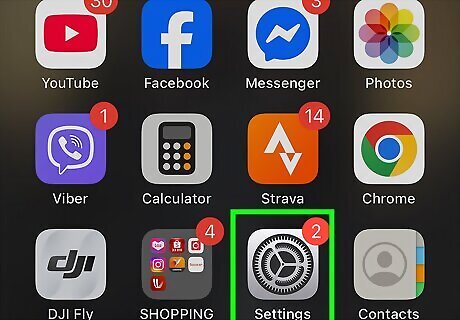
Open your Settings app. Some apps allow you to enable Face ID to log in instead of using your password. You can adjust which apps can use Face ID in this way, but you can't change which apps have this functionality.
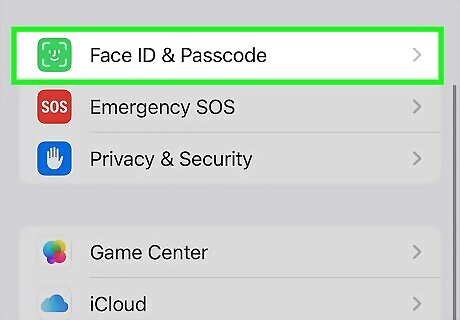
Tap on Face ID & Passcode. You'll have to scroll to find it. It's got a green Face ID icon.

Enter your passcode, if you have one set up. You'll be prompted to enter your passcode before you can continue.
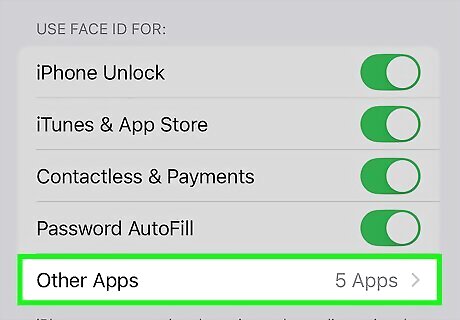
Tap Other Apps under "Use Face ID for". It's the bottom option in this section, which is at the top of the menu.
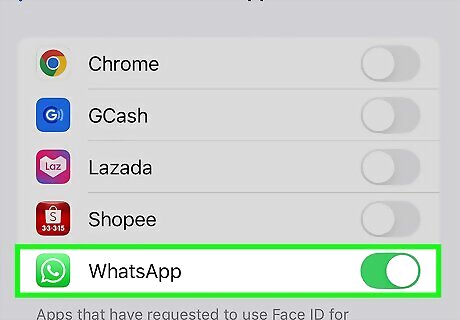
Toggle on apps that can use Face ID. All of the apps you have installed that can use Face ID for logging in will be listed here. Simply tap the toggle to enable or disable that app's Face ID permissions.
Locking Apps with Screen Time

Open your Settings app. If you don't have iOS 18 or later or don't want to use Face ID to open apps, you can also lock apps with Screen Time. You will need to be running iOS 12 or later on your iPhone or iPad to use Screen Time to lock your apps. This method works by only allowing an app to be used for a certain amount of time each day. Once the app is open for the specified amount of time, nobody can open it until the next day. The lowest time you can set is one minute. This means that to truly lock the app, you must keep it open for at least one minute each day. So, after one minute of using the app, it will stay locked until the next day.
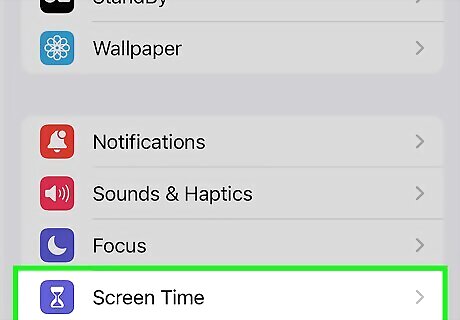
Tap on Screen Time. It's got an icon of a purple hourglass. You'll have to scroll to find it.
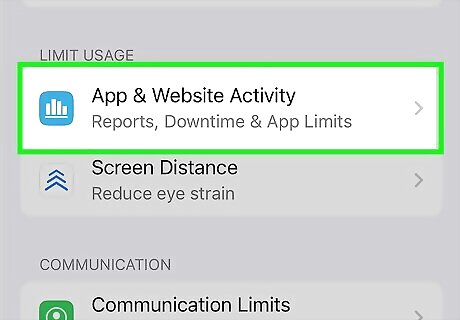
Tap App & Website Activity. When the pop-up opens, tap Turn On App & Website Activity. If you already have App & Website Activity enabled, you can skip this step.
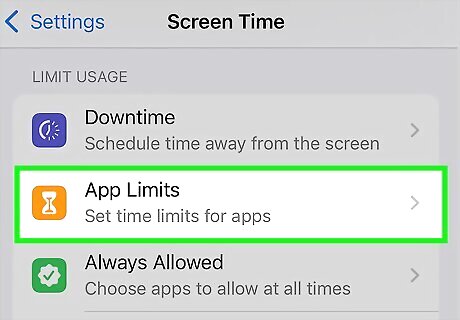
Tap App Limits on the menu. If you've already restricted apps with Screen Time, you'll see them listed here.
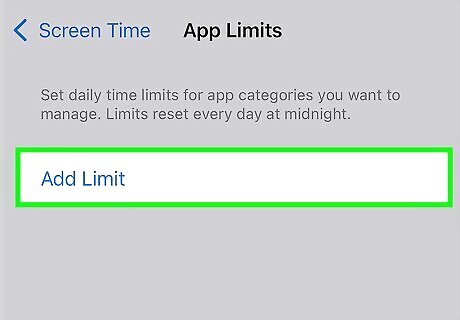
Tap Add Limit. This displays a list of app types and categories.
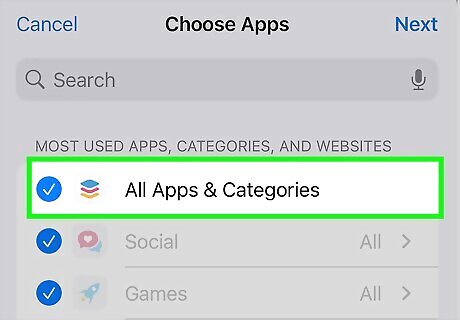
Choose an app or category. There are a few options you can choose on this screen: All Apps & Categories will block all apps except for Settings and Phone. Tap the circle next to an app category to lock all apps within that category. Tap the name of a category to expand it, then select an app from within that category to lock. When you're finished, tap Next to continue.
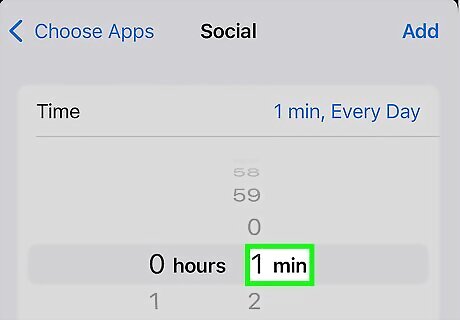
Set the time limit to one minute. The minimum time you can set before locking kicks in is 1 minute. If you see the option to Block at End of Limit, select it. This will make sure the app can't be opened once the time limit has been reached. This option won't be visible on some models.
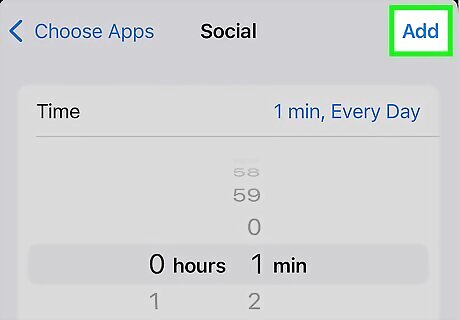
Tap Add to add the app limit. You can add more app limits if desired, unless you selected All Apps & Categories. To lock the app now, open it for at least a minute.


Comments
0 comment