
views
Learning Safely

Find a safe place to practice. Before you attempt a front walkover, you'll need a spot where you can play around with new techniques and exercises without worrying about hurting yourself. Look for spots that are outside or have enough space for you to move around freely. If you're practicing outside, try to find an area with grass, sand or loose dirt, which can help cushion the impact if you fall. Make sure your outdoor practice space is clear of rocks, twigs and other debris that could cause a painful mishap. See if you can spend the afternoon learning the front walkover in your school gymnasium or the local community center. Parks and playgrounds with rubberized flooring make great places for safely trying out new skills.
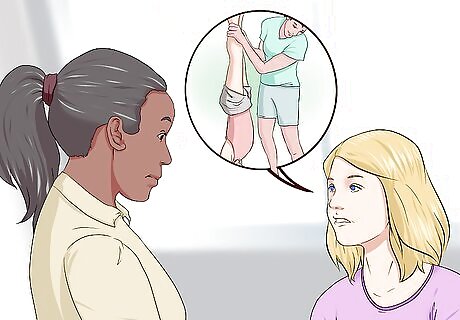
Grab a spotter. Pull a friend, parent or sibling aside and ask them if they can spot you as you get the hang of difficult or scary skills. A spotter can guide you and support your weight as you run through the movement, which lets you focus on your technique. Almost anyone can be a spotter, so there's no reason not to have one on your first few tries. To properly spot a front walkover, have your spotter place one hand across your lower back and give you a lift as you stand up out of the bridge. Your spotter should be someone who is tall and strong enough to help hold you up.
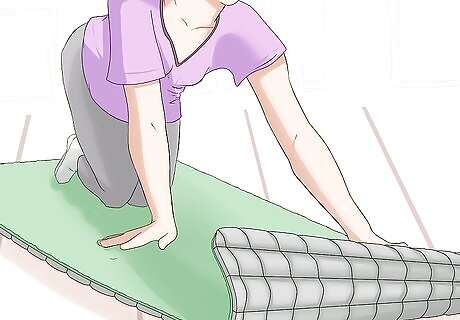
Put down some mats. Mats and protective padded surfaces will serve to prevent injury in case you land incorrectly. They will also take away a good deal of fear, as you know you're unlikely to get hurt even if you mess up. Once you get more comfortable with the skill, you can slowly start building up the courage to do it without pads. Testing the waters with a mat can really speed up the learning process, so that by the end of the day you'll be doing walkovers with no hesitation. You can buy fold-up tumbling mats designed specifically for gymnastics and cheerleading at most sporting goods stores. These will lay over any flat surface and store easily when you're finished with them. If you don't have mats available to you, use folded blankets, pillows or couch cushions to break your fall.
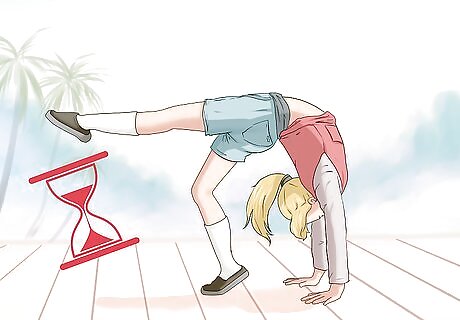
Go at your own pace. Even though your goal is to learn to do a front walkover in the course of a day, there's no need to rush yourself. The bigger a hurry you're in, the more likely you are to make mistakes or develop bad habits. Spend a couple of hours or longer breaking down and drilling each phase of the technique and take your time overcoming intimidating challenges. Create short-term goals for the day, such as "I'd like to be able to hold a bridge by the end of the afternoon," or "I'll try my first walkover without a spotter after dinner." Don't forget to take rest breaks occasionally. Tumbling is a strenuous activity, and you won't perform as well if you're tired.
Working on Skill Progressions
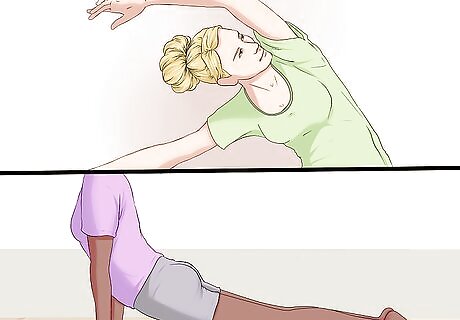
Stretch out thoroughly. Movements like the front walkover can put a lot of strain on your wrists, shoulders and back, so it's a good idea to stretch out these parts of your body prior to practicing. Following a light warm up, loosen up your muscles and joints. This will get your blood flowing and energize you, as well as increase your range of motion, allowing you to get into tricky positions easier. Raise both arms up high, then reach across your body as you lean from side to side at the waist. Lie face down on the floor and push your torso up and back to limber up your lower back. Flex both wrists to get them ready to hold you up. Don't neglect your warm up and stretching routine. You're at a much higher risk of injury if you force your body to perform difficult movements before it's ready.
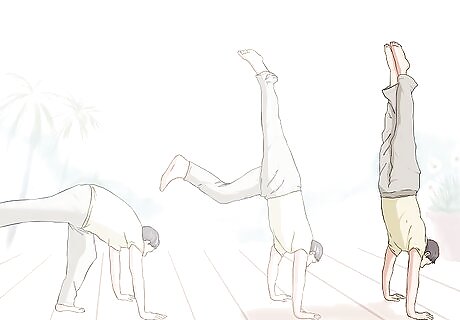
Start with a handstand. Since a well-controlled handstand is the setup for the front walkover, it will be useful to make sure you have it down first. Place both hands on the floor in front of you. Kick up with one leg, then bring both legs together in a vertical position with your body straight and aligned. Maintain your balance by making minor adjustments with your hands and shoulders. Practice your handstands against a wall until you get used to being upside down and supporting yourself on your arms. Try taking a video and putting it in slow motion to see your mistakes. Instead of returning your feet to the floor beneath you when you exit the handstand, lower yourself forward into a bridge. This technique is called a front limber, and it will help get you more comfortable with transitioning to your feet. Aim to spend an hour or two drilling your handstand, then start working on transitioning into the bridge and follow-through.
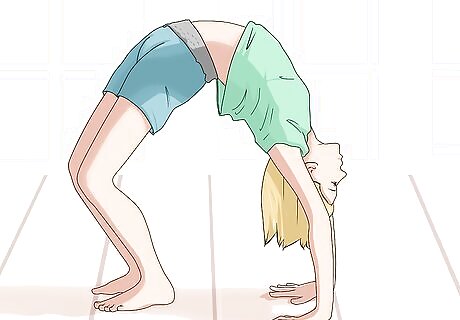
Get the hang of a bridge. The bridge and backbend translate perfectly to the second part of the walkover. Lying on your back with your hands and feet planted firmly on the ground beneath you, press up so that your body forms an arch. Support yourself by keeping your arms and legs straight and strong. The back flexibility needed for to hold a solid bridge is key for learning the front walkover. Squeeze your butt muscles to help you stay tight in a bridge. You won't need to be able to hold a bridge for very long in order to do a walkover, so focus on standing up from the bridge to help you practice coming out of the technique easily.
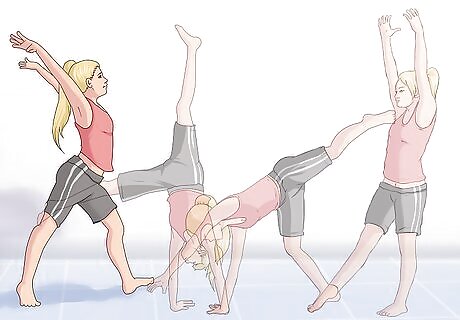
Turn a few cartwheels. Master your cartwheel to get used to the action of kicking up to your hands, which will carry you over when doing the walkover. Set your hands down on the floor one after the other as you swing your back leg up. Drive through with your kicking leg to lift yourself into an inverted position, then rotate around and set it back down, followed by your opposite leg. The technique of landing on the same foot you kick with is used in both the cartwheel and front walkover. When doing a front walkover, you'll only be tweaking your cartwheel technique slightly so that you're moving straight forward rather than sideways. Adjusting your cartwheel technique to practice kicking up into a handstand can help you get the hang of getting inverted by the end of the day.
Performing the Front Walkover
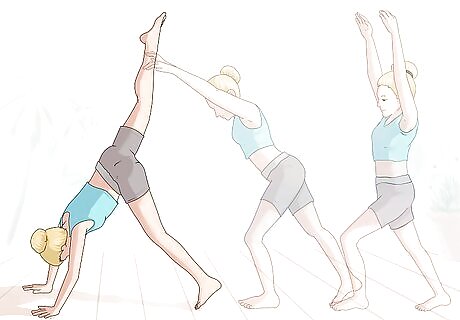
Reach down and place both hands on the floor. Take a staggered stance, with whichever leg you prefer to kick up with in the back. Bend over at the waist and set your hands down a couple feet ahead of your front foot. Your hands should be a comfortable distance apart and parallel, with your fingers spread out in front of you. Start with your weight in the heels of your palms and shift it to your fingers as you raise up into the handstand. Your hands should stay in the same position throughout the walkover.
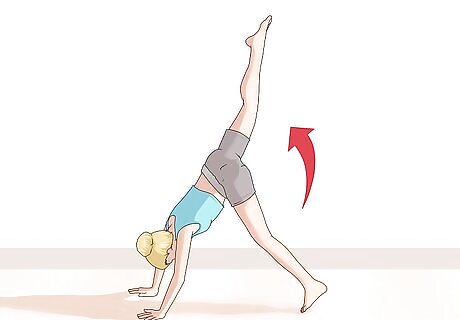
Kick your back leg up behind you. Throw your kicking leg up hard, keeping it as straight as possible throughout the movement. The kick will begin to lift you into a handstand. Keep your other foot on the floor for as long as you can. The momentum generated by the kick will power you through the walkover in one smooth motion, while your extended front leg will act as a counterbalance to help you stand back up. You'll need to kick forcefully in order to rotate around with enough speed to walk out of the backbend. Front walkovers are all about confidence. If you don't commit to the movement, you won't have enough force to carry you over.
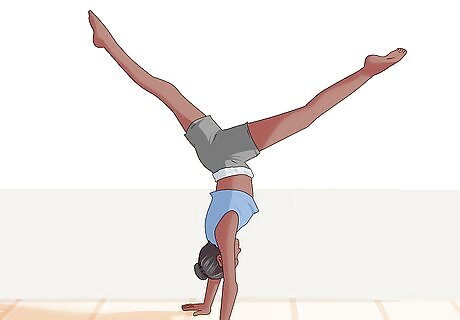
Raise up into a handstand. After you kick up, begin lifting your other leg off the ground. Both legs should now be in the air, leaving you in an inverted position. Balance carefully as you continue to whip your legs over and behind your body. Brace your upper body, but keep your hips and legs loose. Press your fingers into the floor to stabilize yourself and control your speed as you bring your legs over the top. Unlike a normal handstand, resist the urge to bring your legs together. They should stay split from the time you kick to the time your first foot hits the floor.
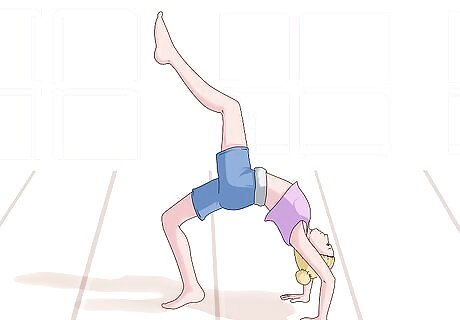
Lean forward to catch yourself in a bridge. At the top of your handstand, arch your back to bring your kicking leg closer to the ground as it comes around. Lean your weight forward as you prepare to come into contact with the floor. The basic idea is that you're gracefully falling into a bridge one leg at a time. While your body is tilting forward, keep your eyes on the floor just in front of your hands to maintain your center of gravity. If you try to look too far up or down, you may fall out of position. Use a raised surface, like a bed or the seat of a couch, to get a feel for landing with your first leg. This is the most difficult part of the skill, and will likely take a few hours to practice before you get it down.
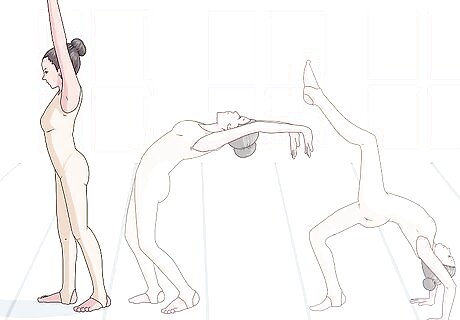
Touch down with one leg after the other. Your kicking leg should now have traveled over your body and be pointed at where you will land. Keep leaning and arching your back until you feel your toes hit the floor. Shift your weight onto your first foot. As you swing your other leg through, push off of the ground with your arms and shoulders to return you to an upright position. You can then glide naturally out of the movement and finish strong and tall. You've just done your first front walkover in less than 24 hours! Keep your legs split until the moment your first foot touches the floor. If they're too close together, the transition won't be as smooth and it will be much harder to stand back up. Practice front walkovers regularly until you start to see improvement in your technique.


Comments
0 comment