
Planting Your Susans
Pick a spot that gets a lot of sunlight. Black Eyed Susan plants thrive in full sun but will also grow in partial or bright shade. They are not very particular about soil type or pH though, which makes them easy to grow just about anywhere, even if they have to deal with some shade.
Plant your susans in well-draining, rich soil. While they don’t necessarily care about the pH of their soil, they do prefer organically rich soil that drains quickly. If the soil is predominantly sand or clay, mix in a 2- to 3-inch depth of sphagnum peat moss, well-aged cow manure, compost or leaf mold. This addition of organic matter will improve soil fertility, texture and drainage. Use a rototiller to mix the organic matter into the soil to a depth of 8 to 10 inches (20.3 to 25.4 cm).

Select your plant date depending on whether you are growing your susans from seed or seedlings. Plant Black Eyed Susan plants in early spring right after the last expected hard frost has passed. Plants are readily available at garden centers. Black Eyed Susan can also be planted by seed. When starting from seed, sow them directly into the soil in your garden around the last frost date, or start them indoors around the end of February or beginning of March.
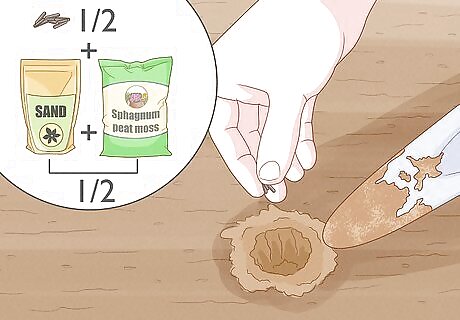
Sow your seeds (optional). Sow the seeds in a half and half mixture of sand and sphagnum peat moss. Leave the seeds so that they are barely covered with the soil mixture. Keep them warm, between 70 and 75 degrees Fahrenheit (21.1 to 23.8 degrees Celsius), and moist until they sprout. When the seedlings have two sets of leaves, transplant them into cell packs or individual pots.
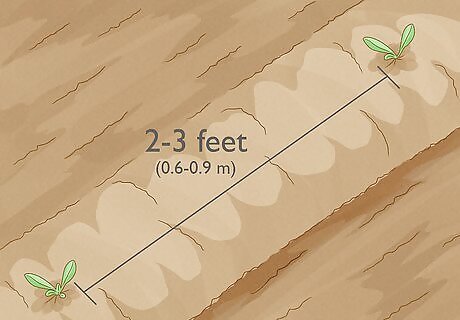
Make sure to give your seedlings enough space. Whether you grow your seedlings from seed, or purchase your seedlings at a nursery, you will have to give them enough space in your garden. Seedlings should be planted about 2 to 3 feet (0.6 to 0.9 m) apart so there is plenty of room for good air circulation around the plants after they reach their mature width. Increased air circulation reduces the likelihood of fungal diseases. If the seeds are sown directly in the garden, thin the seedlings to 2 to 3 feet (0.6 to 0.9 m) apart when they are a few inches tall.
Caring for Your Susans
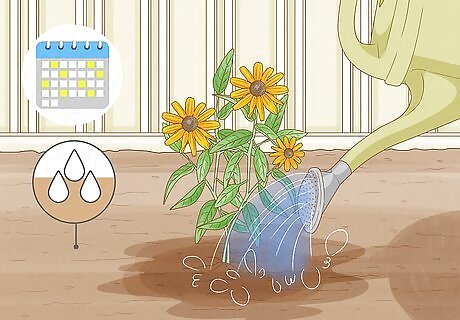
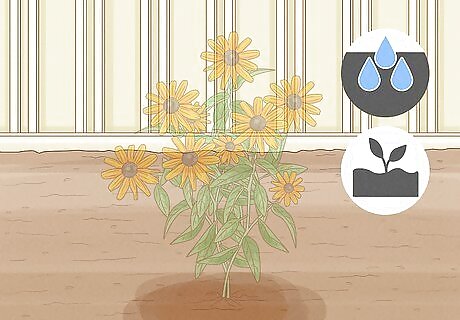
Water your plants when the soil becomes dry. Black eyed Susans are surprisingly drought-tolerant after they become established. For the first year, however, they should be watered when the top of the soil begins to dry. Water them only once or twice each week during dry spells from the second year on. Try to avoid getting the foliage wet, as this can cause mildew to form.
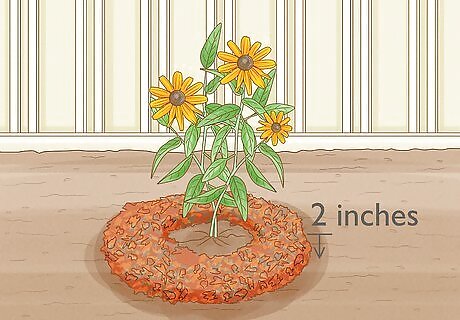
Mulch the area around your Black Eyed Susans. Spread a 2-inch depth of organic mulch over the soil around the plants to help retain moisture in the soil. You don’t need to give your plants fertilizer, as they grow well enough without it.
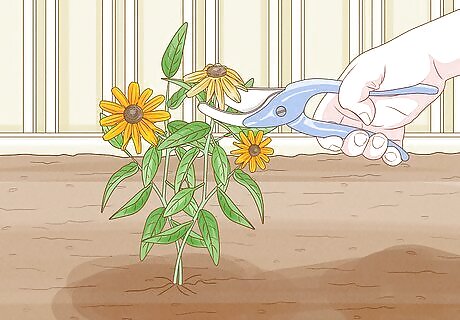
Remove dead flowers. Remove the flowers as they begin to fade to encourage the plants to produce more flowers or, if more Black Eyed Susan plants are desired, leave a few of the flowers on the stems to go to seed. Trim all of the stems right down to the ground in late winter to make room for fresh growth in the spring.

Divide Black Eyed Susan plants every three years. This dividing should be done in March. Prepare the planting site before digging them up if the divisions are to be replanted. Water the plants one to two days before digging them up. To dig your plants up and divide them: Push a dirt shovel into the soil all the way around the plants 6 to 8 inches (15.2 to 20.3 cm) away from the stems to sever the roots. Push the dirt shovel into the soil again and lift the whole clump up with the tip of the shovel. Carefully work the plants apart, being sure to leave a good fist-full of roots and three to five healthy stems on each division. Replant them right away or pot them up in soil-based potting soil to give away to neighbors, friends and family.


![Hyundai Grand i10 Nios Launch Today - Watch it Live Here [Video]](https://cdn.sharpss.com/news/66/ab/e3/66abe3055e828e6c5deb46a1d469c9a9-s.jpg)

Comments
0 comment