views
How to Enable Remote Desktop
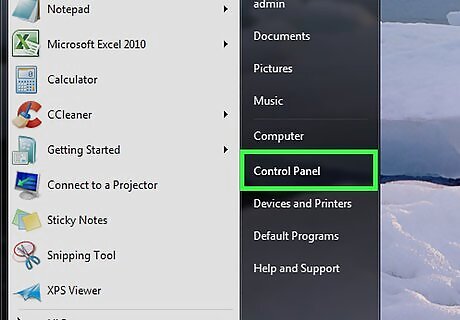
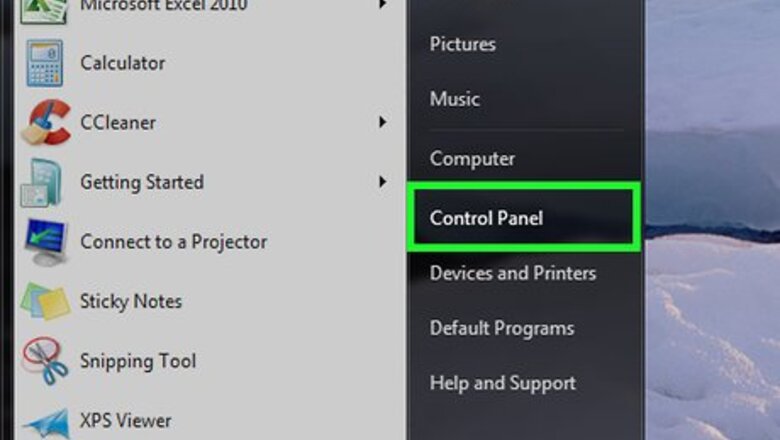
Open Control Panel. You'll find it in the Start menu. To turn on Remote Desktop, you must be on an account with administrator privileges, and the account must have a password enabled. Complete these steps on the computer you want to connect to.
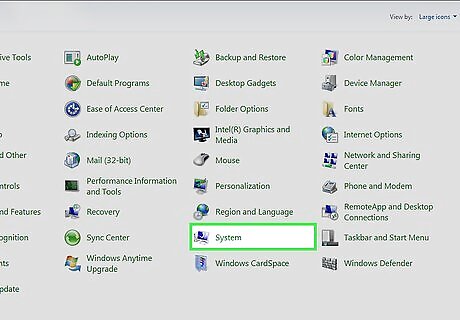
Click System. It's a heading near the bottom of the window. If you don't see this option, select System and security, and then click Allow remote access. You may have to scroll down to see this option.
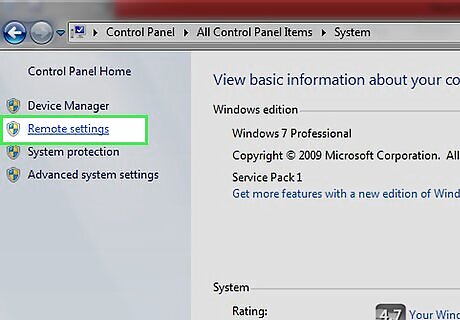
Click Remote settings. This link is in the upper-left corner of the window.
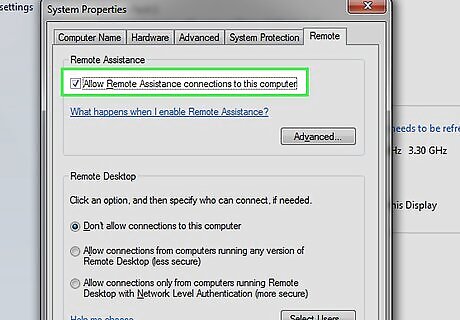
Check the "Allow Remote Assistance connections to this computer" box. It's at the top of the new window. If you don't see this option, first make sure you're on the right tab by clicking Remote at the top of the window. Skip this step if the box has already been checked.
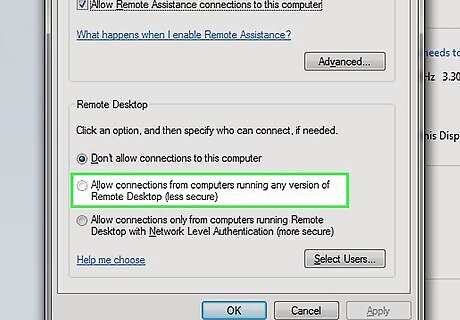
Select "Allow connections from computers running any version of Remote Desktop". It's under the "Remote Desktop" header near the bottom of the window. Doing so lets you connect to this PC from any Windows computer running Remote Desktop (e.g., a Windows 10 or 11 computer).
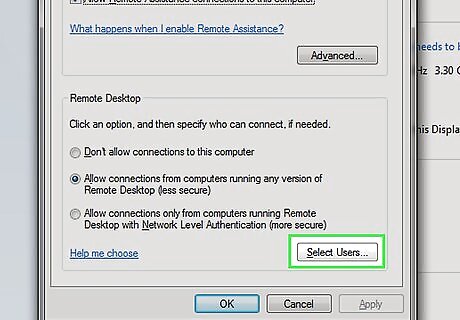
Add user accounts with permission to connect. Click Select Users… to open the Remote Desktop Users window, where you can control who can access the Windows 7 PC remotely. If you only want your current user account to be able to log in, you can skip this step. Click the Add… button to Click Select Users…. Click Add. Click Advanced…. Click Find Now. Scroll down in the pane at the bottom of the window and double-click the name of the user you want to add. Click OK on the top two open windows.
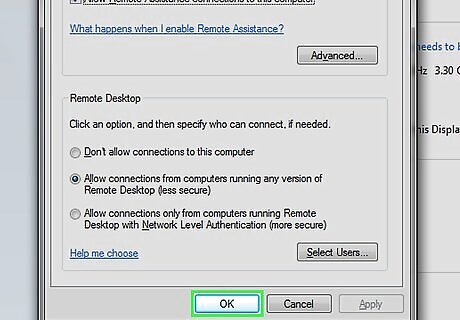
Click OK. It's at the bottom of the window. Doing so saves your settings and enables Remote Desktop on your target computer.
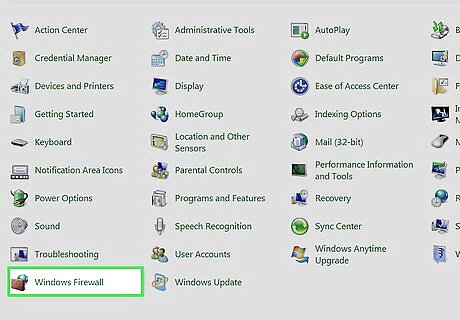
Open your Windows Firewall settings. Now you'll need to allow Remote Desktop connections through your firewall. Click Control Panel Home at the upper-left corner of the Control Panel window, and then click Windows Firewall.
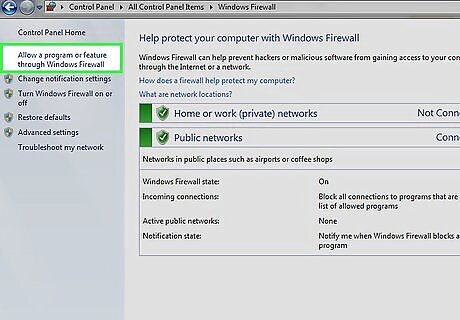
Click Allow an app or feature through Windows Firewall. This link is in the top-left corner of the page.
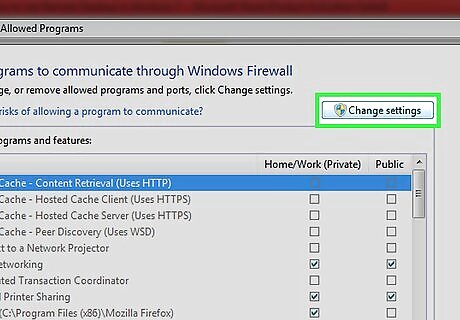
Click Change settings. It's at the top of the page, just above the list of programs in the middle.
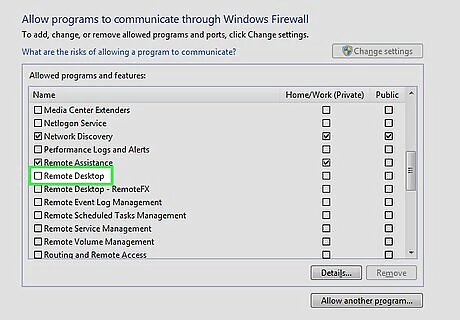
Check the "Remote Desktop" box and click OK. Doing so will allow Remote Desktop through the Windows Firewall. To connect to this computer from another Windows 7 PC, you will need to know the Windows 7 PC's IP address or hostname. To get the hostname, return to Control Panel > System > Remote Settings and click the Computer Name tab. If you're connecting within the same network, you can use the PC's local IP address. To get it, open Control Panel, type ipconfig /all, and press Enter. The local IP address appears next to "IPv4 Address" under your adapter. To get the external IP address, which you'll need if someone is trying to connect over the internet rather than your local network, go to https://www.whatismyip.com.
How to Connect to a Windows 7 PC with Remote Desktop
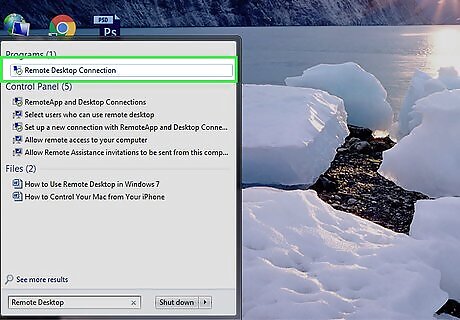
Open Remote Desktop on another computer. You can use Remote Desktop on any Windows PC, including later versions like Windows 8 and 10. You can do so by clicking the Start menu, typing remote desktop, and then clicking Remote Desktop Connection.
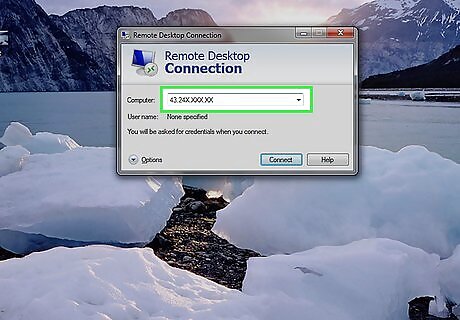
Enter the IP address of the target computer. Click the "Computer" text box in the middle of the Remote Desktop window, then type in the target computer's public IP address.
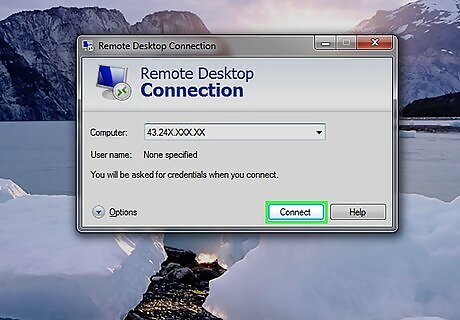
Click Connect. It's at the bottom of the window.
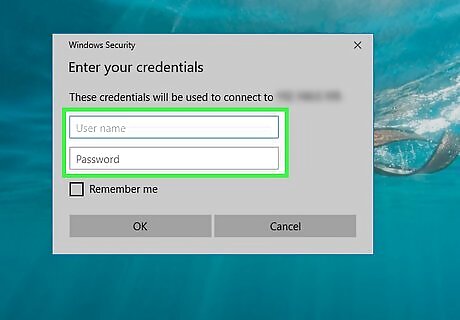
Log in to the target computer. When prompted, type in the administrator name and password for the account on which you enabled Remote Desktop. If you added another user to Remote Desktop, you can enter their credentials instead to access their account.
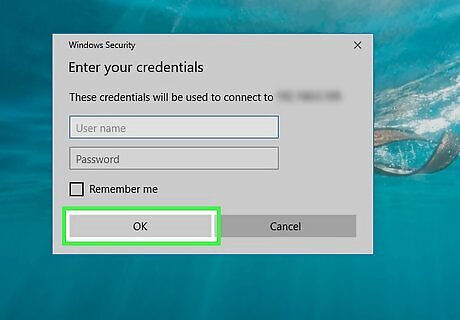
Click OK. It's at the bottom of the window. Doing so connects your computer to the target computer, though it may take several minutes for the connection to finalize; once you see the other computer's desktop appear in Remote Desktop, you're free to peruse your remote computer as you please.
Troubleshooting
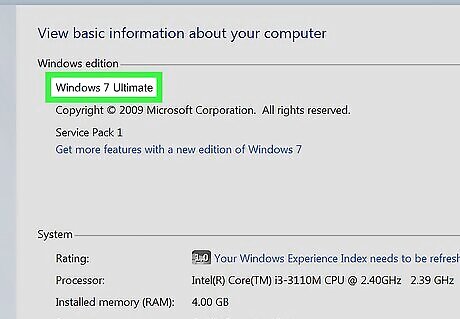
Make sure the host PC is running Windows 7 Professional, Enterprise, or Ultimate. You will not be able to connect to the Windows 7 PC with Remote Desktop if it's running Windows 7 Starter, Home Basic, or Home Premium.
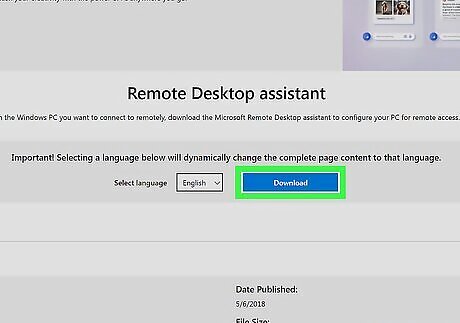
Try the Windows 7 Remote Desktop Assistant. If you're having trouble using Remote Desktop on Windows 7, use this tool from Microsoft to check your settings, including your firewall. Go to https://www.microsoft.com/en-us/download/details.aspx?id=50042, click Download, and double-click the downloaded program to run it.
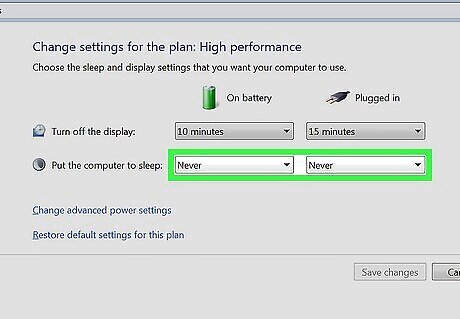
Check the power settings on the host computer. If the Windows 7 PC you're trying to connect to remotely is unreachable, it may have gone into sleep or hibernation mode. Click the Start menu on the Windows 7 PC, type power and sleep, then click Power and sleep settings in the search results. Select Never under "Turn off after" and/or "Put the computer to sleep" menus if not already selected. Click Save changes.
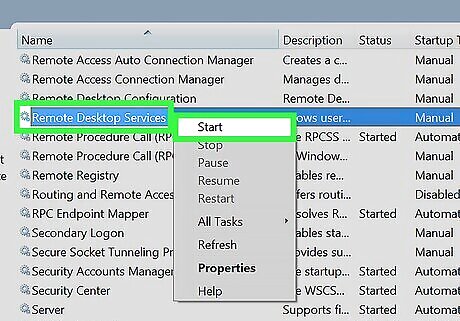
Make sure all Remote Desktop services are running. If the Windows 7 PC isn't accepting your remote connection, a service may have stopped. On the Windows 7 PC, press Windows key + R, type services.msc, and then press Enter. Scroll down the list of services until you find the ones that begin with "Remote Desktop." If any of these services aren't running, right-click them and select Start.
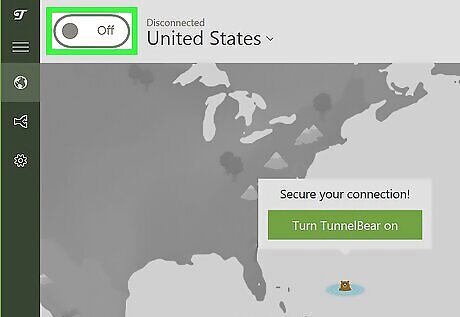
Disconnect from your VPN if you can't connect. If you're trying to connect to a Windows 7 PC that's on the same network (and a VPN is not required to connect), disconnect from your VPN. An external VPN changes your IP address, and the host computer may not accept your connection.


Comments
0 comment