
Transplanting from Pots to the Ground
Pick a planting location that meets your plant’s sunlight and soil needs. Different flowers thrive in different environments. Choose a spot in your yard that gets the correct amount of sun and contains the right kind of soil for your particular flowers to help them grow and thrive. For example, if you have peonies, plant them in a location that gets full sun and has well-draining soil in order to get the best results possible. If you aren’t sure what your type of flowers need, do some research online to find out.
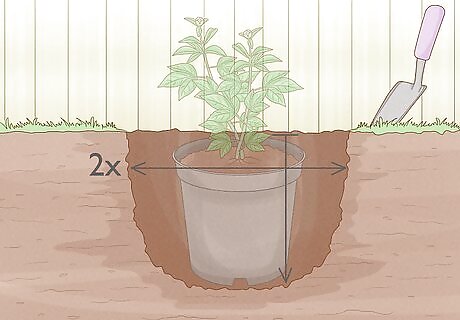
Dig a hole that’s twice as wide and just as deep as the pot. Use a shovel to dig a hole in your chosen planting location. Make sure that the hole is as tall as the pot or container that your flowers are currently in. Also make sure that your hole is about twice as wide as the pot or container is.
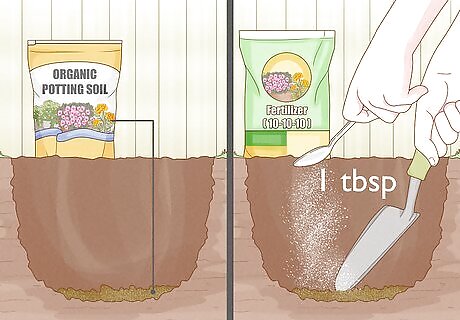
Add potting soil and 1 tablespoon (15 ml) of balanced fertilizer to the hole. Get some organic potting soil from your local garden center and sprinkle a little bit into the hole. Then, measure out 1 tablespoon (15 ml) of 10-10-10 slow-release fertilizer and mix it in with the potting soil to ensure that your flowers are surrounded by all of the proper nutrients. 10-10-10 fertilizer contains equal quantities of potassium, nitrogen, and phosphorus.
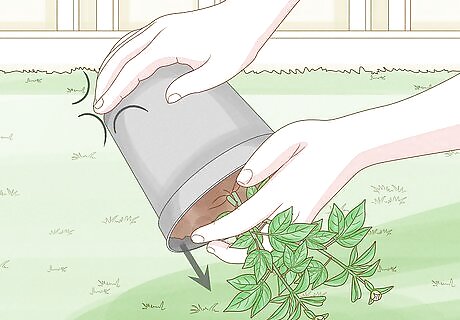
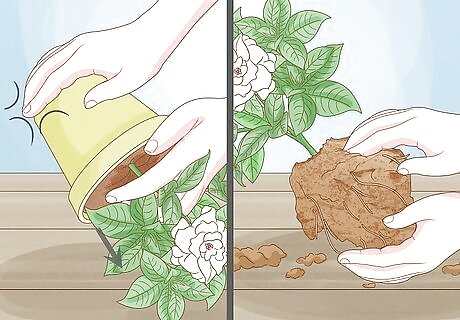
Slide the flowers out of their pot. Hold the base of the plant with 1 hand and hold the pot with the other. Lean the pot over sideways and slightly upside down. Pull up on the pot while supporting the flowers with your other hand. Allow the plant and dirt to slide out. Give the bottom of the pot a pat if the plant doesn’t slide out easily.
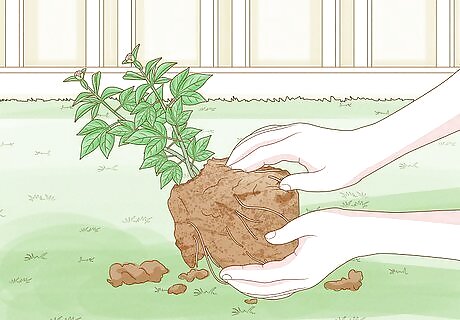
Massage the flowers’ root ball to break it apart. The soil surrounding your flowers’ roots is likely compact and shaped like the pot from being kept inside it. Gently grab at the edges of the soil surrounding your flowers’ root system to break it apart a little bit. This should help the plant adapt to its new environment.
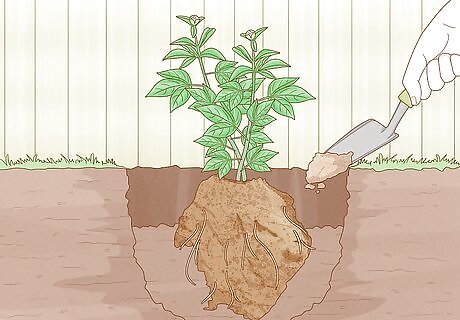
Place the root ball in the hole and backfill it with soil. Set the root ball in the hole you dug and make sure that it’s straight and centered. Then, push the soil you dug up towards the base of the plant. Pat the dirt down gently.
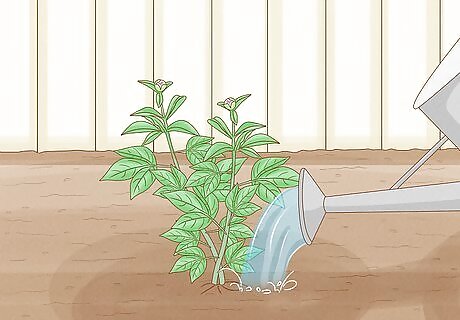
Water the flowers at their base. Fill a watering can with water and then pour water at the base of the plant. If the water soaks into the ground quickly, refill your watering can partially and water the flowers again.
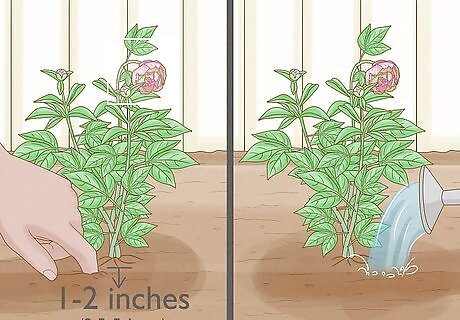
Check on your flowers daily to ensure that they’re adapting. Check on your flowers each day for about a week to make sure that they’re adjusting well. Continue to water your flowers consistently as needed. If you check on the flowers and they’ve started to wilt and/or brown a little bit, give them more water and provide shade for them with a sunshade cover or patio umbrella. If you aren’t sure if your flowers need water, stick your fingers into the soil. If the first 1–2 inches (2.5–5.1 cm) feel dry, you may need to water your flowers.
Transplanting from a Container to a Pot
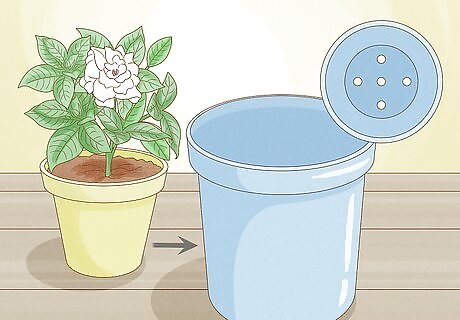
Choose a large flower pot with drainage holes. Large pots are better at providing insulation for your flowers’ roots and can also hold more water than smaller ones. Drainage holes are necessary for preventing root rot. Try to find a pot that has all of these qualities. Keep the container size in mind while picking out a flower pot. While you want your pot to be bigger than your container, you don’t want it to be so big that the flowers look small in the pot.
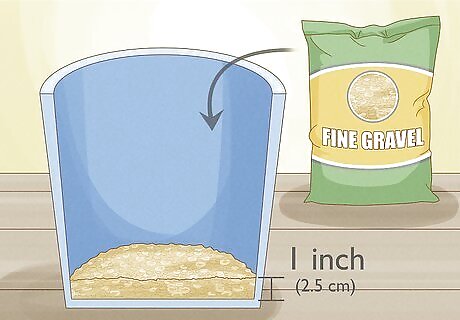
Put a 1 inch (2.5 cm) layer of fine gravel in the bottom of the pot. Fine gravel, horticulture charcoal, and clay pot shards typically keep water from collecting in the bottom of potted plants. Spread any 1 of these out in an even layer.
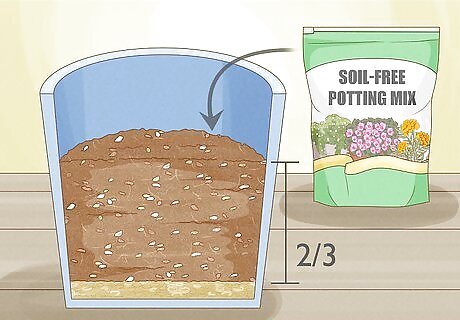
Fill the pot ⅔ of the way with soil-free potting mix. Soil-free potting mix is light and fluffy, and so roots that are planted in it can access more oxygen and nutrients. Pour the potting mix into your pot until it’s about ⅔ of the way full.
Slide the plant out of its container. Tilt your container sideways and carefully slide the plant and surrounding dirt out. Use your hands to break apart some of the compacted dirt that’s on the outside edges of the root ball. Hold the root ball over the pot while you do this so that some of the dirt falls in. This should encourage the plant to adapt to its new environment. If your flowers are in a thin, plastic container, cut the container off instead of sliding the flowers out of it.
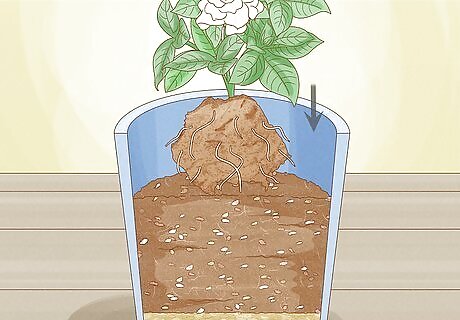
Place the root ball in the pot. Set the root ball on top of the soil-free potting mix. Make sure that the plant is sitting centered and straight inside of the pot.
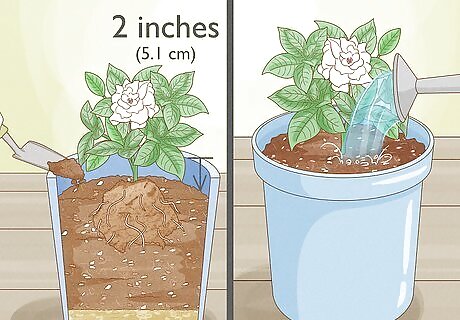
Add some more potting mix to the pot and water your flowers. Sprinkle more soil-free potting mix into the pot until it’s about 2 inches (5.1 cm) from the top. Then, water your flowers and lightly press the potting mix down evenly.
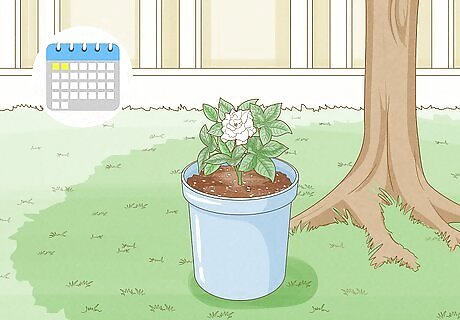
Place your pot in the shade until the next day. Set your pot somewhere outside in a well-shaded area. It may take your flowers 1-2 days to adjust, so keep them in this location during this time. After a day or so, you can move them to a location that has a little more sun. After a few more days, your flowers should be able to handle being placed somewhere that gets full sun.
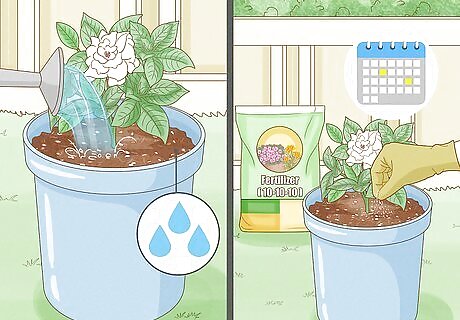
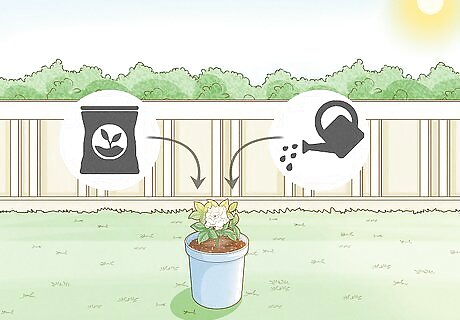
Provide water and fertilizer for your flowers. Different flowers need different amounts of water, but as a general rule of thumb, it’s best to keep the potting mix consistently moist. Additionally, provide balanced 10-10-10 liquid fertilizer for your flowers about twice a month to give them the best shot at survival and healthy growth. Stick your fingers into the top of the potting mix if you aren’t sure if your flowers need to be watered. If the mix feels dry, it’s likely time to water.
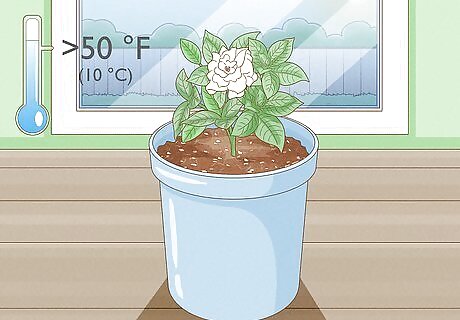
Bring your flowers inside during the winter. Your potted flowers will need to be moved inside in order to survive once the temperature drops. As winter nears, bring the flowers inside to keep them thriving. Don’t bother bringing the flowers inside if you live somewhere that doesn’t tend to drop below 50 °F (10 °C).
Moving Your Potted Houseplants Outside
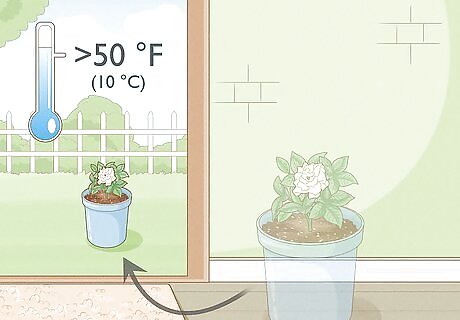
Wait until the temperature is above 50 °F (10 °C). While each type of flower has different needs, most flowers grow and thrive best in temperatures over 50 °F (10 °C). If you’re wanting to move your flowers from inside your home to outside, wait for the weather to warm up first to ensure that your flowers will adjust well. Make sure to move your flowers back inside once the weather cools down again.
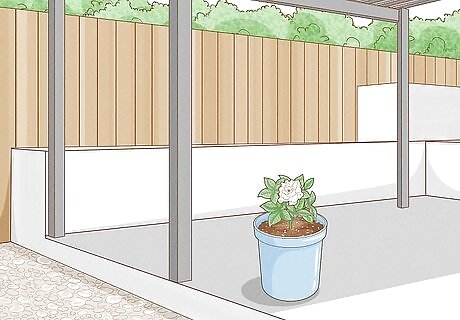
Put your potted flowers in a sheltered, shady place. A smaller environmental change is better for your flowers than a big one is. When you first move your potted flowers outside, make sure to place them somewhere that’s protected and that doesn’t get too hot. Screened-in porches are ideal for this.
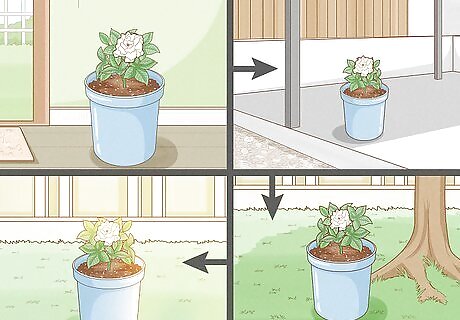
Expose your flowers to sun over time. Since they’ve been indoors, it’ll take some time for your flowers to be less light-sensitive. Each week or so, move your potted flowers to a location that gets a little bit more sun until they’ve adjusted enough to be placed in the location you want to keep them in.
Give your flowers more water and fertilizer than you normally would. Since your flowers have been kept inside with minimal exposure to direct sunlight, they probably haven’t needed a whole lot of water or fertilizer. Increase the amount of each that you give your flowers, especially if it’s very warm and/or windy outside, to keep them as healthy as possible.


Comments
0 comment