
X
Trustworthy Source
State of Oregon
Official website for the State of Oregon
Go to source
However, there are a few uncommon options for DIY ammonia removal, including distilling the water and using a mineral called clinoptilolite to absorb the ammonia. In general, water is safe for consumption and use so long as there is less than 0.5 mg/1 ppm (parts per million) of ammonia in it, although you must test the water to confirm this. Keep in mind that ammonia can be a lung, eye, and skin irritant, so always wear gloves when handling water with ammonia in it and throw on a respirator and protective eyewear if you opt to distill the water.
Distilling the Water
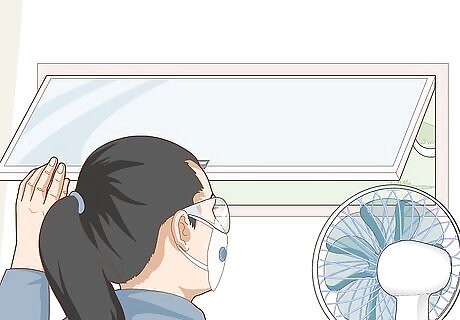
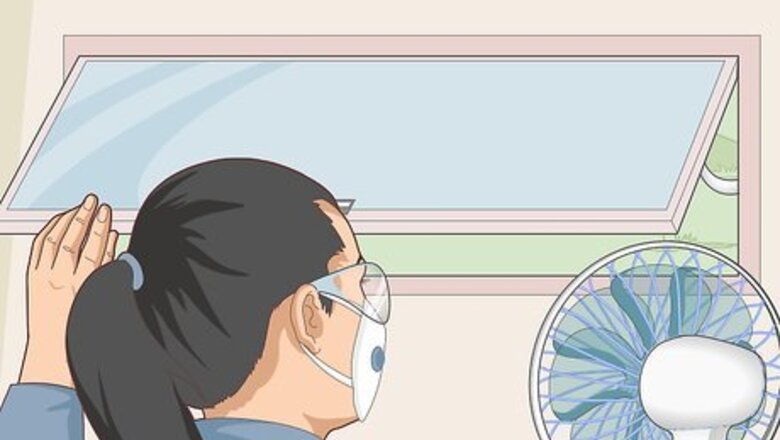
Open the windows, turn some fans on, and get some protective gear. Distilling water involves boiling it, which may kick up some nasty ammonia fumes. This can seriously irritate or damage your eyes or lungs, so you really can’t skip out on the safety equipment. Open all of your windows, turn the fans on, and throw on some airtight protective goggles. Get a respirator with a green cartridge and put it on. Respirator filters are color-coded based on what they filter out. Green respirator cartridges are designed specifically for ammonia and methylamine, so they’re perfect for this. If done properly, this may remove up to 98% of the ammonia. You do have to test the water with an ammonia testing strip before using it, though.

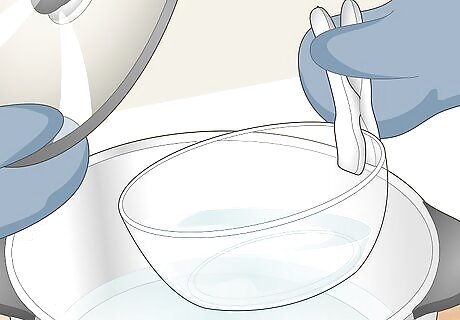
Fill a pot halfway with your water and add a glass bowl that floats. Grab a large pot and set it on your stove. Fill the pot halfway with your water. Find a light glass bowl that takes up at least 75% of the space inside of the pot. Set it on top of the water so that it floats in the middle of the water. If the glass bowl you grab doesn’t float, retrieve it, wash it, and find a different bowl. The bowl cannot sink (or be close to sinking) for this to work. A half-filled pot is the maximum. You can use less water if you’d like.

Get a lid with a metal handle and place it upside down on top of the pot. Find a lid that’s slightly bigger than the diameter of your pot. Set it upside down on the pot so that the handle on the lid is hanging in the middle of the pot. The lid must have a metal handle. Those pots with plastic or cushioned handles will not work.
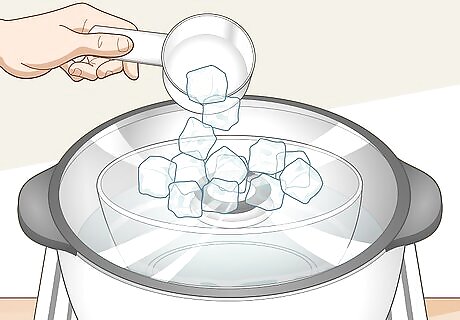
Fill the lid with ice cubes to help the water condense efficiently. You are going to heat the water so that the ammonia water evaporates. The distilled water will condense on the lid while the ammonia won’t. To help the condensation process along, reach into your freezer and pull out a dozen ice cubes or so. Pour the ice cubes directly on to the lid. While you’re doing this, you can replace the ice cubes as they melt and the cold water dissipates. It’s not mandatory, though. Keep in mind, the lid will be extremely hot! Wear oven mitts if you’re doing this.
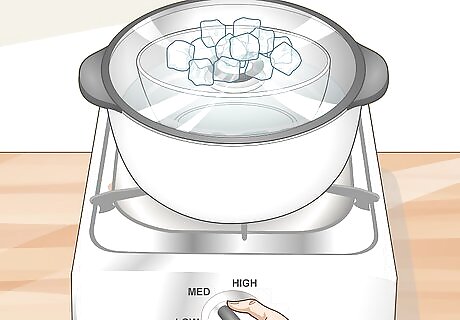
Turn the burner on medium heat and let the water evaporate. Put on all of your safety equipment if you haven’t already. Turn the burner on to medium heat and let the pot sit. You don’t actually want the water to reach a rolling boil since some of the ammonia water may splash into the glass bowl reserved for the distilled water. Keep the heat on medium and wait. This works because the boiling point of water is 212 °F (100 °C), while ammonia boils when it’s cooled to −28 °F (−33 °C). Heating the water will extract and evaporate the water but leave the ammonia behind.
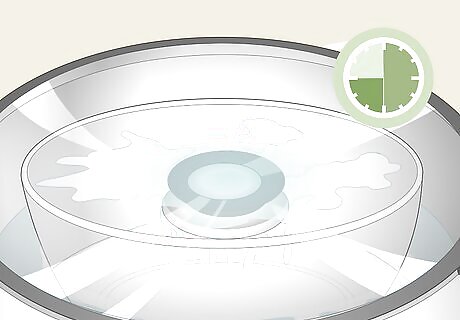
Let the water condense in the floating glass bowl for 30-45 minutes. Monitor your pot to make sure it doesn’t reach a rolling boil. Over the next 30-45 minutes, let the steam condense on the underside of the lid. Since it’s upside down, the water will reform and drip towards the center of the lid. The distilled water will collect in the middle of the pot! The bowl isn’t going to fill up all the way. You’re likely only to get back 10-20% of the original amount in distilled water.
Remove the lid carefully with oven mitts and retrieve the glass bowl. Once the pot has heated for 30-45 minutes, throw some oven mitts on and turn the burner off. Gently lift the lid up and place it in your sink. Then, either carefully lift the distilled water out by the rim, or use a strong set of tongs to lift the glass bowl out carefully.Warning: Do not drink or use the water before testing it. Get an ammonia testing kit for and dip the strip into the water to test the ammonia level. So long as there is less than 0.5 mg/1 ppm (parts per million), it’s safe to use.
Using Clinoptilolite to Absorb the Ammonia

Purchase some clinoptilolite online to absorb the ammonia. Clinoptilolite is a natural mineral that is created through volcanic activity. It comes in rock or powder form, but make sure to buy the rocks. Clinoptilolite is porous and contains ions that neutralize and absorb ammonia. The amount of clinoptilolite you require depends on the ammonia levels and the amount of water you’re treating. In general, you will be able to purify a glass of water with 1 oz (28 g) of clinoptilolite, although it may take more. At best, this process will remove roughly 99.5% of the ammonia. Some of the ammonia may still remain. It may remove less than this depending on the toxicity of the water and the amount of ammonia, though. This process isn’t particularly popular since it’s more of an art than a science. The amount of clinoptilolite you need is highly dependent on how porous your rocks are, how much ammonia there is, and the type of ammonia you’re dealing with.

Punch a hole in a disposable cup and grab a glass bowl. Grab a disposable plastic cup. Take a pen or small utility knife and punch a small hole in the bottom of the cup. Make this hole ⁄2 inch (1.3 cm) or smaller. Set the cup down in the middle of a clean glass bowl.
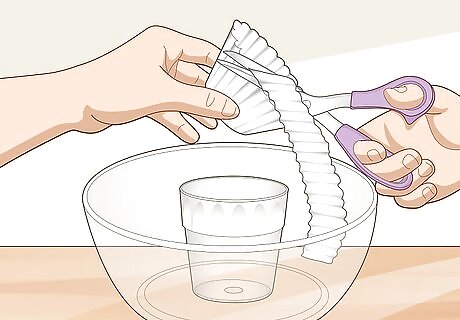
Cut a coffee filter out and fit it inside of the disposable cup. This doesn’t have to be perfect, so don’t worry about measuring the cup or anything. Just cut a small disc out of a coffee filter so that it covers the bottom of the cup. Stuff the round filter in the bottom of the cup. It’s okay if it’s a little bigger than the base of the cup since the rocks will weigh it down. You’re basically making an ammonia filter with the clinoptilolite and the coffee filter. The water will drain through the cup slowly and the clinoptilolite will absorb the ammonia as it filters out. If you want to remove ammonia from a larger amount of water, get a clean, plastic 1 US gal (3.8 L) bottle. Use a utility knife to cut the top 2–3 inches (5.1–7.6 cm) off of the bottle to give yourself room to reach inside and place a coffee filter. Put 2-3 holes in the bottom to speed up the filtration process. A milk jug is perfect for this!
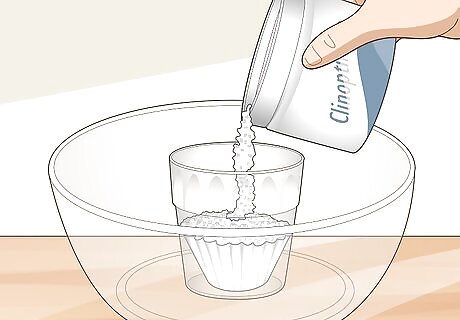
Fill the cup halfway with your clinoptilolite. Take your clinoptilolite and gently lower rocks until the coffee filter is entirely covered. Then, stack more clinoptilolite on top of the base until the cup is roughly halfway full. The clinoptilolite isn’t technically a rock, it’s a zeolite. A zeolite is a type of porous mineral. They sure seem like rocks, though! If you’re using a 1 US gal (3.8 L) bottle, fill it up halfway with the clinoptilolites as well.
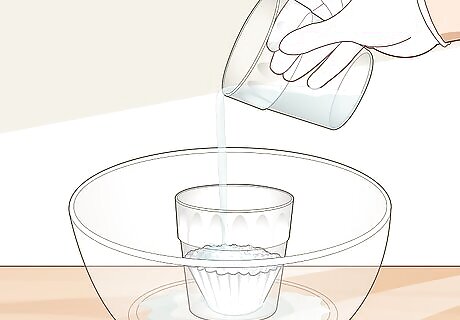
Pour the water slowly over the cup and let it filter into the bowl. Throw on some nitrile gloves to protect your hands from splashes. Hold the cup 3–4 inches (7.6–10.2 cm) over the bowl. Slowly pour the water into the cup and let it fill up with your ammonia water. Wait for the water to drain slowly into the bowl. This may take 10-15 minutes depending on how easy it is for the water to drain into the bowl. Unfortunately, you can’t leave the cup in the bowl. You can set a funnel upside down in the bowl and rest the cup perfectly over the thin opening if your arm gets tired. It may just be easier to hold the cup, though.
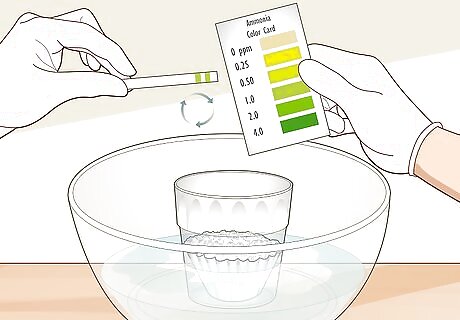
Test the water with an ammonia testing kit and repeat this process as needed. Once the cleaned water has pooled up in the bowl, dip an ammonia testing strip into the water to test it. Compare the color of the strip to the manufacturer’s key to determine how much ammonia is left in the water. So long as there is less than 0.5 mg/1 ppm (parts per million), the water is safe for use. You can repeat this process with new rocks to continue purifying the water.Tip: Once you’ve used the clinoptilolites once, replace them if you’re going to repeat this process. You can theoretically reuse them by washing them and treating them with salt, but it’s safer to just swap them out. The clinoptilolite doesn’t harm the water. Some people even take clinoptilolite as supplement, although the efficacy is questionable. Either way, the zeolites won’t ruin the water.


Comments
0 comment