
Assembling & Holding the Recorder
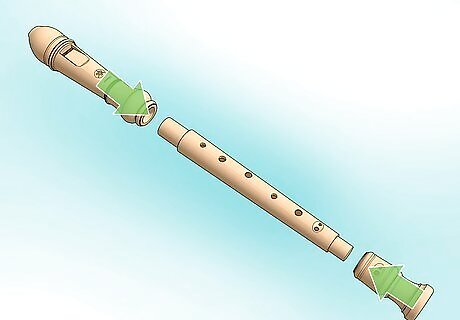
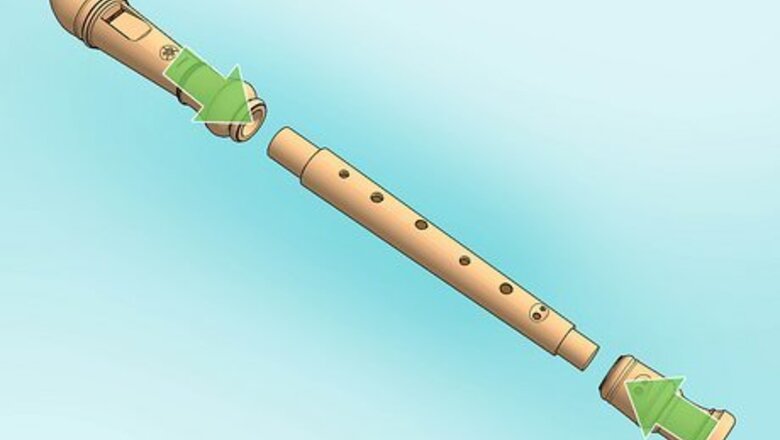
Gently push and twist the 3 pieces of the recorder together. Recorders usually come in three parts: the head (the top part which has the mouthpiece), the body (the middle part with finger holes), and the foot (the bottom part which has a bell shape). Gently twist the pieces together. The bottom piece (the foot) should be turned out slightly so the finger hole is slightly to the right compared to the other holes on the body. Twist the mouthpiece so that the vent on top is aligned with the holes on the body of the recorder. Some recorders, typically those used in schools, come in only one piece.
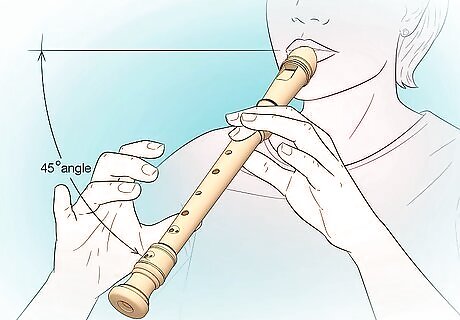
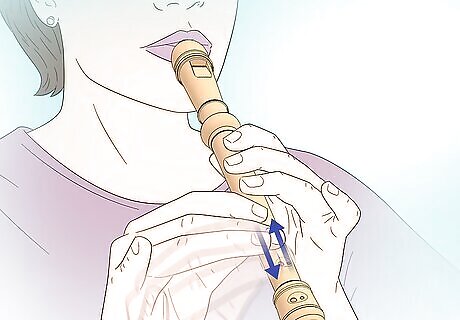
Hold the recorder with your left hand on top and your thumbs underneath for support. Your lips and both thumbs are the 3 “anchors” that balance the recorder while you play. To practice holding it, pick up the recorder and place the tip of the mouthpiece on your lips. Gently hold it between your lips and balance it with your thumbs underneath the body and your other fingers on top (to cover the tone holes later). Remember to put your left hand at the top half of the body and your right hand on the lower half. Hold the instrument at about 45 degrees; not sticking straight forward or straight down, but somewhere in the middle. The back side of the recorder with only one hole should face toward your body. The front side with multiple tone holes should face up and away from you. Do not bite the mouthpiece or allow it to touch your teeth. Just let it sit on your bottom lip and hold it in place with your top lip and the corners of your mouth.
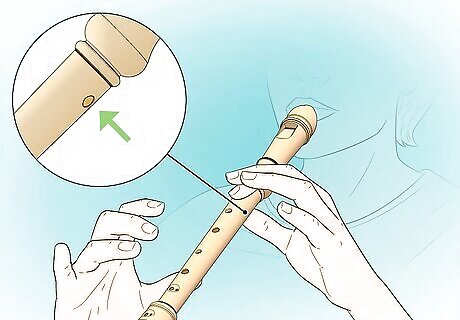
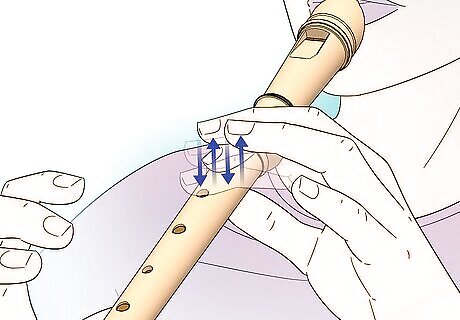
Practice covering the tone holes to work on your finger position. Position your left thumb so that it covers the lone tone hole on the back of the instrument. Then, gently curve your left fingers so the thickest part of the pads of your fingertips covers the first 3 holes on top of the body (your index finger covers the topmost hole, your middle finger covers the next one down, etc.). Keep your fingers slightly curved or arched so they stay relaxed and nimble (no straight fingers), but not so curved that you’re covering the holes with your very fingertips. Use a similar, curved shape in your right hand and fingers. Your right thumb has no hole to cover, but sits underneath the instrument for support. Your index finger on your right hand covers the 4th hole on the body, your middle finger covers the 5th hole, etc. all the way down to your right pinky.
Making Sounds on the Recorder
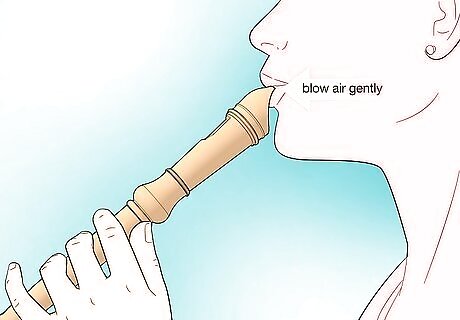
Blow a gentle but steady stream of air into the mouthpiece. Take a deep breath that engages your core and then exhale through the opening in the mouthpiece without covering any of the finger holes. Keep your air stream soft and gentle, but steady and focused (almost like you’re trying to blow out a birthday candle or blow a piece of dust across the table). Blowing softly with a steady stream of air is one of the more challenging but important techniques as you begin to play the recorder. Listen for a pure, unwavering, flute-like tone to know you’ve got a good sound. If the sound is “wobbly” or weak, your air stream may not be fast enough (think about blowing faster, not harder, until the sound evens out). If you blow too hard, you will produce a piercing, unpleasant, high-pitched sound (or it’s possible that no noise will come out at all). Blow more gently to produce a musical sound. Breathe from the diaphragm and make sure you blow evenly. It will help to keep the sound consistent.
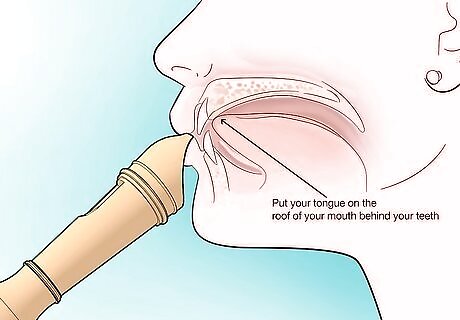
Tap your tongue against the ridge behind your top teeth while blowing to articulate. Articulating (also called “tonguing” on wind instruments) is how you start and stop the sound to play notes that are short or separated from the notes around them. On recorder, you start and stop the sound with your tongue: Inhale, place the recorder in your mouth, and place the top of the tip of your tongue (not the very tip or point) on the ridge on the roof of your mouth behind your top teeth. To begin the sound with articulation, “release” the air stream from behind your tongue by bringing it down from the roof of your mouth. Mimic the motion your tongue makes when you say the syllables “doo doo doo” or “too too too.” Keep blowing and repeat the “doo doo doo” motion with your tongue to separate your air stream into multiple, distinct notes. You can also clip the ends of notes by placing your tongue back on the roof of your mouth to stop the sound. Think “dood dood dood” syllables. Tip: You don’t always have to start the sound with your tongue. Sometimes, you can just start blowing for a gentler, less defined start to the note. This is called an “air attack.”
Learning Notes & Fingerings on Recorder

Get familiar with a recorder fingering chart to learn all of the notes. A fingering chart is a visual guide used to represent the notes on a recorder. Some show a diagram of the recorder holes with black, filled-in circles representing the holes you cover and white, open circles showing what’s uncovered. Others may use numbers 0 through 7, with 0 representing the left thumb, 1 representing the left index finger, 2 representing the second left finger, and so on. For example, the note B (played with the left thumb and let index finger) would be represented on a numeric fingering chart like: 0 1 - - - - - - The numbers represent the holes that are being covered, while the dashes represent the holes that remain uncovered. In this instance, the 0 indicates that your thumb is covering the hole on the back of the recorder, while the 1 shows that your left index finger is covering the first hole.
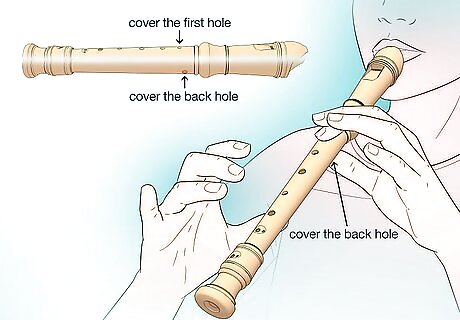
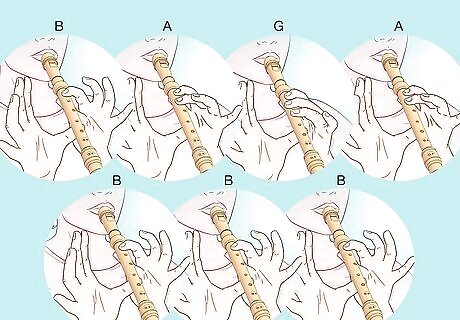
Start by learning the note B. This is a fairly easy note to play and is the first note a lot of beginners learn. Cover the back hole with your left thumb, then take your left index finger and cover the first, topmost hole on the body, just under the mouthpiece. Use your right thumb to balance the recorder lower down. Blow gently into the mouthpiece, remembering to say “doo” or “too.” The sound you just made was the note B! If the note does not come out or it squeaks, make sure that your fingers are fully covering the holes. Another reason it might squeak is because you're blowing into the instrument too hard. Try sustaining the note B, listening for a solid, unwavering sound. Try articulating it a few times to practice tonguing on a real note, too.
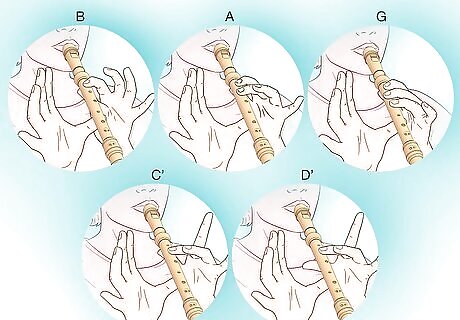
Learn the rest of the left hand notes. The first notes that you will learn to play using only your left hand are B (which you just played), A, G, C’, and D’ (the apostrophes at the top right hand corner of the last notes indicates that they are an octave higher than “low” C and D, which you’ll learn later). To play A: Starting from a B, place your left middle finger on the second hole from the top as well. The fingering chart for A is: 0 12 - - - - - To play G: Starting from A, place your left ring finger on the third hole from the top. The fingering chart for G is: 0 123 - - - - To play C': Cover the back hole with your left thumb, then place your left middle finger on the second hole from the top (leaving the very top hole open). The fingering chart for C' is: 0 - 2 - - - - - To play D': Leave the back hole uncovered and place your left middle finger on the second hole from the top. The fingering chart for D' is: - - 2 - - - - -
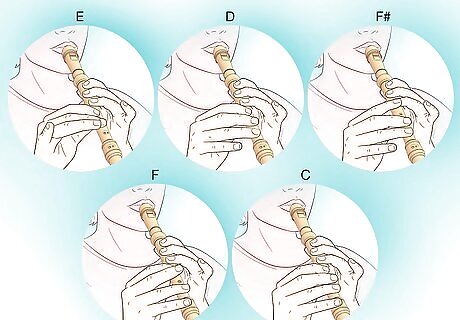
Learn the right hand notes. The next common notes that you will learn to play using your right hand are E, low D, F-sharp (F#), F, and low C. The notes F and low C can be a little tricky for new players as a lot of holes need to be covered at once when playing them. To play E: From the note G, add your right index finger on the fourth hole from the top and your right middle finger on the fifth hole from the top. The fingering chart for E is: 0 123 45 - - To play D: From E, place your right ring finger on the sixth hole from the top. The fingering chart for D is: 0 123 456 - To play F#: From a D, remove your right index finger from the fourth hole from the top, leaving all other fingers in place. The fingering chart for an F# is: 0 123 - 56 - To play F: From a G in the left hand, place your right index finger on the fourth hole, your right ring finger on the sixth hole (leaving the middle finger up), and your right pinky on the seventh hole. The fingering chart for an F is: 0 123 4 - 67 To play C: Cover all seven holes and the thumb hole in the back. The fingering chart for a C is: 0 123 4567
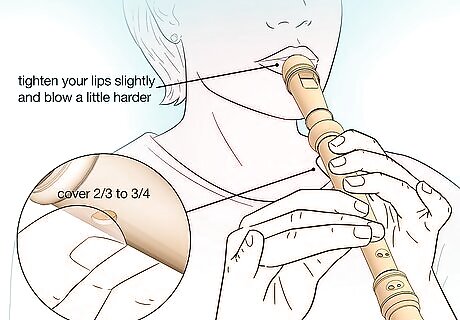
Practice playing high notes with a “half thumb.” The half thumb (also called half-holing or pinching) allows you to play notes higher than D’. Roll or pinch your left thumb so that you’re only covering about 90% of the thumb hole (the exact amount you uncover may depend on your specific instrument). Tighten your lips slightly and blow a little faster than usual to support these higher notes. For example, to play a high E (E’), finger a normal E and then half-hole the left thumb. The pitch will jump up an octave (the music interval between 2 notes of the same letter name). Do this to play high F, F#, G, A, etc.
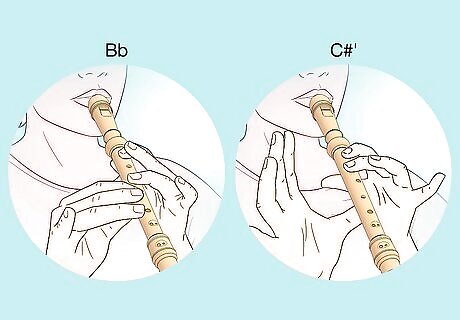
Learn the remaining chromatic notes. When you add a sharp sign (#) or flat sign (♭) to a note, its pitch changes by a half-step (the smallest interval between 2 notes in Western classical music; think of the threatening first 2 notes of the Jaws theme). A sharp sign raises notes by a half-step and a flat sign lowers them. You’ve already learned F#, which is a half-step higher than F and sits between the notes F and G. There are lots more of these chromatic notes to learn, and a fingering chart will show you all of them. Some common ones include: B-flat (B♭): A half-step lower than B and higher than A: 0 1 - 3 4 - - - C’-sharp (C#’): A half-step higher than C’ and lower than D’: - 12 - - - - -
Learning Simple Songs on Recorder
Practice playing easy beginner songs that only use a few notes. Once you have mastered playing different notes on the recorder, put them together to play a few simple songs. You don’t necessarily need to know how to read sheet music (although it’s helpful for learning new or more complicated songs). For simple beginner melodies, you can just read the note names in the order they’re played. A dash next to a note means to hold it out, while a plain letter indicates a short note. Mary Had a Little Lamb: B A G A B B BA A AB D' D'B A G A B B BA A B A G– Twinkle Twinkle Little Star: D D A A B B A–G G F# F# E E D–A A G G F# F# E–A A G G F# F# E–D D A A B B A–G G F# F# E E D– Auld Lang Syne: C– F– F F–A– G– F G– A G F– F A– C'– D'–D’– C’– A AF G– F G–A G F– D D– C– F–
Practicing Advanced Techniques on the Recorder
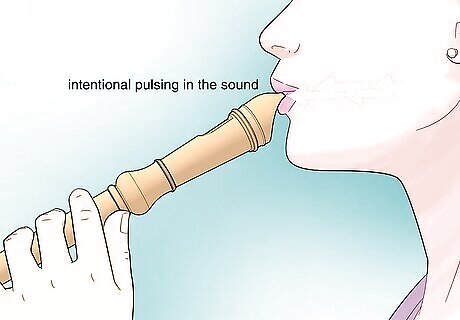
Playing with vibrato Once you have mastered playing with a supported straight tone, you can work on your vibrato technique. Vibrato is an intentional pulsing in the sound to add depth and expression to the tone. For an easy beginning vibrato exercise, try this: Without the instrument, giggle to yourself and feel how your abdominal muscles pulse and contract. Then, try giggling without making any noise to get used to that feeling. Choose a note on the recorder and try “silent giggling” while holding the note out. You’ll probably hear an aggressive wobbling in the sound that pushes the pitch higher (sharp). Make your “giggle” shallower and to smooth it out and keep the pitch in line with the note you’re trying to play. For a super expressive effect, try playing the note without vibrato first (a straight tone), then add the vibrato after a second or two. Listen to how it changes the mood of the sound!
Trilling A trill is a decorative element where you alternate very rapidly between 2 notes that are right next to each other (for example, from A to B). Usually, you’ll trill from a primary note (the main note that belongs to the melody you’re playing or that’s written in your music) upward to the next note to “decorate” it. For example, to trill from A to B (the note right above it), you’d rapidly finer and play A B A B A B A (etc.) for the duration of the note A. Don’t articulate or tongue the separate notes in the trill. Instead, play them all in one continuous breath (this is called slurring). In classical music, trills are a great way to add tension to a note for dramatic effect or to signal that the end of a phrase is coming up.
Doing a glissando A glissando, or a gliss, is when the pitch slides between 2 notes instead of changing right away. To do this on recorder, practice slowly sliding, pulling, or rolling your fingers off the tone holes in quick succession to create a sliding sound. For example, if you wanted to gliss from G to A, you’d slide your left ring finger off of the tone hole to gradually bend the pitch upward instead of lifting your finger up and changing the pitch right away. To gliss between notes that aren’t right next to each other, slide one finger after the other quickly. To gliss from G to B, for example, you’d slide your ring finger off the hole to make A, then immediately slide your middle finger off to make B. For a quick gliss, you’ll be moving your fingers almost simultaneously.
Caring for Your Recorder
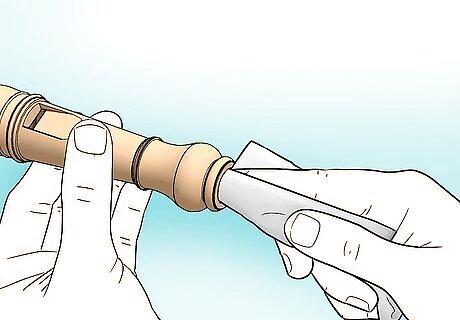
Remember to clean your recorder after each use. It’s important to keep your instrument clean both for hygiene reasons and to keep the recorder in good playing condition. All you have to do is take the instrument apart and run a cleaning rod and swab through it to remove saliva. After that, your recorder will be good to go for your next practice session or music class! To avoid spit bubbles forming in the tone holes while you play, let your recorder dry completely before playing again. For deep cleaning a plastic recorder: Plastic recorders can also be washed in the top rack of the dishwasher or in a sink with warm soapy water for a deep clean. Take the pieces apart before washing and be sure to rinse all the soap off. Only do this when the mouthpiece needs cleaning or sanitizing, as too many runs through the dishwasher may crack the plastic. For wooden recorders: Disassemble the recorder and carefully wipe the moisture off the inside with a soft silk or microfiber swab or cloth.
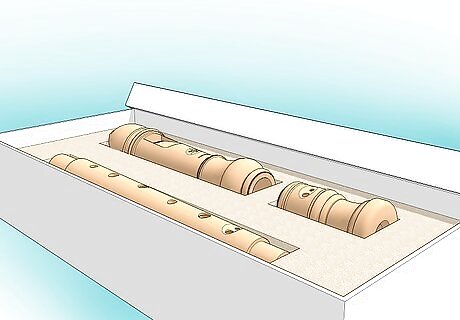
Keep your recorder in a case whenever you’re not playing it. Keep the recorder in its case when not in use to prevent chipping or damaging the whistle-like hole at the top, because damage there can render the whole recorder useless. Most beginner recorder cases are just long cloth or zipper pouches that you can slide the recorder into without taking it apart. More advanced recorders may come in hard, protective cases with fitted slots for the individual pieces or for the entire instrument together.
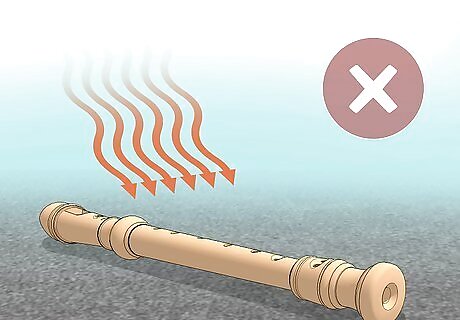
Protect the recorder from extreme temperatures. Protect your instrument against sudden changes of temperature or direct sunlight, and never leave it in a warm car or near a source of heat. This is particularly important for wooden recorders, but is good practice for any instrument. Extreme cold, like leaving your instrument in the car during winter, can also cause wooden recorders to crack or split.
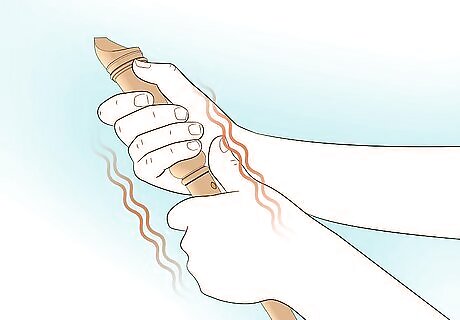
Clear out clogs to produce clean sound. Condensation of beads of moisture in the windway of the recorder can cause clogging; these might choke the sound completely, or cause a “bubbly” sound on some notes if there’s spit in the tone hole. You can minimize clogging in both plastic and wooden recorders by warming the head joint up to body temperature in your hands, under your arm, or in your pocket before playing. If water has accumulated in the windway, completely cover the vent at the top of the recorder with one hand and exhale forcefully into the windway. This should clear out any excess moisture. If clogging persists, swab out your instrument to remove as much excess moisture as you can. In wooden recorders, excess moisture in the mouthpiece can make the wood waterlogged and dampen your sound. If swabbing or blowing the moisture out doesn’t work, let the recorder sit and dry for a few hours.


Comments
0 comment