
Making Mortar from Scratch

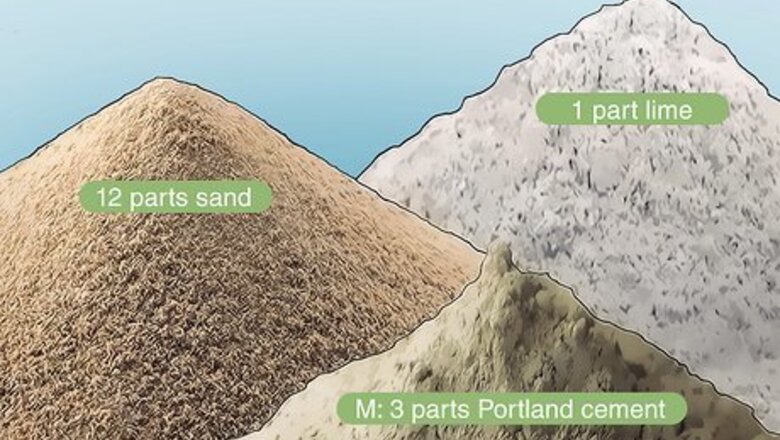
Use the correct ratio of material for your project. All mortar is made of various proportions of Portland cement, lime, and sand. Portland cement is simply a type of cement made from limestone and clay—it's not a brand. The ratios are always measured in parts per volume and always list the parts of Portland cement first, followed by the parts of lime, then the parts of sand. Each type of mortar uses different proportions: M: 3 parts Portland cement, 1 part lime, 12 parts sand S: 2 parts Portland cement, 1 part lime, 9 parts sand N: 1 part Portland cement, 1 part lime, 6 parts sand O: 1 part Portland cement, 2 parts lime, 9 parts sand

Put on safety gear before getting started. Wear waterproof work gloves, long sleeves, a respirator mask, and safety goggles. Cement can cause chemical burns on any part of your body it comes in contact with, including your skin and eyes. If the dust is inhaled or swallowed, it can also damage your throat and lungs. When you pour or stir the dry ingredients, dust inevitably rises up. It's easy to inhale if you're not wearing a mask.

Mix your dry ingredients in a separate bucket. Use a shovel to mix your dry ingredients together until the mix looks fairly uniform. You want to make sure the ingredients are evenly distributed so that your mortar has consistent strength. If you're using a mechanical mixer, pour about half of the water you plan to use into the mixer first. Then, add half the sand and any lime, followed by the concrete and the rest of the sand.

Pour or shovel the dry ingredients into the mixing container. Spray the container with water first so the dry ingredients won't stick to the bottom. For a small batch, you might use a bucket. If you're making a larger batch, you'll probably want a wheelbarrow so you'll have room to mix it. The wheelbarrow also makes it easy to take the mortar to the place where you'll be using it. Pour slowly so the ingredients won't cloud up as much. This is not only a hazard but causes you to lose part of your batch. If there's wind, turn so the wind is blowing away from you as you pour. You don't want the dust blowing directly onto you, even when you're wearing safety gear.

Add water to the dry ingredients gradually. Pour water into the center of your dry ingredients, then fold them slowly into the water, spreading the water throughout the mix. Continue this process until your mortar is the consistency of toothpaste or thick peanut butter. The amount of water you'll need can vary greatly depending on humidity, air temperature, and other factors. Just add it slowly and pay attention to the consistency of the mortar as you go.
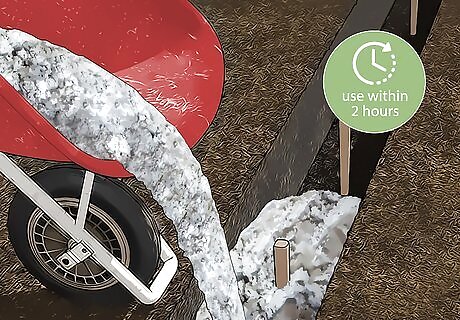
Use your mortar within 2 hours of finishing it. Mortar will set after 2 hours or so, at which point it becomes unusable. You can add a little drizzle of water to the mortar as you go to keep it workable, but after it sets, you have to throw it out. Adding any water at this point would make it too weak. The outside temperature affects how quickly your mortar will set. If it's hot, your mortar will set much faster. Make smaller batches if you're working in higher temperatures.
Using a Mortar Mix
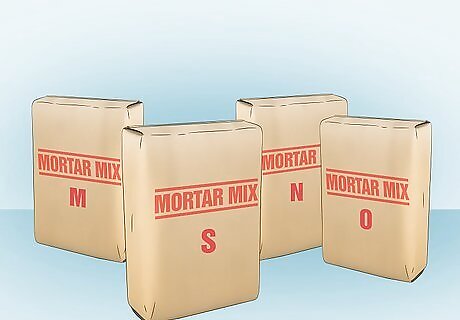
Choose the right mortar mix for your project. Different brands might have slightly different mixes of ingredients, so read the label carefully. There are 4 basic types of mortar: M, S, N, and O. Each type is best used for different projects—just pick the type that best suits what you're trying to do. M: used for below-grade (at or below ground-level) load-bearing work, as well as for chimneys and brick manholes S: used for below-grade work including foundation walls, brick manholes, retaining walls, sewers, walkways, patios, and pavement N: a general-purpose mortar mix that can be used for both interior and exterior above-grade (above ground-level) work O: also referred to as "pointing" mortar, used for above-grade, non-load-bearing, and decorative work
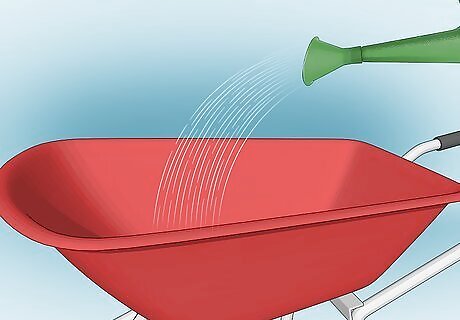
Pre-wet the bucket or wheelbarrow you're using for mixing. Spraying your containers down with water keeps your dry mix from sticking to the container. This ensures that your mortar is consistent throughout. Pre-wetting your containers and tools also makes clean-up a little easier. While you'll still have some mortar stick, it won't be as bad if you pre-wet everything.
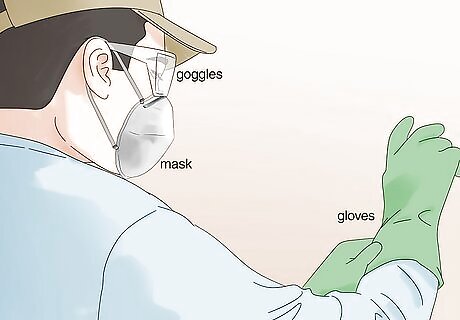
Put on your gloves, mask, and goggles. Because concrete can cause chemical burns, it's important to protect yourself. Mixing it stirs up clouds of dust that can cause serious lung damage if inhaled. It can also burn your eyes. Always gear up before you even open a bag of mortar mix. Just the act of opening the bag can cause dust to escape.
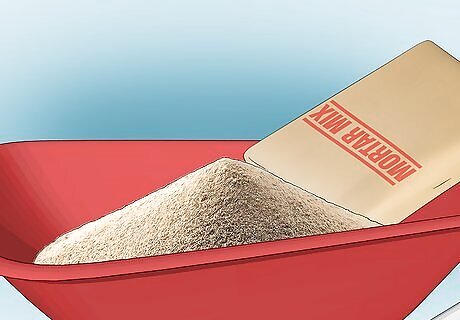
Dump the dry mix into the container. Make sure the wind is blowing away from you when you dump the bag of mix to keep the dust from blowing directly towards you. Pour it out slowly so it won't cloud up too much. Pouring a puddle of water in the bottom of the container before you add the dry ingredients also helps decrease clouding.
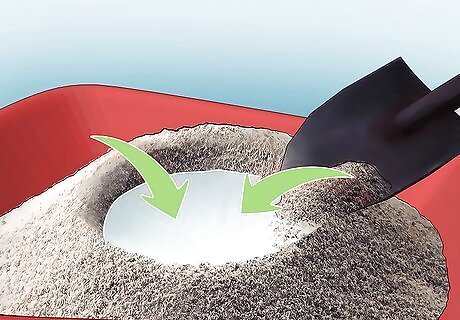
Add water gradually until the mortar is the consistency of toothpaste. Pour the water into the center of the container and fold the mortar from the outside in using a trowel or shovel. Make sure you dig all the way to the bottom to fold the mortar toward the center. Mix well so that the mortar has a consistent texture. You don't want dry spots or puddles of water anywhere. You can also think of the proper consistency as being something like thick peanut butter. The amount of water used can vary drastically depending upon the weather, how wet the sand is, and the variety of mix you're using, so add it slowly.

Use the mortar within 2 hours of mixing it. Masons typically transfer the mortar to a flat piece of wood known as a "mortarboard." On the mortarboard, you can work the mortar and make sure the consistency is correct. Scoop some mortar on your trowel, then flip it to 90 degrees. If the mortar stays on the trowel, it's good to go. Your mortar will set more quickly if it's hot outside. Compensate for this by making smaller batches so you won't waste as much.
Mixing in Masonry Additives

Change the color of your mortar with pigments. If you're making your own mortar from scratch, you can use a different color of sand to change the color of your mortar. But if you're using a pre-made mortar mix, change the color with pigments, powdered additives available wherever masonry products are sold. Dissolve the pigment you want in the water you plan to use to mix your mortar to ensure the color is consistent throughout the batch. You can also add pigment after you've mixed your mortar. This gives you a little more control over the specific shade, especially if you're using something you've never used before. However, it can be more difficult to keep it consistent from batch to batch. Add the exact same amount of pigment using the same process for all subsequent batches so all of your mortar is the same color throughout the project.

Protect your mortar from extreme temperatures with admixtures. It's best to mix mortar in mild temperatures with relatively low humidity—but you can't control the weather. If you're going to be working in hot or cold weather, admixtures can help keep your mortar workable so you can get the job done. Accelerators increase the mortar's workability in cold temperatures. Use hot water to mix mortar with an accelerator added. In hot weather, you can add a retarder to slow the rate of hydration and keep the mortar workable for a longer period of time. Use cool water to mix mortar with a retarder added. Some masons will even add ice to the water to lower the temperature further. It's still best to mix smaller batches in hot weather because mortar can "flash set" and become unusable quickly—even with a retarder.
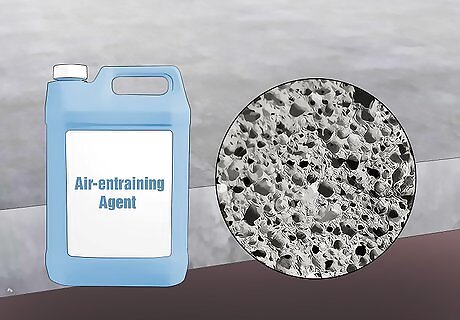
Include an air-entraining agent to make the mortar stronger. Air-entrained mortar contains tiny air bubbles that relieve internal pressure on the mortar, making it stronger. In cold weather, water can expand into the air pockets when it freezes so it won't crack the mortar. If you're making your mortar from scratch, you can buy air-entrained Portland cement to use. Some pre-made mixes also use air-entrained Portland cement—just read the bag.
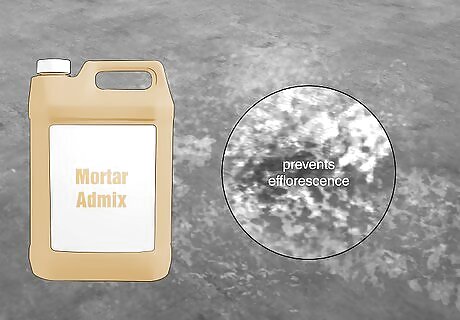
Use an admixture to prevent efflorescence. Efflorescence happens when evaporating water in your masonry leaves salt behind, resulting in a white powder on the surface of your bricks. The water necessary to cause efflorescence is typically introduced by the mortar. Many manufacturers have created admixtures that claim to prevent efflorescence. The ingredients used in these admixtures are protected as trade secrets, so there aren't general instructions for how to use these products. If you're mixing one of these products into your mortar, follow the manufacturer's instructions precisely.

Add a water-repellant to block water penetration. Water-repellant admixtures are common in many pre-mixes. These additives protect your brickwork from moisture by keeping water from penetrating the mortar. While they're more frequently used in concrete walls, they can also be helpful in mortar mixes. Since efflorescence is caused by evaporating water, water repellant admixtures help with that too.
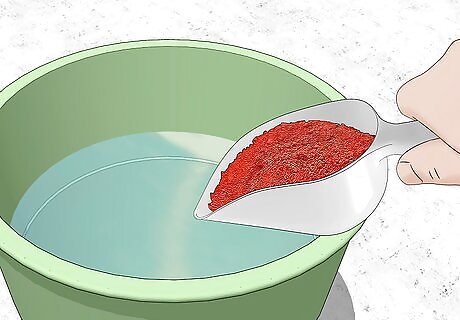
Dissolve separate additives in the water before you make your mortar. Most additives are in powder form. They'll spread evenly and consistently throughout your mortar if you dissolve them in water first. Use a small amount of water and pour it in first. Many pre-made mixes have various additives already in them. Check the ingredients in your mix carefully to make sure you don't add something separately that's already in the mix—that could weaken your mortar or make it unusable. With pre-made mixes, you still have to follow the same masonry practices that you would if you were mixing in an additive yourself. These requirements will be listed on the bag, so read them and follow them carefully.


Comments
0 comment