
Checking if Your Roof is Right for Panels

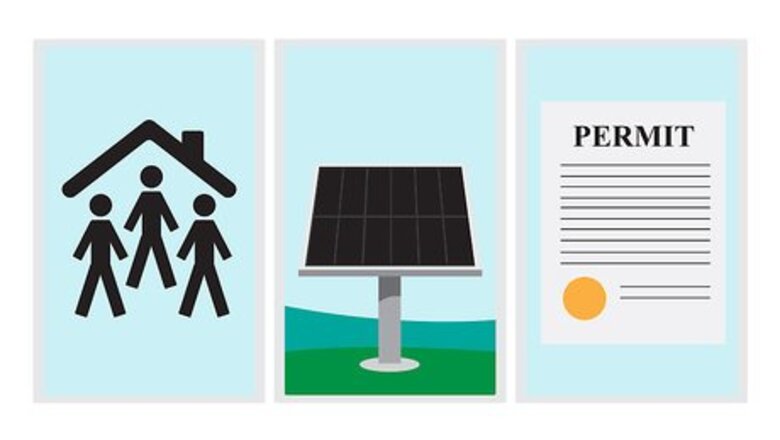
Determine if there are legal restrictions for solar panel placement. Don’t risk having to tear down your newly-installed solar panels because they run afoul of local municipal, building, or homeowner’s codes. Before grabbing your drill, do your homework on where you can and cannot install solar panels. If you have a homeowner’s association or live in a historic district, for instance, there may be restrictions on placing rooftop solar panels. Ground-mounted panels may need to be out of public view, or a certain distance from your property line. Installing solar panels may require a building permit where you live.
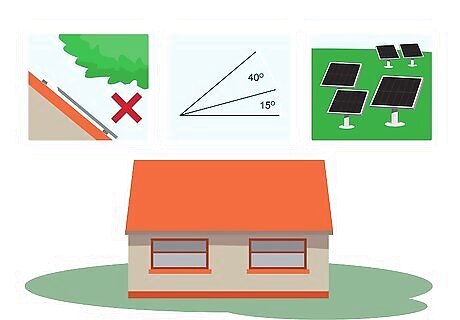
Check the orientation, size, pitch, and shading of your roof. The ideal roof for a residential solar system has 500 sq ft (46 m) of unobstructed, south-facing, unshaded space, sloped at a 30-degree pitch. Your roof likely doesn’t meet this ideal, but that doesn’t mean it’s unsuitable for solar. East- or west-facing roof areas are okay, so long as they’re not shaded by trees or other buildings. Roof pitches between 15 and 40 degrees are manageable. If you have a flat roof, hire a professional installer to angle the support structure as needed. 100 sq ft (9.3 m) of solar panel coverage produces around 1 kilowatt (kW) of energy on average, and the typical home requires around 5 kW. If necessary, you can install panels in multiple locations to achieve this amount. Sometimes you can get around trees obstructing areas of the roof. However, it may be hard to install solar panels if your house is surrounded by trees.

Assess the age and structural integrity of your roof. Properly-installed solar panels are typically expected to last 20-25 years, so make sure the roofing material below the panel structure is ready to last that long. If you have asphalt shingles, for example, you should replace them before or along with your solar installation. Installed solar panels typically weigh around 2–4 lb (0.91–1.81 kg) per 1 sq ft (930 cm), which—if the panels are installed properly so the load is evenly distributed—is typically manageable for a roof in good condition. Consult a structural engineer if you have any concerns about your roof’s capability to support solar panels.

Opt for a ground placement if your roof isn’t suitable. While rooftop placements are often the most convenient and least obtrusive option, ground placements often generate more electricity. If you have a lot of open, sunny space on your property, for example, you may be able to build a solar array that’s as big as your budget allows. While you don't have to worry about climbing on the roof, ground-based panel installs still involve complicated anchoring and wiring tasks that require at least moderate DIY skills.
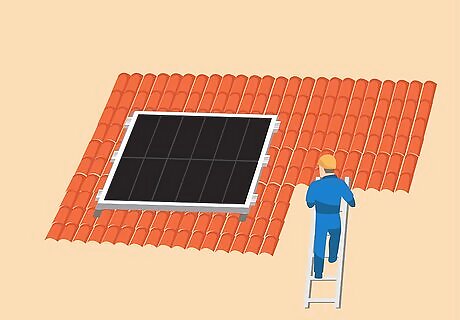
Installing Panels on a Suitable Roof

Lay out the location of the roof stanchions on the shingles. Follow the installation guide for your solar panels to determine the correct spacing for the stanchions. Use a measuring tape and marking chalk to identify the position for each stanchion. It’s vital that each stanchion is located directly above a roof rafter—rafters are the wood “ribs” that provide the shape and structural support for the roof. With some experience, you can locate roof rafters beneath the shingles, flashing, and sheathing by tapping a hammer and listening for the difference in sound. Otherwise, you can measure from protruding objects like chimneys or exhaust pipes, or drive several pilot nails through the roof and use their location to guide your measurements. No part of this job is suitable for a novice. If you’re not fully confident about working on a roof and installing the solar panels correctly, hire a professional installer!
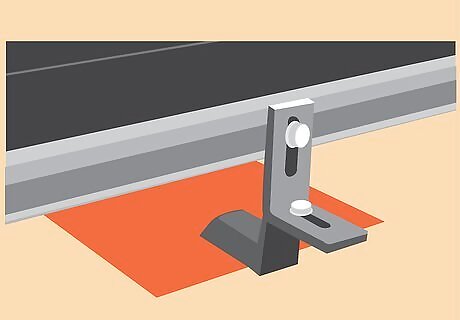
Attach the stanchions by screwing them into the roof rafters below. Mark the locations for your pilot holes, then drill through the roof and into the rafters. Use the screws that come with the solar panel kit to secure the stanchions in place. Before securing them with screws, slide each stanchion under the edge of the row of shingles above it. That way, water will shed over top of the stanchions instead of getting underneath them.
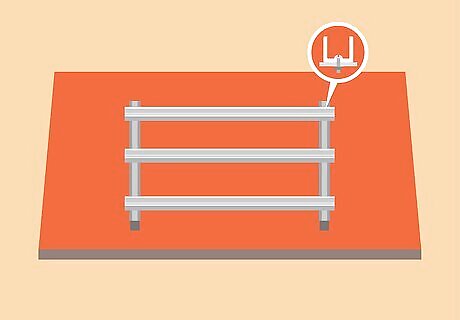
Fasten the framework of aluminum rails to the stanchions with bolts. Many solar panel models use 3 parallel rows of aluminum rails to serve as the framework for the panels. Follow your model’s instructions for attaching these rails to the stanchions. This often involves using an impact driver to secure the rails with stainless steel bolts. After installing the rails and before installing the panels, check that the framework is “square” (even on all sides). Measure diagonally from corner to corner, both ways—if the measurements aren’t the same, you’ll need to adjust the framework.

Run electrical conduit and wiring up to your solar panel array. This is a job best left to a professional electrician, unless you are very experienced with electrical work. The tubular conduit, made of plastic or metal, protects the electrical wiring inside it from the elements. This wiring will need to run to both a new electric meter (to track the electricity you draw from or produce for the electrical grid) and a new electrical sub-panel. Depending on where you live, a government building code enforcement officer may be required to inspect and approve the work.

Install a micro-inverter and grounding wire for each solar panel. Each panel in your solar array should have its own micro-inverter. This essentially creates a parallel rather than series circuit, meaning the whole system won’t break down if one panel stops functioning. Follow your solar setup's instructions (or hire an electrician) to hook up an inverter to the framework beneath where each solar panel will go. Make sure that, along with the electrical wiring, each micro-inverter is connected to a 6-gauge, bare copper ground wire. Without proper grounding, the panels will be a fire hazard if struck by lightning.
Secure each panel in place with the provided retaining clips. One at a time, carefully lower each solar panel onto the stanchions in its intended spot. Snap the wiring plug from the micro-inverter into the underside of the panel. Then, screw the retaining clips that are attached to the edges of the panel to the aluminum rails. Once the final wiring connections are made, your solar panels will be ready to start producing electricity!
Evaluating Ground-Mounted Options

Install a fixed ground mount for the lowest upfront cost. With a standard ground mount, a series of metal rods are driven into the ground to secure the panel structure in place. Concrete footings typically aren’t required, which helps to reduce the cost and installation time. If you’re interested in doing the job yourself, contact solar retailers to see if they sell DIY installation packages. Instead of using metal rods, another advanced DIY approach involves pouring concrete footings and attaching a framework of 4 in × 4 in (10 cm × 10 cm) dimensional lumber. Then, angle brackets are used to attach the panel supports and solar panels.
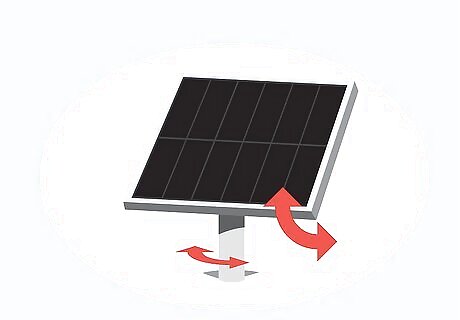
Use a pole-mounted ground installation to enable solar tracking. With this installation, a single metal pole is secured into the ground with a concrete footing. A pivot point at the top of the pole allows the solar panel array to move and track the positioning of the sun throughout the day. Tracking the sun’s position in the sky maximizes electricity production. Most tracking systems use sensors and the power generated by the panels to operate automatically. This type of installation is best left to professionals or skilled DIYers with experience helping with solar installs.
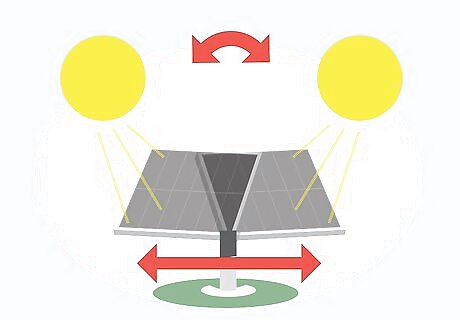
Upgrade to a pole-mount with dual-axis tracking for max solar capture. Dual-access tracking enables the solar panel array to follow the sun across the sky during the day, as well as to adjust its angle to suit the sun’s position at different times of the year. In a sunny location, this basically maxes out the amount of solar energy you can produce per panel. This installation is another step up in complexity from a single-axis pole-mount, so it’s best left to the professionals.


Comments
0 comment