

- Seal the bottom of your garage with a bottom seal and a threshold seal.
- Seal the top of your garage with a brush-style top seal.
- Install vinyl weather stripping to the sides and top of your garage door frame.
- Install V-strip seals between the panels of your garage door.
Bottom Seal
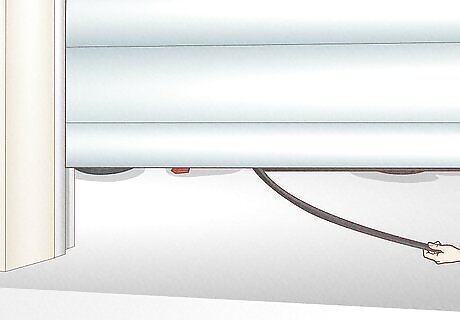
Remove the old bottom seal. When your garage door closes, the rubber bottom seal conforms to the shape of the floor to provide a cost-effective barrier. However, these seals often deteriorate with use will need replacing. First, remove any screws on the bottom edge of the door that may be keeping the seal in place. Then, simply tug at the seal and pull or rip it away from the bottom of the door. Bottom seals are more or less universal in their design and application, but if your garage door lacks the twin grooves into which a bottom seal is installed, consult your garage door manufacturer for alternatives.
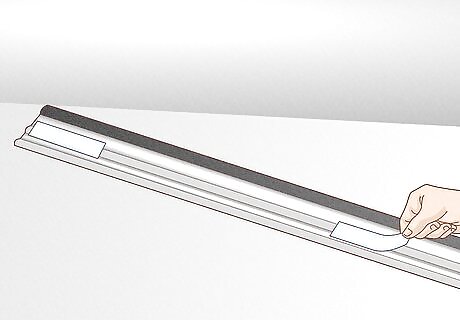
Feed the new bottom seal into the door’s grooves. Fold the strip of seal so that the two T-shaped edges are facing upwards and align with the two grooves on the bottom edge of the garage door. Carefully insert one end of the seal into one side of grooves, and feed the seal along the track, as though you’re pulling a curtain closed. If you find that the strip becomes stuck as you move toward the other end of the door, have another person support the strip of seal as it's fed into the groove.
Trim away any excess seal and screw it in. Once you’ve pulled the seal so that it spans the entire length of the door, trim away the excess with a utility knife so that the seal is about 1 inch (2.5 cm) longer than the width of the door on either side. Finally, reinsert the screws. Check your garage door’s bottom seal once a year for wear. If it appears torn or has holes, it’s time to get a new one.
Threshold Seal

Measure and cut the seal to size. Use a tape measure to find the width of the garage entrance. Then use a utility knife or hacksaw to cut the strip to size. If your garage door track doesn’t extend to the floor, include the space beneath it in your measurement. If it does, still include the space in your measurement, but cut a notch in the threshold seal to accommodate it. A threshold seal sits on the floor of the garage and helps seal the door, and is great when the door doesn’t quite meet the floor evenly.
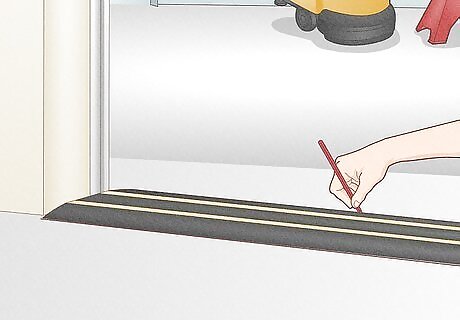
Mark the desired position of the seal in pencil. Position the seal beneath the garage door, and, with a pencil, mark its position on the floor, tracing along both sides of the seal. This will let you know where to apply the adhesive in the next step. Make sure the garage door lowers into the seal snugly, and correct the seal’s position as needed.

Glue the seal in place. With a damp rag, wipe down the underside of the seal to remove debris. Then, apply a construction adhesive directly to the floor where you marked the seal’s desired position, drawing two parallel lines just within the pencil outline, then zigzagging between them along the length of the floor. Finally, lay the seal over the adhesive, pressing down firmly to ensure the adhesive takes. Let the glued seal dry for 24 hours before you disturb it with a vehicle.
Brush-Style Top Seal

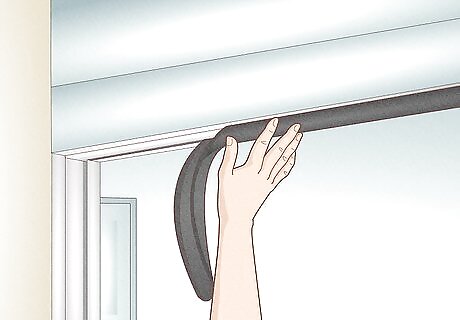
Raise your garage door and clean the top I-beam of the garage. Using a pair of gloves and a rag dampened with methylated spirits, wipe the top I-beam so that you have a clean and sanitized surface on which to install your seal. Top seals target the tricky gap at the top of the garage door, which can be a bit awkward to seal because of the way the door retreats into the garage. A brush-style top seal will make sure that your garage door is sealed, even up high.
Apply double-sided tape to lengths of the top seal and cut the brush. Lay your top seal segments on a clean floor with their bottom sides facing up, then apply 5 in (13 cm) lengths of double-sided tape about 1.5 feet (0.46 m) apart, with a piece of tape on each end of each span of seal. Then, pull the brush about 2 inches (5.1 cm) out the seal and cut it short with a pair of pliers. Reinsert the brush into the seal. You only need to cut the brush on the first length of the seal.
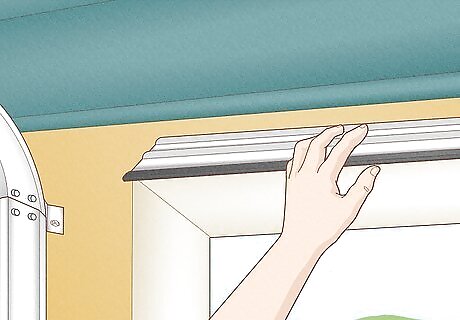
Press the seals into the I-beam. Press the first seal into the corner of the I-beam. Then, place the next length of seal directly next to it, and feed the second length’s brush into the first’s brush track, so that the seals are connected. Continue to do this until your seal spans the length of the I-beam, until your last length would be too long.
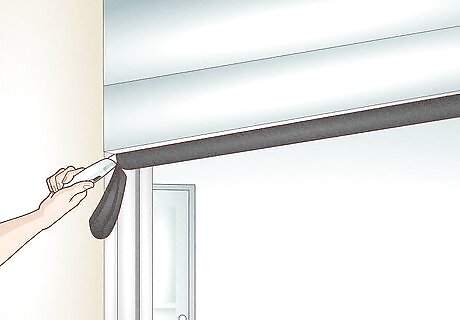
Cut the final length of seal to size and install. Hold your final length of seal next to the others, and mark with a pencil where it becomes too long for the I-beam. Shorten the seal to that mark with a hacksaw, then install it next to the others. Your brush seals should graze the door of the garage in its closed position for maximum effectiveness.
Weather Stripping

Remove any raised wood strips with a hammer and pry bar. The weather stripping needs to sit as flush as possible with the frame of the garage, so use a hammer and a pry bar to remove any raised wood strips from the frame of the garage. If the inside of your garage door frame is smooth and even, skip this step. Vinyl weather stripping is nailed or screwed into the frame of the garage door, and essentially brings the frame of your garage closer to the door itself in order to help seal it against the elements.
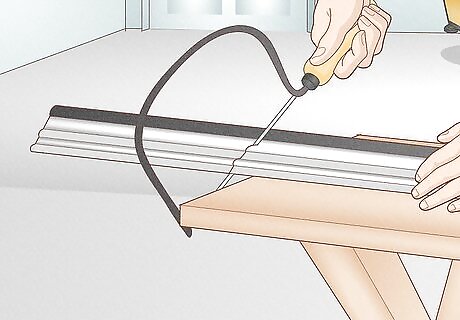
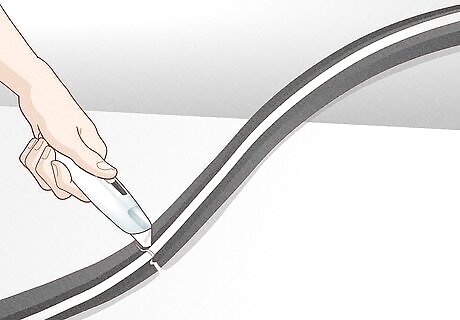
Measure and cut the weather stripping to size. Use a tape measure to measure the height and width of the garage door. Then, use a hacksaw to cut 3 pieces of weather stripping to size: 2 for the sides, and one for the top. On either end of the top piece, cut the fin at a 30-degree angle, so that it sits flush with the fins of the sides when installed.
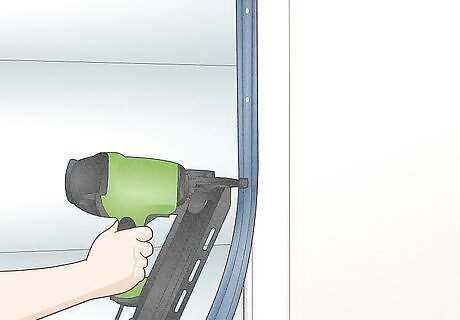
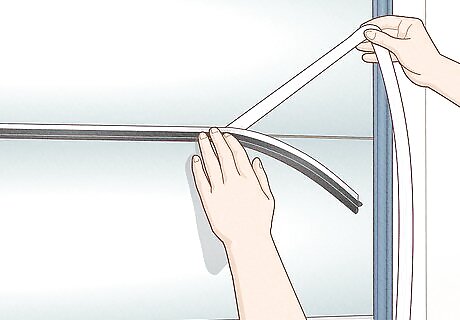
Install the stripping with aluminum nails or the included screws. With the garage door closed, position first the side stripping so that it grazes the door and provides a good seal. Then, secure the stripping to the door frame with nails spaced about 6 inches (15 cm) apart. Do the same with the other side, then install the top length last. The fins of the top length of weather stripping should overlap the fins of the side lengths, creating a secure seal.
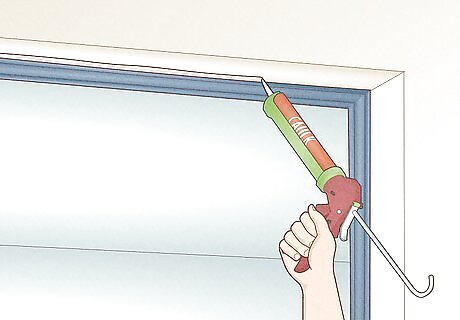
Caulk the weather stripping to the door frame. Apply caulk to weatherproof the seam where the stripping meets the door frame. Run a length of caulk down the seam, then run your finger over the length to seal and round out the caulk. When using a caulk gun, try for a conservative amount of caulk rather than too much; you can always do another pass, but cleaning up excess caulk can be messy.
V-Seals

Measure the width of your garage door. The V-seals work by spanning the cracks in your paneled garage door, sealing them against wind or rain. Use a tape measure to find the width of one of these panels, then count how many gaps are in the door.
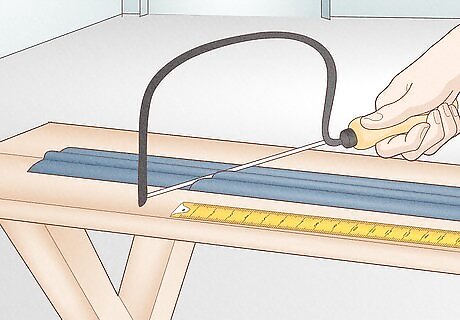
Cut enough V-seals to length. Cut the same number of V-seals as gaps in your paneled garage door, making sure each is as long as the garage door is wide. The V-seals will need to span the entire length of the door in order to seal it properly. You can also do this by holding the length of the V-seal up to the gap, and simply trimming away any excess.
Apply V-strips with the self-adhesive. Peel away the covering on both fins of the V-seal, and place them so that they span the gaps between your garage door panels. Ensure the seals are pressed and secured completely. V-seals may deteriorate fairly quickly with heavy garage door usage, so check their condition every couple months or so.


Comments
0 comment