
- To fix connection reset in Minecraft, renew your IP address by using the /release, /flushdns, and /renew commands in Command Prompt.
- Add Minecraft as an allowed app in Windows Security Firewall.
- Manually change your DNS server in your Internet connection "Properties."
Renew IP Address

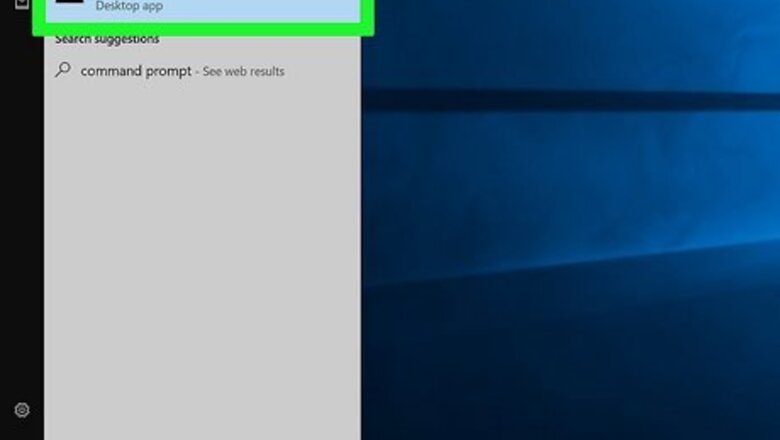
Open the Command Prompt. Click the Start menu and type "cmd." Right-click the first option and click Run as administrator.
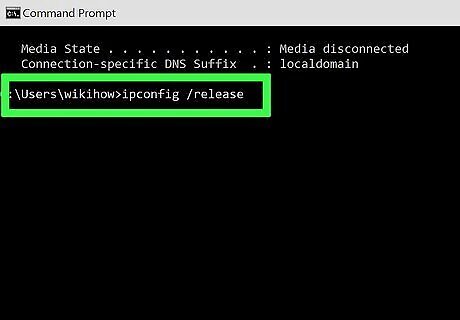
Enter ipconfig /release and press ↵ Enter. This will release your IP address.
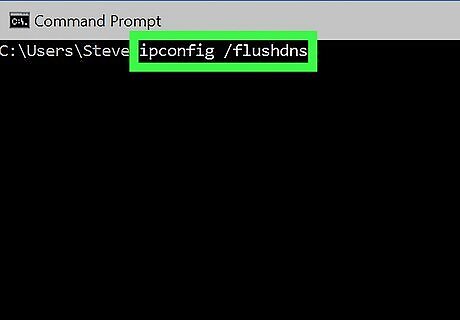
Enter ipconfig /flushdns and press ↵ Enter. This will flush your IP address.

Enter ipconfig /renew and press ↵ Enter. When the command is finished, a new line will appear with a new IP address. Try connecting to Minecraft again.
Allow Minecraft in Windows Firewall
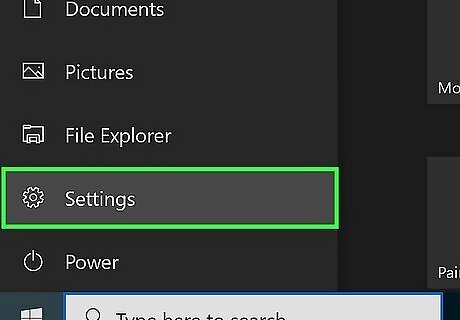
Open the Settings. Click the Start menu and click the cog icon.
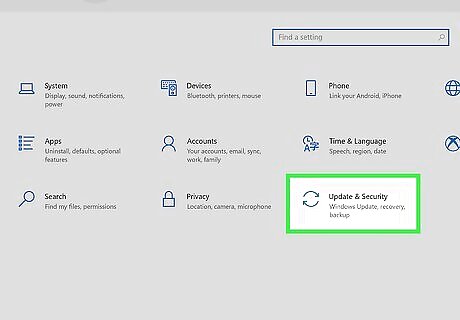
Click Update & Security. This will be towards the bottom of the page.

Click Windows Security. You can find this in the left panel.

Click Firewall & network protection. A new window will open.

Click Allow an app through firewall. This is near the bottom of the screen.

Click Change settings. A new page will open.
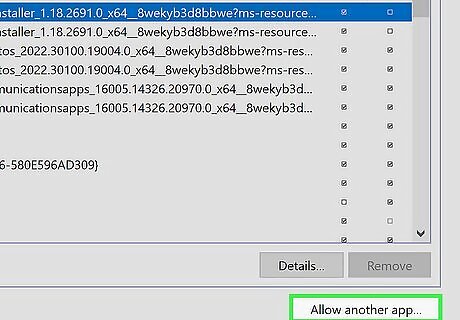
Click Allow another app…. You can find this at the bottom of the allowed apps list.
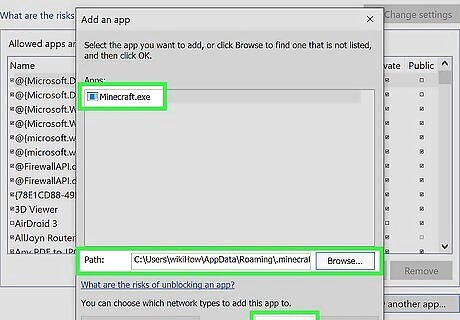
Add Minecraft. Click Browse… and select the Minecraft.exe file. Then, click Add. Try connecting to Minecraft again.
Change DNS Server

Open the Control Panel. Click the Start menu and search for "control panel." Click the first option. Make sure you're using an administrator account before you begin changing your Windows DNS. Close Minecraft completely before troubleshooting.
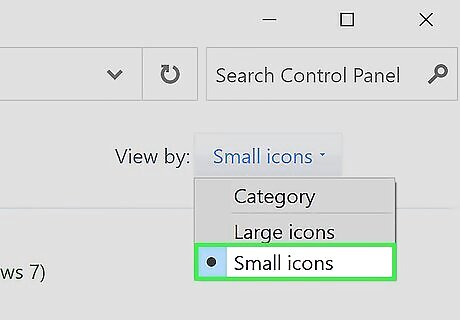
Switch "Category" to "Small icons." You can find this in the top-right corner, next to View by. The icons will switch to a small list format.
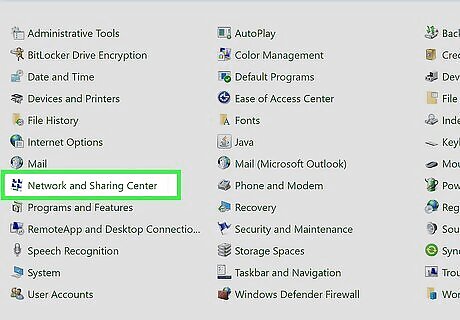
Click Network and Sharing Center. This will be on the right of the window.
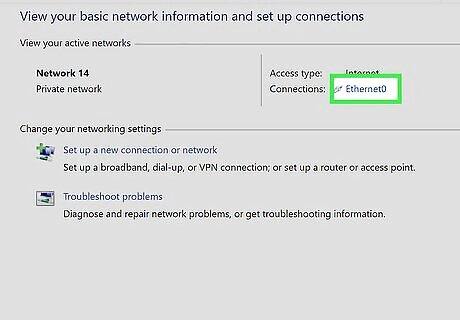
Click your Internet connection. This will be next to Connections. If you're using an Ethernet cable, you'll click Ethernet. A new window will open.

Click Properties. You can find this at the bottom-left corner. A new window will open.
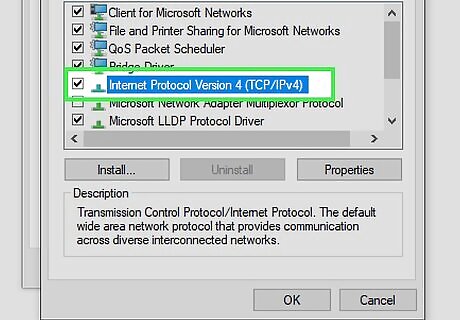
Double-click on "Internet Protocol Version 4 (CTP/IPv4)". This will be listed underneath This connection uses the following items. A new window will open.
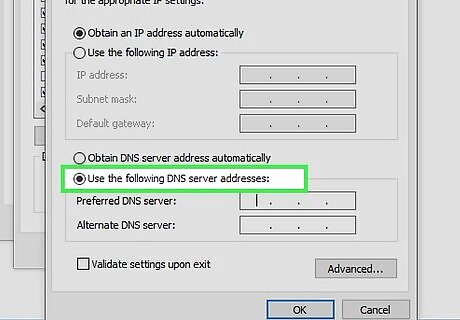
Adjust the options. By default, the circles should be bubbled in next to Obtain … automatically. Check the circles next to Use the following IPv6 address and Use the following DNS server addresses. This will open the Preferred DNS server and Alternate DNS server fields.
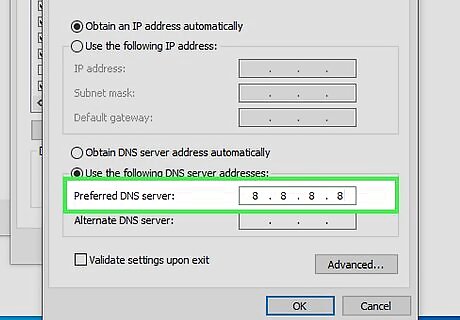
Enter 8.8.8.8 in the "Preferred DNS server" field. You can find this underneath Use the following DNS server addresses.

Enter 8.8.4.4 in the "Alternate DNS server" field. You can find this underneath Use the following DNS server addresses.
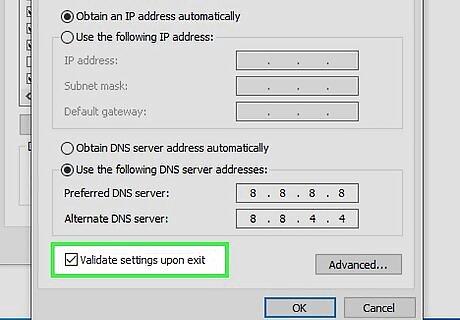
Check the box for "Validate settings upon exit." This will be at the bottom-left corner.
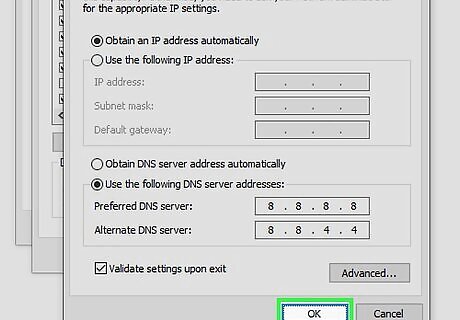
Click OK. This will apply your new settings. Try running Minecraft again.
Decrease Render Distance

Launch Minecraft. Some users report that decreasing your render distance can fix this error. If you have your render distance set higher than 12, you'll need to decrease it.

Go to Settings. This will open a new window.

Select Video. You can find this tab on the left panel.

Set "Render Distance" to 12 Chunks. Use the slider to decrease the render distance. Try connecting to multiplayer again.


Comments
0 comment