
How to Screen Record on a Mac

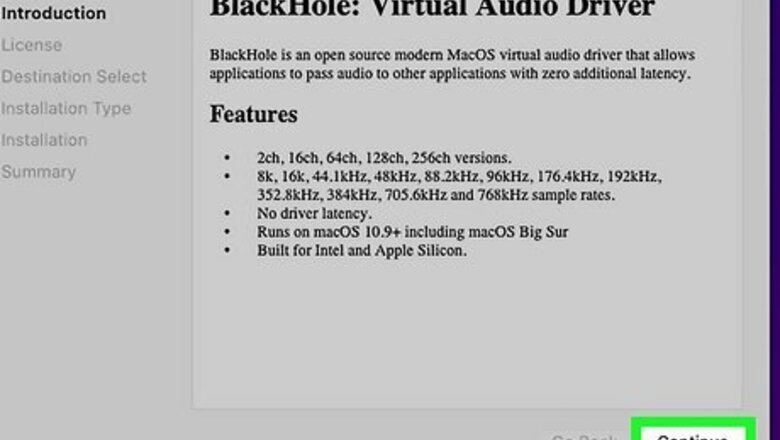
Download and install Blackhole Audio. On Mac, you can screen record using QuickTime, but it does not record your Mac's internal audio. You can record your speakers with your Mac's microphone, but it won't sound very good. However, you can record your Mac's audio using Blackhole Audio. It's a free plug-in, but it will ask for an optional donation. Use the following steps to download and install Blackhole Audio: Navigate to https://existential.audio/blackhole/. Select the option to donate or click I can't afford to donate.. Enter your name and email address. Click Send Link to Download. Click the download link in the email you provided. Click the option to download the Blackhole 16ch option. Open the installer file. Follow the prompts to complete the installation.
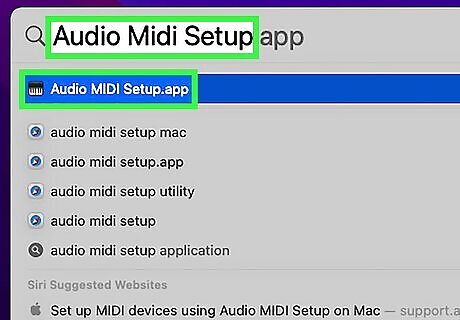
Open the Audio Midi Setup tool on your Mac. To do so, click the magnifying glass icon in the upper-right corner of your Mac. Search "Audio Midi Setup" and click the Audio Midi Setup icon.

Create an aggregate input device. You'll need to create an aggregate input for the Blackhole Audio plug-in to capture your Mac's audio. Use the following steps to do so: Click the plus (+) icon below the menu on the left. Click Create aggregate device. Check "Blackhole 16ch".

Create a multi-output device. The will send the audio from Mac's internal audio to both the aggregate input device and your speaker (or headphones). Use the following steps create a multi-output device: Click the plus (+) icon below the menu on the left. Click Create multi-output device. Check your Mac's speakers (or "External Headphones" if you are using headphones). Check "Blackhole 16ch." Select your speakers (or "External Headphones") as your primary device.
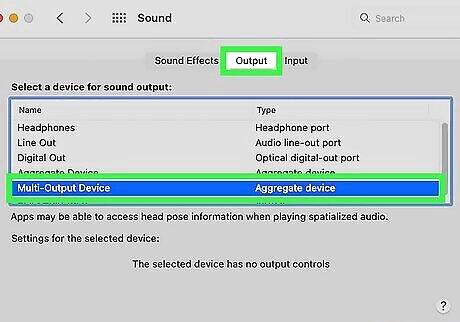
Select aggregate input device in your Sound settings. Use the following steps to do so: Click the Apple icon in the upper-left corner. Click System Settings (or System Preferences). Click Sound. Click the Output tab. Select your multi-output device.

Press ⇧ Shift+⌘ Command+5. This opens the QuickTime screen recording options.

Click Options. It's towards the right-hand side of the Screen Record bar.
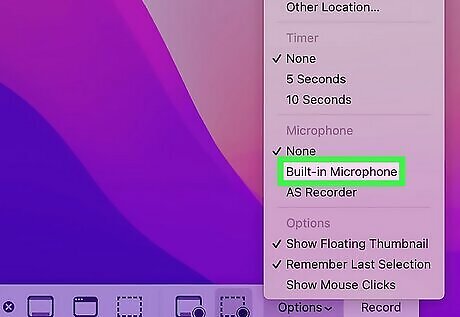
Select your Audio Input Device. It should be listed in the menu under "Microphone."

Record your screen. Use the options in the Screen Record menu to record your screen. To record your entire screen, click '"Record and then click anywhere on your screen to start recording. To record a part of your screen, click the icon that resembles a rectangle with a dotted line and select the portion of your screen you want to record.

Click the Stop button to stop recording. It's in the menu bar at the top of the screen.
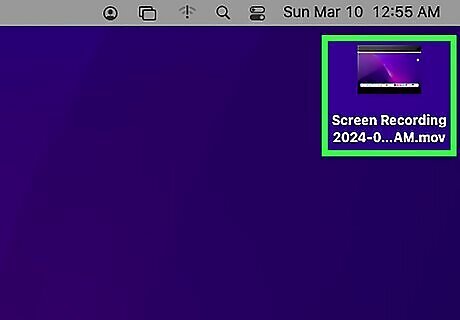
View your screen recordings. By default, screen recordings are saved to your desktop. If they are not saved to your desktop, you may find them in your "~/Library/ScreenRecordings" folder.
How to Screen Record in Windows
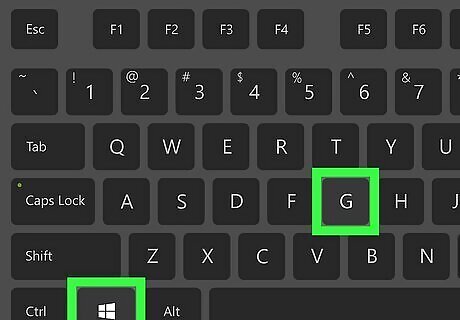
Press ⊞ Win+G. This will open the Game Bar. You can use the Game Bar to screen record on Windows.
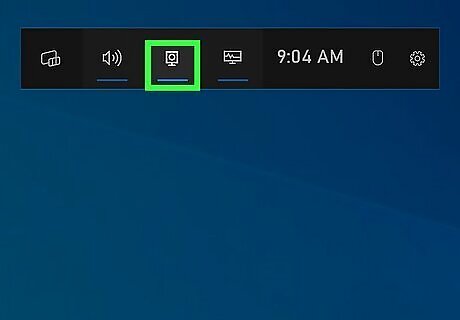
Click the Capture icon. It's the icon that resembles a webcam in the Game Bar. This displays the Screen Recording options.
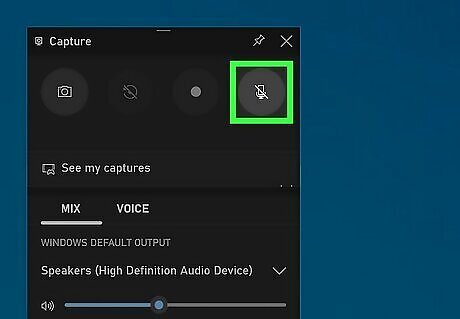
Click the microphone button (optional). It's the icon that resembles a microphone. This turns your microphone on or off. If you want to record your voice while you screen record, turn your microphone on.
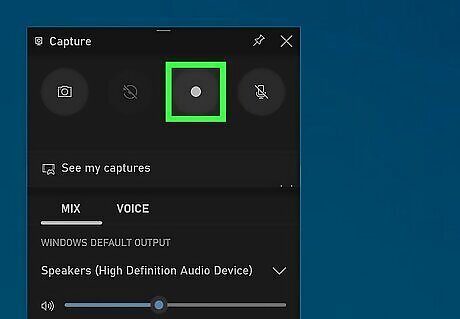
Click the Record button. It's the button that resembles a circle in the Capture window. This starts screen recording.
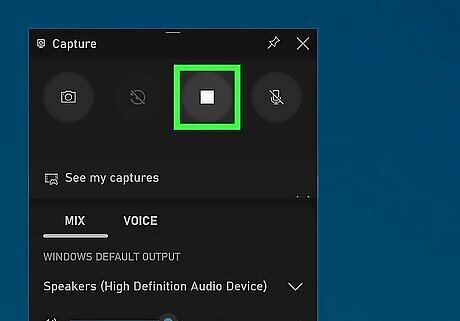
Click the Stop button. It's the button that resembles a square in the Recording Status window. This stops and saves your screen recording.

View your screen recordings. By default, you can view your screen recording in the "Capture" folder in your "Video" folder.
How to Screen Record on Android
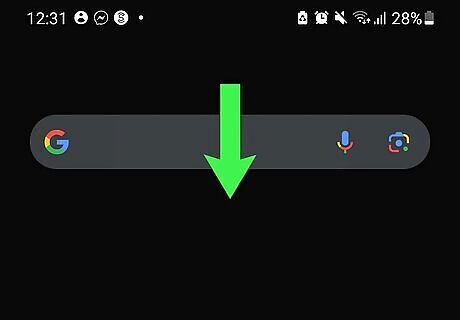
Swipe down from the top of the screen. This will display the Quick Access menu. You may need to swipe down twice to display all the Quick Access icons.

Tap the Screen Record icon. It's in the Quick Access menu. You may need to swipe left or right to find it.

Select Media or Media and mic. If you just want to record your phone's audio, select Media. If you want to enable your microphone so that you can talk while you record, select Media and mic.

Tap Start recording. It's at the bottom of the screen. This starts screen recording.
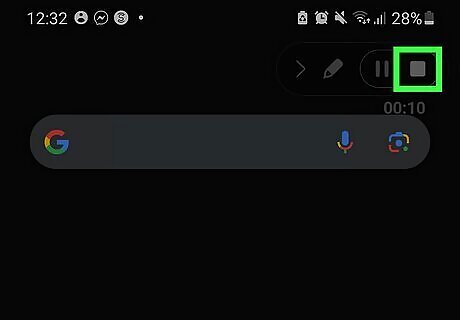
Tap the Stop button. It's the button that resembles a square in the upper-right corner. This stops and saves your screen recording.
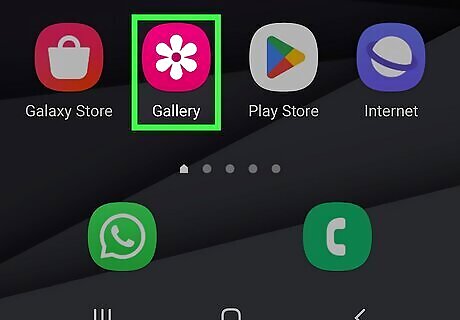
View your screen recording. By default, you can view your screen recordings in the Gallery or in the Google Photos app.
How to Screen Record on iPhone and iPad

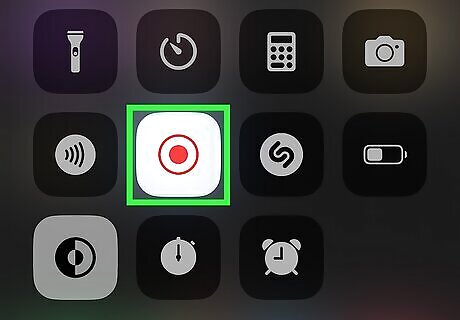
Swipe down from the upper-right corner. This displays the Control Center. You can use the Record feature in the Control Center to record your screen. Screen recordings include your iPhone or iPad's audio by default.

Tap and hold the Record button. It's the icon that resembles a circle with a dot in the middle. This displays the screen recording options. Tapping this button once will begin screen recording immediately.

Turn your microphone on or off. If you just want to record your iPhone or iPad's sound, leave the microphone off. If you want to record your voice while you record, turn your microphone on. Tap the icon that resembles a microphone to turn your microphone off.

Tap Start Recording. It's in the center of the screen. This starts screen recording.
Tap the record button to stop recording. To do so, swipe down from the upper-right corner to open the Control Center. Then tap the Record button to stop recording. It should be highlighted in red while you are recording. This stops and saves your screen recording.

View your screen recordings. By default, your screen recordings can be found in the Photos app.


Comments
0 comment