
X
Research source
Removing Old Strings

Place your guitar on a flat, clean surface. Lay down a towel or soft cloth on your table or counter to protect your guitar's body from scratches. If you have a headstand, you can use that to hold the neck for added stability. Set up your work station by laying out your tools. You'll need Allen wrenches for the nut plates and saddle, wire cutters, and a string winder. You may also want to gather cleaning supplies so you can clean your guitar after removing the old string.
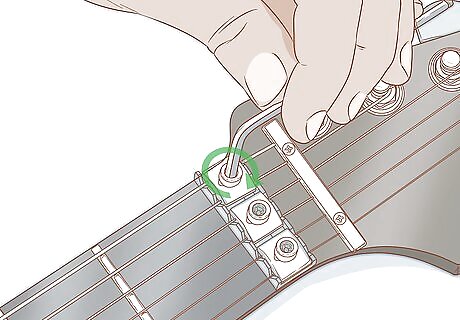
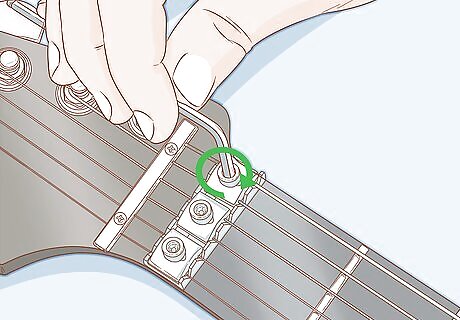
Take off the locking nut plates using an Allen wrench. The locking nut plates hold the strings in place. Turn your Allen wrench slowly to loosen the plates before removing them. Put the plates in a safe place so you don't lose them. Your guitar likely came with a set of Allen wrenches designed specifically for this use. If not, you can find a set at most music or guitar shops, or you can order one online.
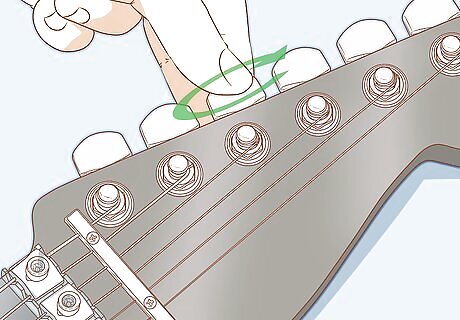
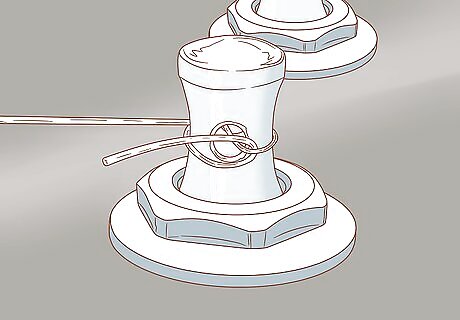
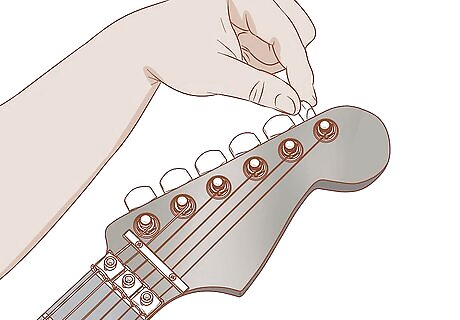
Unwind the string at the tuning peg. Turn the tuning peg slowly to release tension in the string before taking it out. If you need to remove multiple strings, only remove and replace one string at a time. If you take all of them off, your bridge may not have the same tension when you replace them, and you'll have a hard time tuning your guitar. A string winder will make this process faster and smoother. If you don't have a string winder, you can turn the tuning peg with your fingers. If the string is broken, hold the broken end as you turn the tuning peg. This will unwind the top of the string and keep the broken end from getting tangled in the other strings.
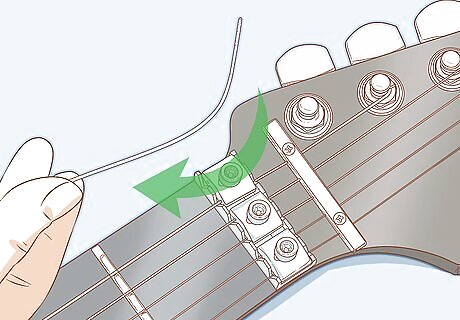
Pull the string out of the peg. When you've unwound the string completely, carefully pull the string to remove it completely from the tuning peg. Take care not to poke yourself with the sharp end of the string. If the string isn't broken, you may want to stick the sharp end in an eraser or wrap some tape around it. That way you won't have to worry about it poking or scratching you as you work.
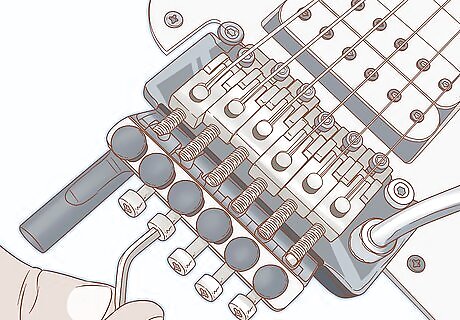
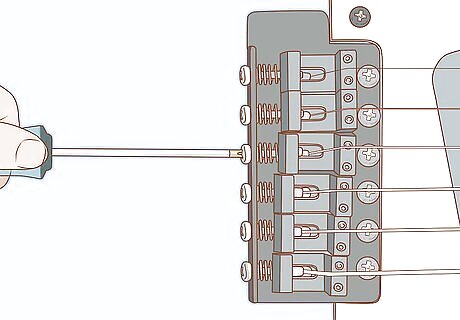
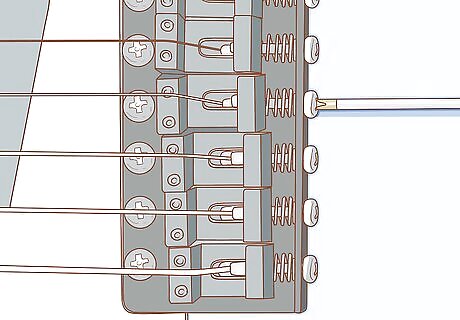
Loosen the saddle with an Allen wrench. Don't loosen all the saddles, only the one that corresponds to the string you want to remove. There is a small metal block in the bridge that keeps the string tight. Keep an eye out for it as you loosen the saddle. If the block does come out, put it somewhere safe so you don't lose it. You'll have to put it back in when you replace the string. It can help to count the number of turns you made with the Allen wrench to loosen the bridge. You can use that number when you tighten it back up to avoid over-tightening it.

Pull the other end of the string out of the bridge. Wrap the string into a neat coil. If the string was broken, you'll have 2 coils of string. Twist the sharp ends around and dispose of the string safely. You may want to wrap tape around the sharp ends to hold the coil together and keep the sharp points from coming loose.
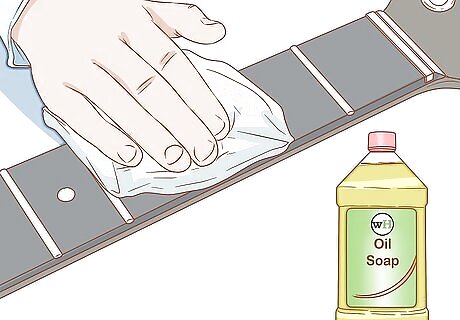
Clean your fretboard with an oil soap or fretboard cleaner. While a string is off, take the opportunity to clean the fretboard beneath it. Use a soft, lint-free cloth to gently rub the cleaner into the wood. Avoid getting the cleaner on any of the other strings. You can also polish the frets using the same oil soap. Once you're done cleaning, wipe away any excess with a dry paper towel.
Replacing the Strings

Buy replacement strings of the same gauge. If you don't know what gauge your old strings are, take your guitar into a music shop and have a tech look at them. If you look for your guitar on a string package, that only tells you that those strings are appropriate for your guitar. There's no guarantee those were the strings you had. If you want to use a different gauge, you'll need to replace all of your strings, not just the one that's broken. Changing the gauge of your strings will alter the balance between the nut and the bridge, which can destroy your guitar's intonation. Talk to a guitar repair expert before you attempt to do this on your own.
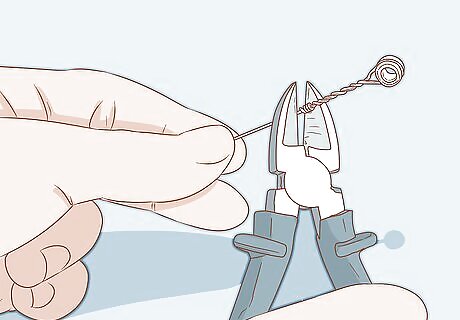
Use wire cutters to snip off the ball end of the replacement string. The ball end of standard guitar strings won't fit in a Floyd Rose bridge. Cut off the ball end as well as the part of the string just above the ball that is tightly twisted. Make sure your cut is even and clean. If you're changing more than one string, only cut the ball end off of one string at a time. Since the ball ends are color-coded, this is the only way to know for sure which string is next (unless you're really familiar with the thickness of the strings).

Secure the new string at the bridge. Insert the string into the saddle at the bridge, then tighten the bridge with your Allen wrench. If the small metal block fell out when you loosened the saddle, set it back into place before tightening the bridge. Take care not to over-tighten the bridge, or you could damage your guitar. If you counted turns when you loosened it, use the same number of turns to tighten it back up.
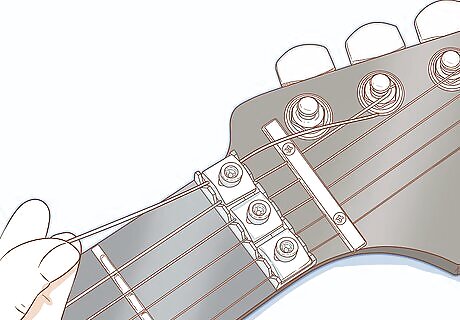
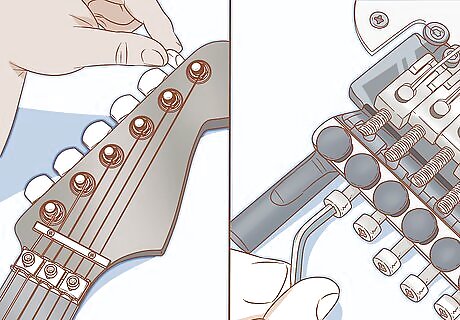
Insert the other end of the string in the tuning post hole. Pull the string up the neck of your guitar, making sure it runs over the correct nut slot. Put the end through the post hole and kink the string over itself to lock it in place. Line up your postholes with the nut, so you can slide the string straight through to the other side. Leave some slack so the string can wrap around the post several times. This will help keep the string from slipping.
Wrap the string around the tuning post. Using your string winder or your fingers, carefully turn the tuning peg to bring the string back to tension. Be careful not to wind it too tight, or the string may snap. Each new wrap of the string should be below the previous wrap. This also helps keep your strings from slipping out of tune. Bring the string slightly up to tension, but don't try to tune it until you've checked the bridge.
Adjust the bridge if you're changing to a different gauge of strings. Open the back of your guitar with a Phillip's head screwdriver to access the bridge's springs. Slowly adjust the tension on the springs until the bridge is level again. A heavier gauge string will cause your bridge to lean forward, while a lighter gauge string causes it to sink back. This can badly affect your guitar's playability. If the bridge is tilted forward, turn the claw screws clockwise to tighten the springs. If the bridge is tilted backward, turn the claw screws counterclockwise to loosen them. Turn the screwdriver a quarter-turn at a time, and then check to see whether it's even. You don't want to go too far in the opposite direction.
Retuning Your Guitar
Tune your guitar. Start from the sixth string and move to the first, getting your guitar in tune. Once it's in tune, check the position of the bridge again and make sure it's still parallel to the body of the guitar. If the bridge is tilting forward or backward, adjust the tension in the springs from the back of your guitar. You'll probably need to tune your guitar again after doing this.
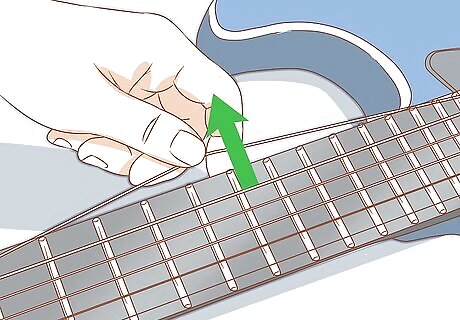
Pull the string gently away from the fretboard to stretch it. Take the new string between your thumb and fingers. Start at the bridge and stretch a few times going down the neck of the guitar. Stretch the string about a finger's thickness away from the fretboard. New guitar strings have a hard time staying in tune unless they've been stretched properly. If you skip this step, your new string won't stay in tune.
Retune your guitar after stretching the strings. After stretching new strings, your guitar will be out of tune again. Go back through the process of tuning your guitar using the tuning pegs at the headstock. You may want to play a little bit to help break the new strings in as well. After playing, check to make sure they're staying in tune and the bridge is still balanced. Make adjustments as needed.
Set the fine tuners to the middle of their adjustment range. Once your guitar is tuned, turn your fine tuners to the middle. This gives you room to adjust your strings flat or sharp after you've locked the nut. Strum your guitar again to make sure it's in tune. Check the balance of the bridge. These small rechecks will help your guitar's new strings stay in tune.
Lock the Floyd Rose nut. Take the locking plates you removed from your guitar and place them back on your guitar. Use the Allen wrench to tighten them back into place. Make sure the strings are all in the appropriate notches. Don't over-tighten, but make sure the strings are flattened out again. The locking plates help keep the strings from slipping when you use your whammy bar.

Fine-tune your guitar before playing it. After you've locked the nut, don't touch the tuning pegs at the headstock again. This will snap your string and could damage your guitar. Use the fine tuner knobs at the bridge to bring your guitar up to pitch. Check the balance of the bridge again. Make sure it's sitting parallel to the guitar with the strings tuned. If your action (space between the strings and the fretboard) is too high or too low, you may also want to make adjustments for that. You can adjust the action by turning the bridge pivot screws or "rocker screws" using an Allen wrench. Adjust slowly, checking after each quarter-turn.


Comments
0 comment