views
Deleting a Simple Background
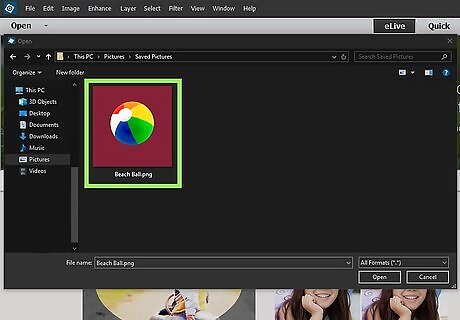
Open an image with a solid background. This method works best if the background is a solid color, or close to a solid color. Use the following steps to open and image in Photoshop: Click File Click Open. Select an image with a background you want to delete. Click Open.
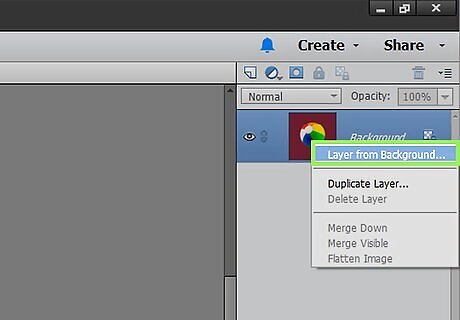
Create a layer from the background layer. You'll need to do this in the Layers panel. It is typically on the right side. Most images that haven’t been edited before will only have one layer called "Background”. You'll need to convert it to a standard layer in the Layers panel so that you can edit it. The Layers panel is usually on the right side. If you don't see if, click Windows followed by Layers. Use the following steps to create a layer from the background: Navigate to the Layers window. Right-click the Background layer. Select Layer From Background…. Leave the options at their presets and press OK.
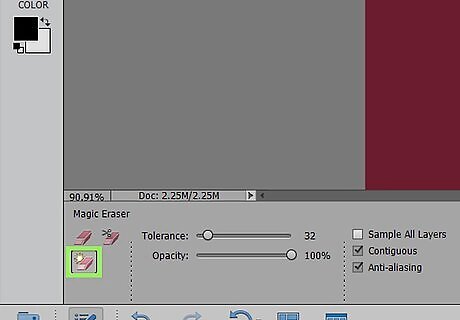
Select the Magic Eraser tool. To select the Magic Eraser, click the Eraser in the toolbar to the left, then click the Magic Eraser icon at the bottom of the screen.
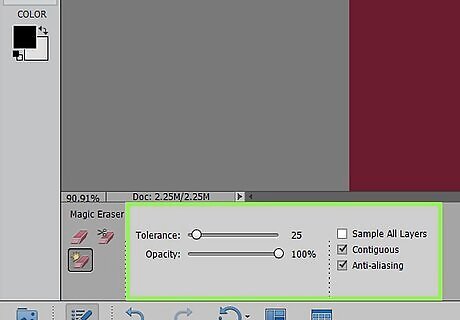
Adjust the Magic Eraser settings. Once you select the Magic Eraser, you will see some settings in the top menu bar in the upper-left corner. Set the following settings: Set Tolerance to 20-30. A low tolerance will keep parts of your original image from being erased when you use the tool. If the Magic Eraser erases too much of your subject, lower the tolerance. If it doesn't erase enough of the background, increase the tolerance. Use the following steps to adjust the Magic Eraser settings. Check the Anti-alias box. Check the Contiguous box. Set Opacity to 100%
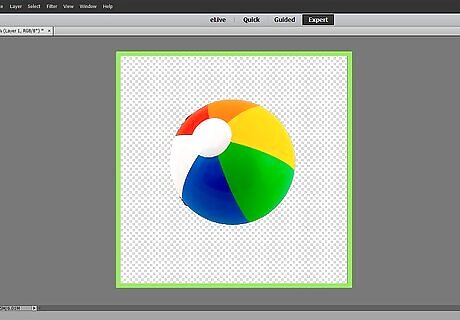
Click the background. The Magic Eraser will remove all of the color that you clicked on, turning it into the transparent background. If the Magic Eraser erases something you don't want to erase, you can press Ctrl + Z or Command + Z to undo the last thing you did. You can undo several steps using the History panel to the right. If you don't see the History panel, click Windows in the menu bar at the top and select History.
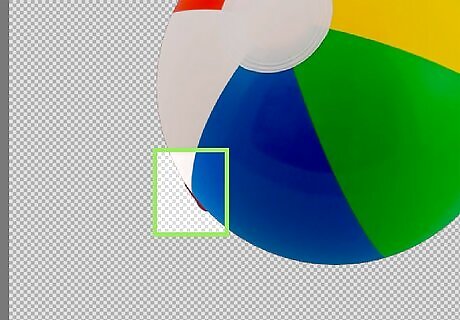
Erase any leftover background. If the background is one solid color, you can probably erase the entire background with one click. If it has multiple colors, you may have to click different areas of the background to delete all of it. If there are any parts of the background around the edges of your subject, you can use the regular eraser tool to carefully erases the remaining edges using single clicks. Click circle (brush) icon in the upper-left corner to display the brush menu. Select one of the solid circle brushes. If you want to feather the edges around your shape, you can lower the Hardness level by about 10% or so. Press [ or ] to adjust the size of the brush.
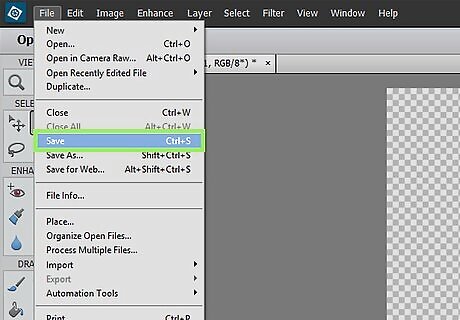
Save your image. You now have an object with a transparent background that can be overlaid onto any other existing image. You'll need to save the iamge in an image format that supports transparent images. Use the following steps to save your image: Click File Click Save as. Enter a name for the file next to File Name. Select PNG, GIF, or PSD in drop-down menu next to "Format." Click Save
Erasing a Complex Background
Open Photoshop Elements. It has black icon with an image that resembles a camera shutter in the middle. Click the Photoshop Elements icon to open Photoshop Elements.

Open an image with a background you want to delete. This method works well with images that have a more complex background. Use the following steps to open an image in Photoshop: Click File Click Open. Select an image with a background you want to delete. Click Open.
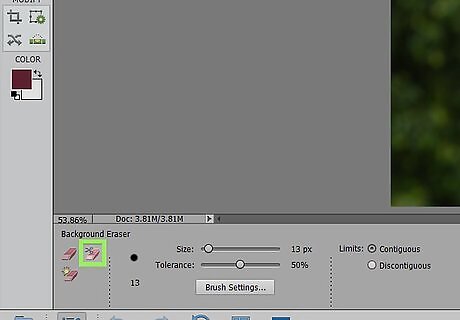
Select the Background Eraser tool. To select the Background Eraser tool, click the icon that resembles an eraser in the toolbar to the left. Then click the Background Eraser tool at the bottom of the screen.
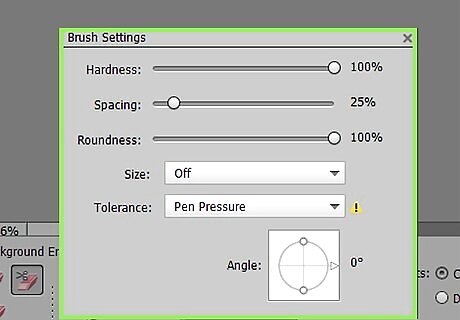
Set your brush options. You can set the brush options in the panel at the top-left of Photoshop. Set the following brush options: Click circle (brush) icon in the upper-left corner to display the brush menu. Select one of the solid circle brushes. Set the Hardness to 100% so that the edges of the brush remove as much as the center. Set the diameter to a size that works well with the image you have.
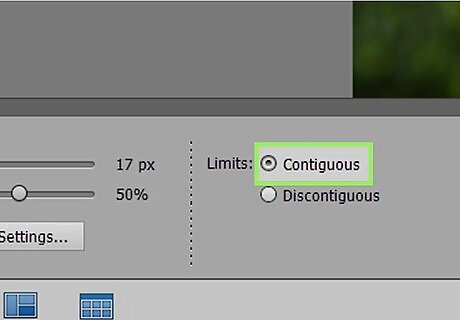
Set the Limits to Contiguous. This will delete the color that you select in the circle, but only if the colors are touching. This will help keep from deleting colors inside the subject of the photo, while only erasing the background. If you have spots of the image where there is background inside the subject (wisps of hair that can be seen through, for example), use the Dis contiguous option to remove the background from inside the isolated spots.
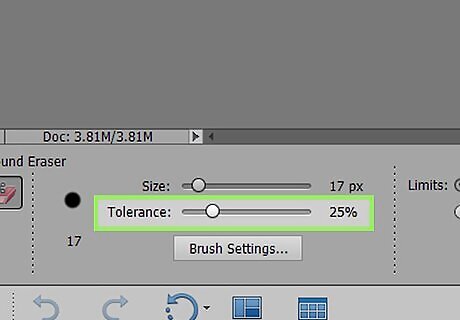
Set a low Tolerance. A low tolerance limits erasure to areas that are very similar to the sampled color. A high tolerance erases a broader range of colors. Set your tolerance between 20-30. If the Background Eraser erases part of the subject, lower the tolerance. If it doesn't erase enough of the background, raise the tolerance.
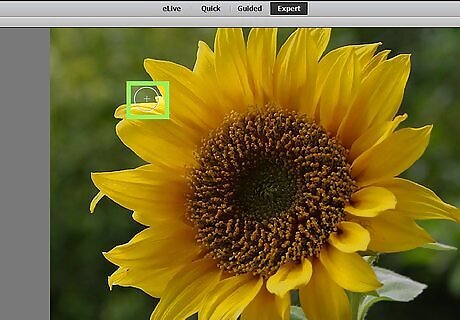
Bring the pointer near to the edge of the subject. You will see a circle with small crosshairs in the center. The crosshairs show the “hotspot” and deletes the clicked color wherever it appears inside the brush circle. It also performs color extraction at the edges of any foreground objects, so that color halos are not visible if the foreground object is later pasted into another image.
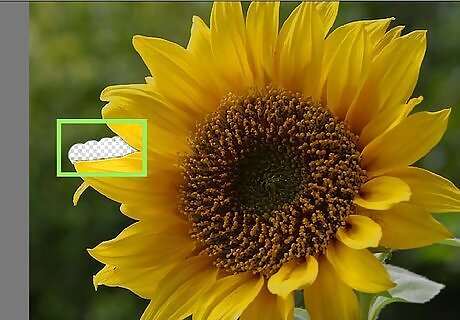
Click around the edges of your subject. Use single clicks as you go around and erase the background around the edges of subject. Use single clicks close to the edge of the subject in the photo.
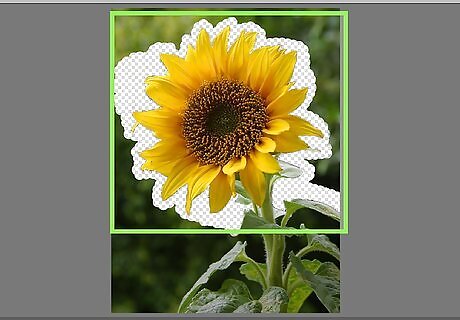
Check your progress. As you click and drag you’ll see the checkerboard pattern appear in the areas you have erased. The checkerboard represents transparency.
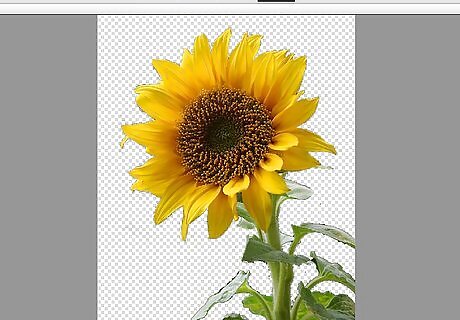
Increase the eraser brush size and erase the rest of the background. You can either use the background eraser, or the regular eraser. Once you have cleared the background around the edges of your subject, you can increase the brush size and click and drag to make broad strokes to erase the rest of the background You can press [ or ] to adjust the brush size while you work. Press Ctrl + Z or Command + Z to undo any mistakes you make. You can also open the History panel to the right and go back several steps. If you don't see the History panel, click Windows in the menu bar at the top and select History.
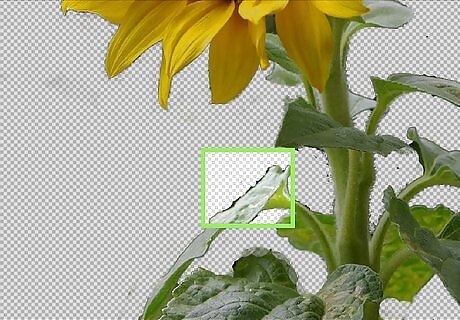
Carefully erase any remaining background around the edges. If there is any remaining background around the egdes of the subject, you can reduce te size fo the eraser brush and carefully erase the remaining background around the edges using single clicks with the regular Eraser tool.

Save your image. You now have an object with a transparent background that can be overlaid onto any other existing image. You'll need to save the iamge in an image format that supports transparent images. Use the following steps to save your image: Click File Click Save as. Enter a name for the file next to File Name. Select PNG, GIF, or PSD in drop-down menu next to "Format." Click Save
Using the Polygonal Lasso Tool

Open Photoshop Elements. It has black icon with an image that resembles a camera shutter in the middle. Click the Photoshop Elements icon to open Photoshop Elements.
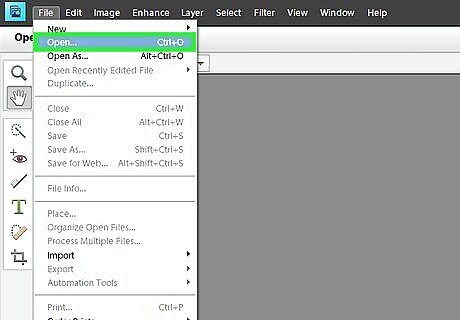
Open an image with a background you want to delete. This method allows you to separate the subject from the background without actually deleting the background. Click File Click Open. Select an image with a background you want to delete. Click Open.
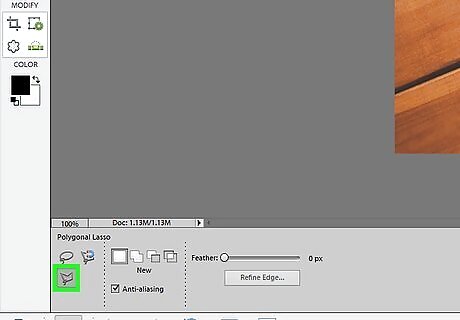
Select the Polygonal Lasso Tool. The Polygonal Lasso Tool has an icon that resembles an angular shaped lasso. To access it, click the Lasso Tool in the toolbar to the left. Then click the Polygonal Lasso Tool at the bottom.

Aline the grey line along the edge of your subject and click. This sets the grey line in place and creates a new spot with a new line attached to your mouse cursor.
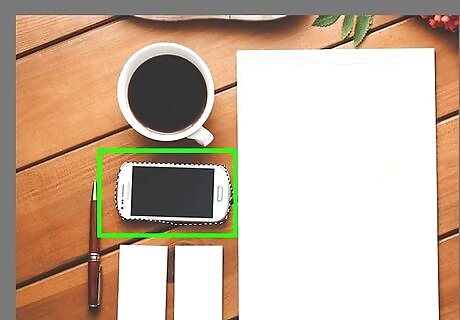
Trace the shape of your subject using the Polygonal Lasso Tool. Go along the edges of your subject and click to create an outline around your subjects. Curved areas will require more clicks to get the shape just right. Straight lines don't require as many clicks. Take your time and make sure the grey line outlines the shape of your subject as accurately as possible. Alternatively, you can try using the Magnetic Lasso Tool in the Lasso Tool menu. It has an icon that resembles the Polygonal Lasso Tool with a magnet. The Magnetic Lasso Tool will attempt to detect the edge of your subject as you trace around the shape of your subject. This may save you a little time, but it's not as accurate as the Polygonal Lasso Tool.
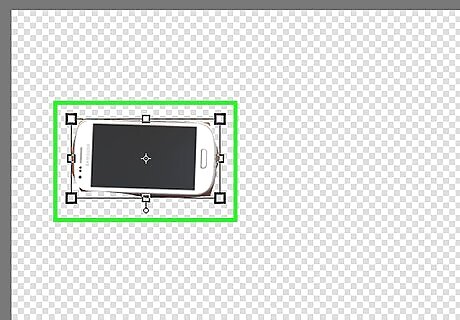
Click the starting point of your outline. When you finish tracing the outline of your subject using the Polygonal Lasso Tool, click the starting point of your outline to create a selection of your subject. When you create a selection, you will notice the grey line how resembles a moving dashed line.
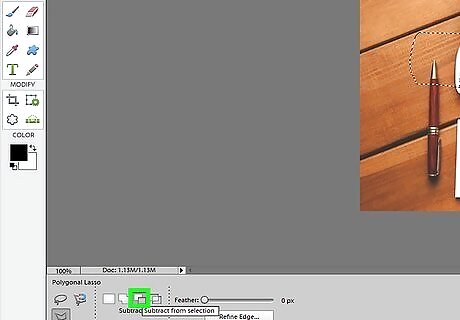
Add or subtract areas of your outline. After you create a selection, you can add or subtract areas of your selection. This is useful if there are parts of your subject you forgot to trace, or if your select something that's not part of your selection. Use the following steps to add or subtract from your selection: Add: Select the Polygonal Lasso tool. Then click the icon that resembles two squares joined together at the bottom of the screen. Then use the Polygonal Lasso Tool to trace the area you want to add to your selection. Subtract: Select the Polygonal Lasso Tool. Then click the icon that resembles a square cut out of another square at the bottom of the screen. Then use the Polygonal Lasso Tool to trace parts of your selection you want to remove.
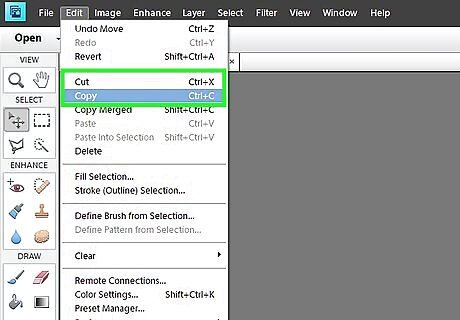
Copy and paste your selection. You can either copy and paste it into a new layer, or into another image. Use the following steps to copy and paste your selection. Click Edit in the menu bar at the top. Click Copy. Click Edit. Click Paste.
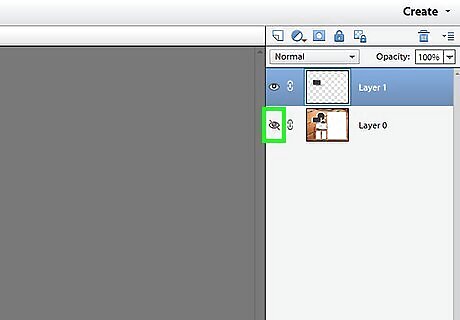
Turn off the background layer. To turn off the background layer of your image, click icon that resembles an eyeball at the next to the background layer in the Layers panel to the right. This disables the background layer and removes the background.
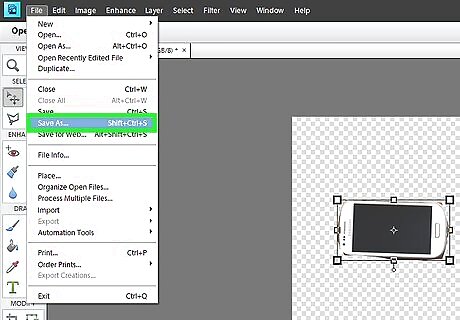
Save your image. You now have an object with a transparent background that can be overlaid onto any other existing image. You'll need to save the iamge in an image format that supports transparent images. Use the following steps to save your image: Click File Click Save as. Enter a name for the file next to File Name. Select PNG, GIF, or PSD in drop-down menu next to "Format." Click Save




Comments
0 comment