views
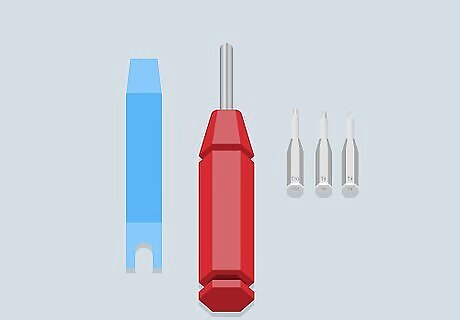
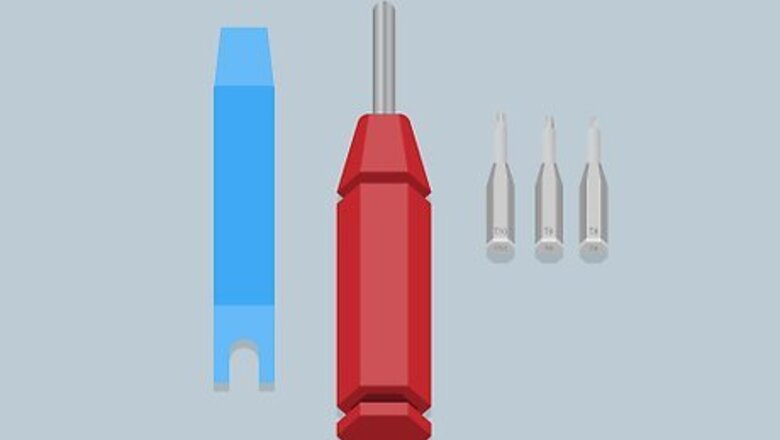
Make sure you have the necessary equipment. To disassemble your Xbox One, you will need the following items: Flathead screwdriver (substitute plastic tool if possible) T8 Torx screwdriver T9 Torx screwdriver T10 Torx screwdriver Plastic prying tool (optional, but recommended)
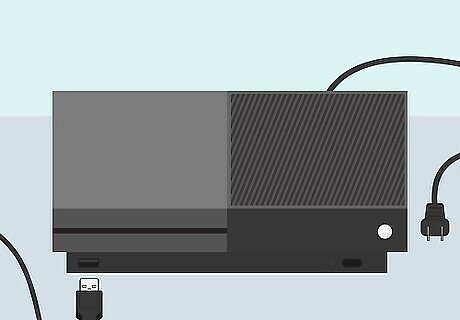
Disconnect your Xbox One from all sources. Your Xbox One should be completely free of any wires or attachments, including external storage, HDMI/audio cables, and the charging cable.
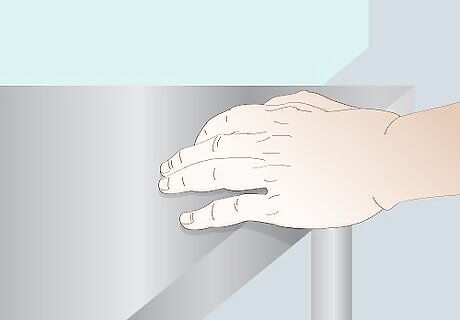
Ground yourself before taking apart your console. Static electricity can permanently damage circuitry, so make sure you practice proper grounding techniques like touching a metal surface before working.
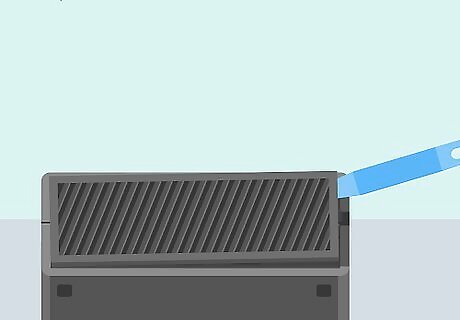
Remove the left-hand side panel. Insert a flathead screwdriver or spudger into the space between the back-left corner of the console and the plastic grille on the left side of the console, then gently pry the grille away from the console. It helps to use a plastic tool rather than a metal tool here since the grille is made of relatively delicate plastic.
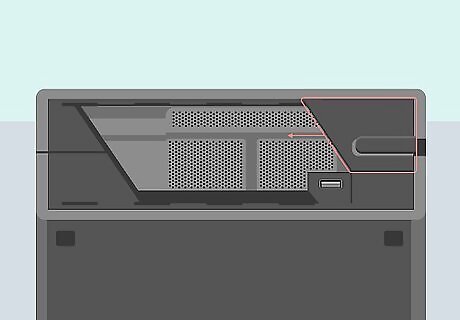
Slide the casing bracket off of the console. The casing bracket is on the far right side of the grille area. Slide this left until it pulls away from the console.
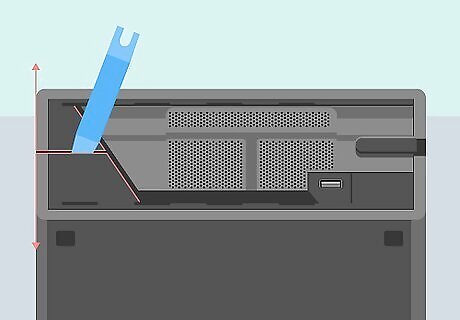
Unhook the second bracket. It's on the far-left side of the grille area. To unhook this bracket: pull on the bottom of the bracket while pushing on the top of the bracket, then insert a flathead screwdriver into the seam that's covered by the warranty sticker on the back of the console and pry until the bracket unhooks. This is easiest if the console is upright. Breaking the warranty sticker will officially void your warranty.
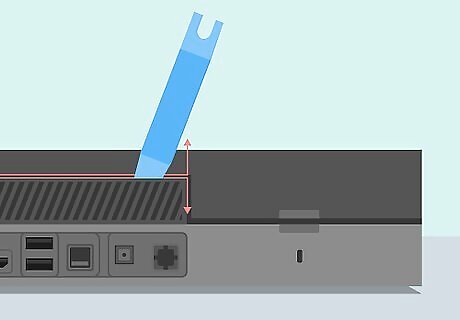
Detach the rest of the casing brackets. Insert your screwdriver into the top section of the grille that's on the back of the console and twist it until the bracket unhooks, then repeat this process down the side of the console. Once all of the brackets are unhooked, the back part of the Xbox One's casing will pop open. Do not pull the casing off of the console yet. Doing so will break the ribbon that connects the front of your Xbox One to the circuit board.
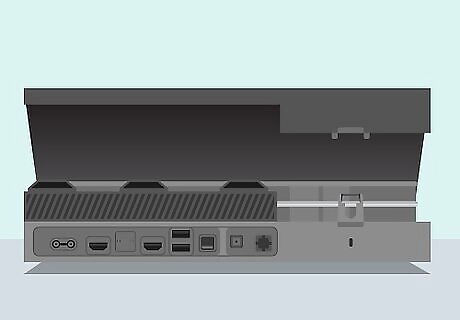
Swing the top of the casing up. Make sure the Xbox One is sitting flat with its bottom face-down when you do this. The top of the casing should swing up and over, coming to rest at a 90-degree angle to the console's body.
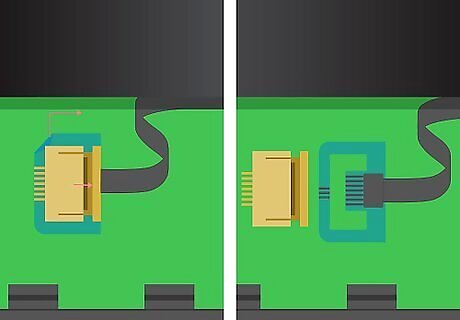
Unplug the front panel ribbon cable. Find the front of the cable, which will be near the "On" button for the console's face plate. Once you find it, pull the blue tab that's wrapped around the connector up, then gently tug the cable to the left. This will disconnect the cable from the top of the casing.
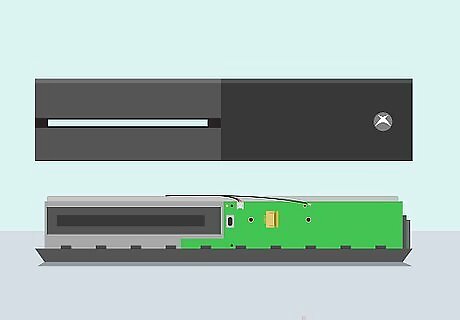
Pull the top of the casing away from the Xbox One's body. You should be able to do this without any resistance since all of the connectors are now unhooked. Set the casing aside in a safe, dry place.
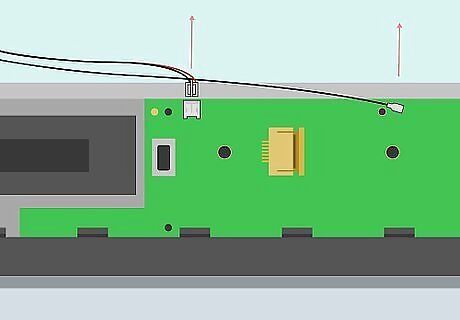
Disconnect the speaker and Wi-Fi wires. There should be two wires connecting the top of the console to the front of the console; unplug these from the front of the console by gently pulling on them.
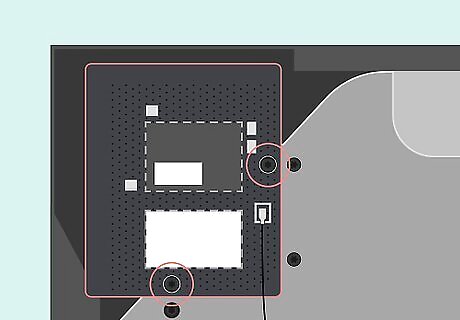
Unscrew the Wi-Fi card. Use a Torx T8 screwdriver to do this. The Wi-Fi card is in the lower-left corner of the Xbox One's casing if the front of the Xbox One is facing you.
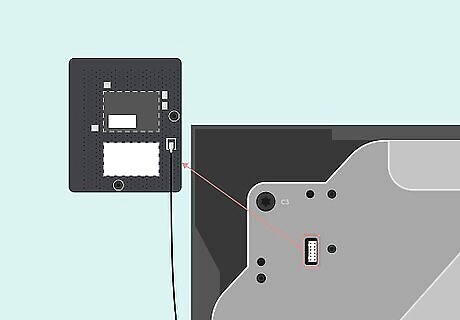
Remove the Wi-Fi card. Pull the card straight up from underneath. This will unplug the Wi-Fi card from the Xbox One's internal circuit board. Set the Wi-Fi card aside in the same place as the top of the Xbox One's casing.
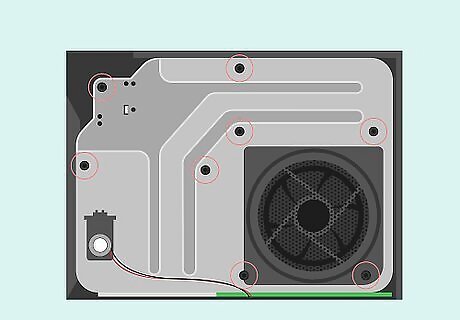
Remove the screws from the metal case. Use your T9 and T10 Torx screwdrivers for this. The metal case is the last piece of the Xbox One that you need to remove in order to open it. There are eight total screws to remove; you'll see a light "C" with a number next to or below the screws. Two of the screws are at the bottom of the fan box. Make sure you place the discarded screws in a plastic bag so that you don't lose them.
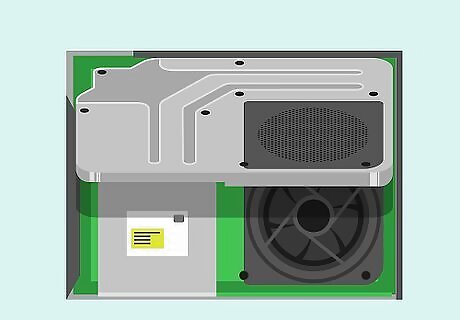
Gently open the metal case. Hold the fan corner of the case and pry it up diagonally so that the cable in the adjacent corner isn't damaged. Don't force this step. If you feel resistance at any point, set the case down and try again.
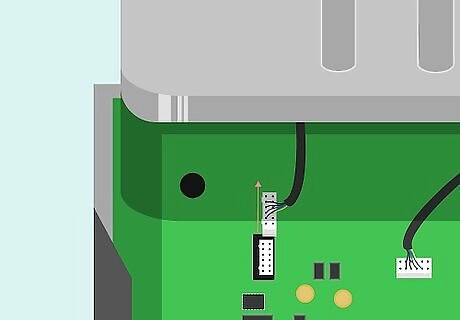
Unplug the cable. This is the cable that attaches the Wi-Fi card to the console's circuitry. Gently tug the cable's connector, which is white, away from the off-white port into which it's plugged. This will completely detach the top of the metal case from the Xbox One. Set the metal case aside with the cable side facing up.
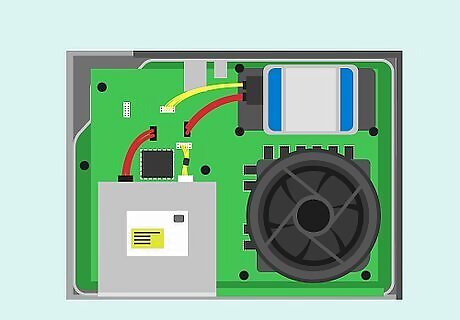
Review your Xbox One's internal parts. You should be able to see the fan, the hard drive, and the CD drive, as well as the green motherboard along the bottom of the console. The whole bottom part of the Xbox One's casing is now removable as well. This is helpful if you want to paint or otherwise detail your Xbox One's casing. If you want to remove a stuck CD from your Xbox One's disk drive, there should be a pinhole in the front of the Xbox One's face plate where you can insert a small item (e.g., a paperclip) to force the drive to open.






Comments
0 comment