
X
Research source
Preparing the Ribbon and Pendant

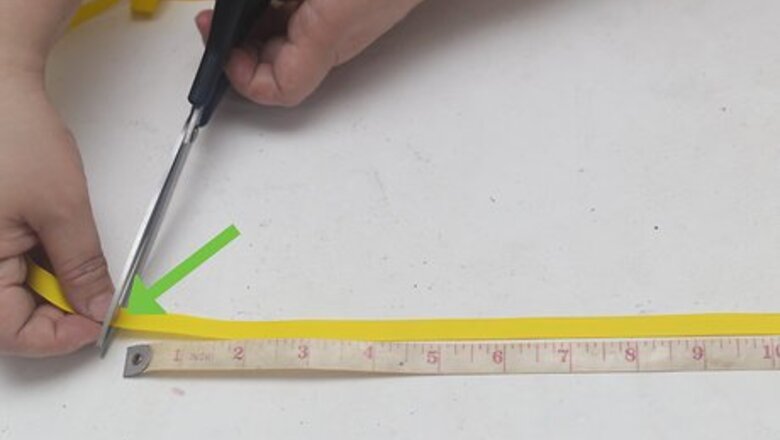
Find out what length of ribbon you need. Measure your neck around the base of your throat. Choose a dark-colored velvet ribbon. Subtract one inch from the measurement of your neck. Use a sharp pair of scissors to cut the ribbon down to size. For example, if your neck is sixteen inches around, cut the ribbon to a length of fifteen inches. Dark shades of velvet were popular for Victorian-era chokers. For instance, black, midnight blue, or burgundy.
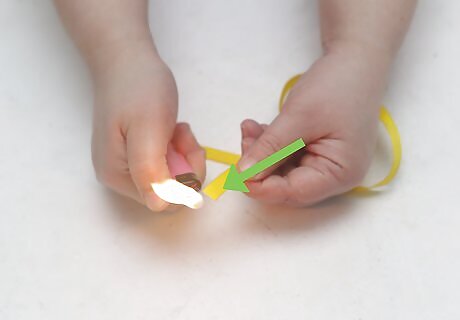
Prevent the ribbon from fraying. There are multiple ways to do this. If the ribbon is made of synthetic fiber like acrylic or polyester, you can seal the ends with a flame. If it is a natural fiber (like cotton or silk) – or the material type is unknown – a different method is required, because the fabric would burn rather than melt. In that case, seal the ribbon ends by applying a thin layer of fabric glue or clear nail polish to the edge of each ribbon end. To seal ribbon tips with a lighter, first pour a little bit of water in the bottom of an empty tin can or glass ashtray. Have a pitcher of water beside you for safety. Hold the tip of the ribbon over the can or ashtray. Light the cigarette lighter, and run the flame lightly back and forth against the tip of the ribbon a couple of times. The fabric should melt and quickly air dry hardened. Repeat on the other end of the ribbon. The ribbon should not catch flame. If it does, try gently blowing the flame out over the container of water. If that doesn’t work, dunk it in the water to extinguish it, and allow it to dry before you continue.
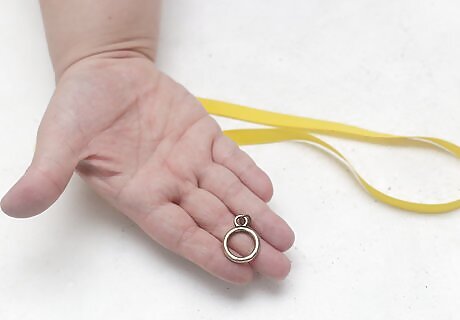
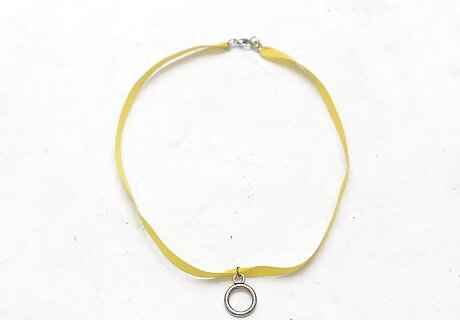
Add the focal piece. In keeping with the Victorian era style, choose a pendant such as a metal medallion, cameo, or a large jewel. If the pendant has a bail, you can just slide the ribbon through the bail. If the pendant only has a hole at the top, use jump rings to connect the pendant to the ribbon. You may need to roll the ribbon lengthwise in order to stick it through the hole. Then smooth it back out with your fingers. If it continues to curl, you can gently steam it with a hand steamer or steam iron on the lowest setting at least half an inch away from the fabric. Never allow the iron to touch the velvet. The ribbon will bunch in the center where it’s pinched smaller by the pendant. This is normal and is how velvet chokers typically looked in that era.
Adding Jewelry Findings
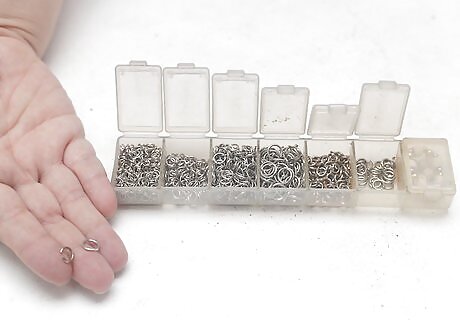
Find the right size of ribbon clamps. Ribbon clamps are also known as ribbon-end findings. Ideally, your findings should match the width of your ribbon. You can use a ribbon clamp that’s wider than the ribbon, but the ribbon cannot be wider than the clamp. For example, use a 13x6mm finding for a 1/2" ribbon. Use a 6x5mm finding for a 1/4" ribbon.
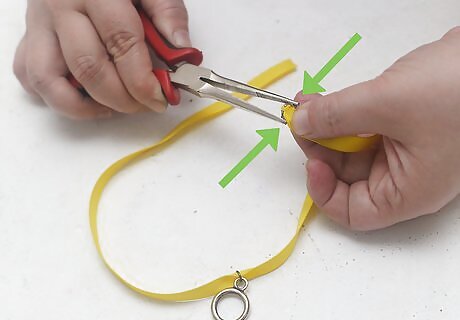
Attach the ribbon clamps to the ribbon. Using a cotton swab or small paintbrush, spread an adhesive such as E6000 on the inside of the ribbon clamp. Slide the ribbon into the finding, with the clamp’s claw facing the fuzzy side of the ribbon. Use light pressure to clamp the finding down with nylon jaw pliers or needle-nose pliers without teeth. Lay it down and let the glue set for at least two minutes. Then repeat this process on the other ribbon tip. Lay the necklace flat again and allow the glue to set for 24 to 72 hours before continuing. The nylon jaws of the pliers may slide a bit on the finding, so use them gently and carefully. Position the pliers at whatever angles work best to grip the finding. The finding should be doing most of the gripping, not the glue.
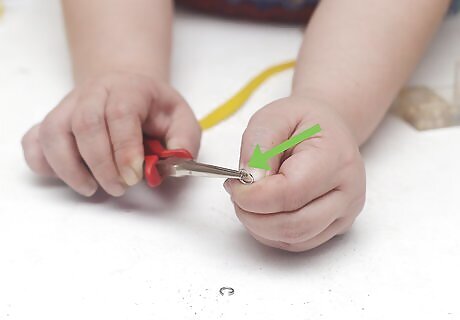
Open two jump rings. Hold one pair of non-serrated needle-nose pliers in each hand. Grasp a jump ring on opposite sides with your pliers. Twist one end of the jump ring towards you as you’re twisting the other end away from you, so that you create a small gap. You don’t want to pull the tips of the jump ring apart horizontally. Twist them away from each other instead of pulling them apart to the left and right.
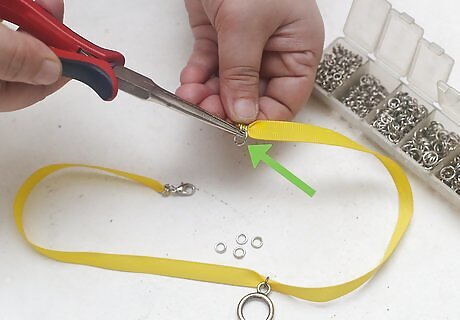
Attach a jump ring and fastener to the clamp. Put one of the open jump rings through the loop at the end of one ribbon clamp. Slide a fastener, such as a lobster clasp, onto the jump ring as well. Then close the jump ring by gripping pliers in each hand and twisting the jump ring closed. The jump ring should sit flush against itself without a gap. Usually you will hear a little click. You may have to rock the pliers back and forth a little bit until the jump ring closes up.
Use a jump ring to attach a necklace extender to the other ribbon clamp. Put an open jump ring in the loop of the ribbon clamp that doesn’t have a fastener on it. Loop the necklace extender onto the jump ring as well. Then close the jump ring by twisting it back together with your pliers.


Comments
0 comment