views
Developing Your Premise
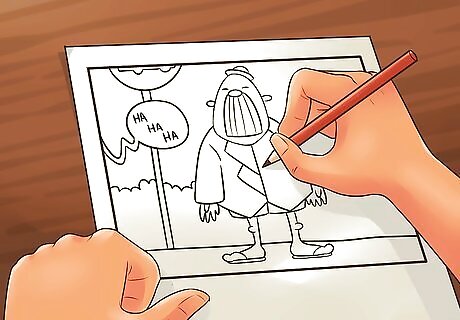
Focus your attention on dialogue and story over presentation. The images you include while writing your simple comic need to be sketches that give the impression of action while taking as little time from the development of your story as possible. Your goal isn't to realize an artistic masterpieces, it's to write a simple comic. If you’re an artist, this may mean you’ll need to go against your natural inclinations and de-emphasize your attention from the image to the story. Identify the relationship and feelings between characters in the scene. This will dictate how the characters treats each other. It'll also create dialogue and set the tone. Tweaking your dialogue and narrative text to make it concise and to the point. Too much dialogue and text can distract or overwhelm the reader. Your sketched images should centralize around some kind of action or interaction. You'll write the text of the comic around these major events in the form of narration and dialogue.
Plan a one-off or a reoccurring comic. Some strips won't get any more mileage than a single strip. These "one-off" simple comics don't need to go anywhere or have a long involved plot. Simply achieve your goal of your comic, like delivering a punchline, and begin a new simple comic when you're through. For episodic simple comics, you'll have to consider the plot of the strip. This way you can do things like connect ending panels so they lead into the beginning panels of the next comic. If your single, one-off comic ends up deeper or more interesting than you first imagined, you can always develop it into a longer comic.

Determine your style. This will influence how you approach the drawing background and characters involved in your story. Whichever style you decide upon, you’ll need to be able to sketch in it. You’re not developing a detailed artistic vision with your simple comic, you’re writing it likely to flesh out an idea or sharpen your skills. This should be reflected in your artistry. Do some rough practice sketches to the flow of your chosen style, such as manga, noir, cartoon, western, or basic. Draw thumbnails to determine the most effective layout of your panels. Start by drawing a rectangle to indicate one page, then divide that up into smaller squares and rectangles. Your simple comic should only be a page or two long.
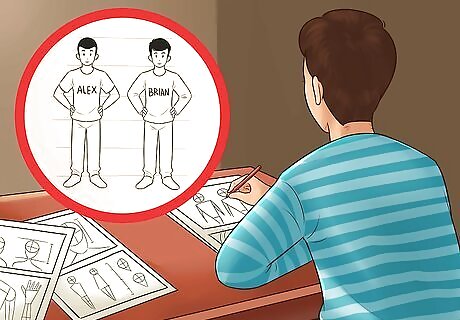
Design your characters on a separate sheet of paper. This is going to the be most detailed work you do in your simple comic. By developing the images of your characters here, you’ll have a more definite idea of how these characters will occupy and move through space when you’re sketching their motion in the panels of your simple comic. This sheet will also serve as a reference for your sketch work when you start writing your simple comic. Give your character a specific style or costume. Don't worry too much about expressions just yet, as those will change with your character's moods. Develop the narrative of the character. Write their name, job, physical details, and notes on personal history.
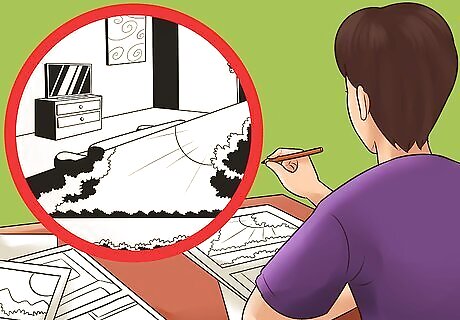
Come up with your setting. On your practice sheet, alongside your style practice, you should begin sketching the setting of your comic. You’ll need to decide on where the events of your simple are taking place. This could be a warehouse, a school classroom, a library, a jungle, a spaceship or numerous other places. Remember, the goal here is not developing the artistry of the setting. In writing your simple comic, your setting is simply a vehicle to help you develop the idea, plot, or situation motivating your simple comic. Use shading to loosely define the depth and perspective of your setting. These can be composed of filled-in shapes or crosshatching. Use organic, connected strokes to create natural shapes, like trees or shrubs; you can also use it for aliens and monsters. The shapes are usually more smooth and fluid.
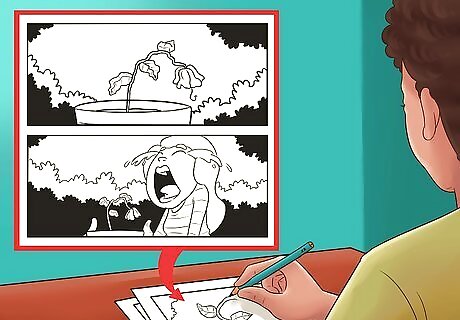
Decide on your plot. You’ll need to capture your plot in one to two pages. It should be compelling and central to the simple action you sketch in the panels of your simple comic. To help you focus your plot, you should identify the key points of your simple comic. Some examples of these would include: conflict (physical), conflict (emotional), man vs. nature, good vs. evil, a pun, a euphemism, a fall from grace, and so on. Choose the major plot points for your simple comic. You can refer to them throughout the comic, or save them for the surprise reveal at the end. Consider how the plot will affect the characters. They might support the driving force of your story, or they might resist it. This is where your story begins taking shape. Write down key words and phrases that are central to your comic's idea. You could pull these ideas from phrases you’ve heard before that stand out to you.
Drawing Your Simple Comic
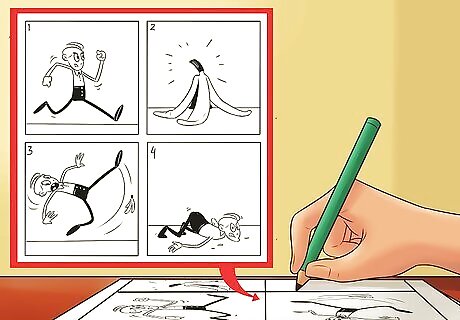
Break your page(s) into panels. Your simple comic should be no more than two pages long for the purposes of practice or idea development, though you may want to use a long-draft simple comic for roughing out more complete comic ideas. Refer to your practice page and the panel distribution you drew there. Using this as your template and a pencil, break your pages into panels that depict the action of your scene. Make the more important panels larger, and the less important panels smaller. For example, the punchline could take up the bottom half of a page, while the other panels could take up the top half. For beginners, you might want to start with the classic four panel approach. Simply divide your paper into four quarters, creating four scenes for each page. Use thick lines when sectioning off the panels of your pages. You don’t want these lines to be confused for the sketch work you add when you put character-shapes and background images in your panels. You can use different shapes or outlines to convey emotion or sensation in your panel. For example, a character getting shocked might have his panel bordered with a zig-zag line.
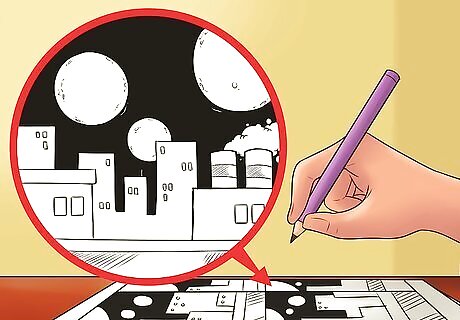
Sketch out the background. You’ll want the setting firmly in place before you start adding characters to the scene. The background will influence how the characters move through your panel, so you should start with this as the first building block for the art in your simple comic. If you need more space for characters later in your comic writing, you can always erase some of the background to free up space. After all, this is only sketch work. Remember to draw important tools or features that are part of the setting. For example, instead of suddenly drawing King Arthur holding his sword, draw the sword in the stone in the background of the previous panel. Include local features to set the tone. For example, if your comic takes place on an alien planet, you might draw three moons in the night sky to give the reader that impression. Use layers to give the impression of distance. You want to have a background, middle ground, and foreground.
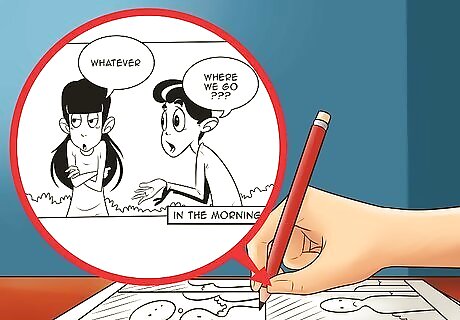
Draw your characters. Since you already know your plot, you should know roughly how your characters are going to play out the scene. Your characters will either be confronting each other or some other plot point, and around this interaction you’ll write the substance of your comic. This substance is conveyed through character dialogue bubbles and narrative text, which is usually plaintext offset in a regular square box at the top, bottom, or sides of a panel. Your characters might interact with each other directly, or they might set off a chain of events that influence each other. The distribution of the characters in your panels will depend upon the plot you have decided and how the characters taking part in the action. Remember to refer to your character sheet when drawing to understand how their bodies and costumes may interact with the environment.
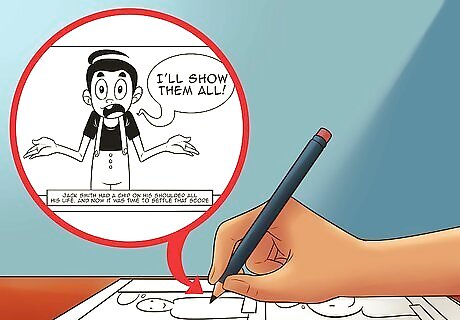
Write dialogue and narrative text. Now that you have your background and characters in your panels, your stage is set and your players are ready for the story. You need to write the text of your comic in the remaining space on the page. This will describe the action and convey the emotions in your simple comic. Take a look at your list of key words, phrases, and dialogue that you came up with while working on the plot of your simple comic. Use these as the foundation upon which you build the rest of the scene. If you can't convey something through dialogue, put it into narrative text. For example, you could write “Jack Smith had a chip on his shoulder all his life. And now it's time to settle that score.” above the image of Jack saying “I’ll show them all!” Keep distance in mind. Make the speech bubbles for the characters who are closer bigger, and the bubbles for the more distant characters smaller. Trim your text down to the bare necessities. Limit the space allowed for the text of each panel to a third.
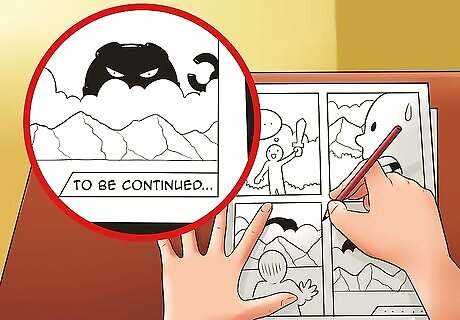
Complete your final panel. Your final panel may be a cliffhanger, or it could be the end of the scene, but you’ll need the panel to convey a sense of finality. You might put the words, “The End” somewhere in the lower right hand corner of the page as a visual cue to readers that your simple comic is finished. You could also use a thicker than normal borderline for the panel to give the sense of a hard stop to the scene. If you really like the idea you’ve been developing, you could write “To be continued” and turn your comic into a series.
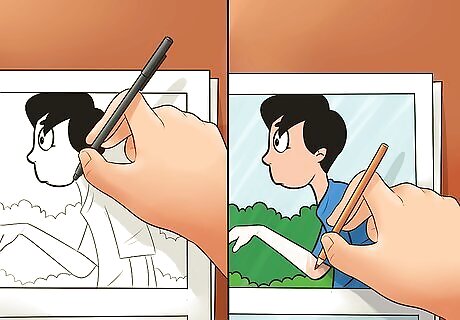
Polish up worthwhile simple comics. You never know when you're going to find a diamond in the rough among your simple comics. A strip that you intended to use as practice might turn into a popular strip in its own right! If you think a particular simple comic, or series of simple comics, has merit, you should: Clean up your linework Ink your drawings Colorize your panels Add it to your portfolio or get it published




Comments
0 comment