views
Managing Tools and Assets
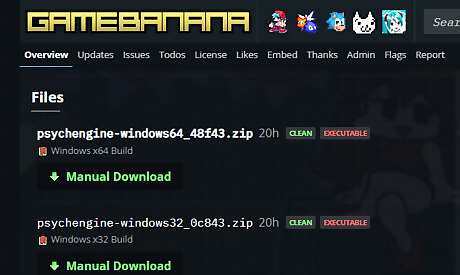
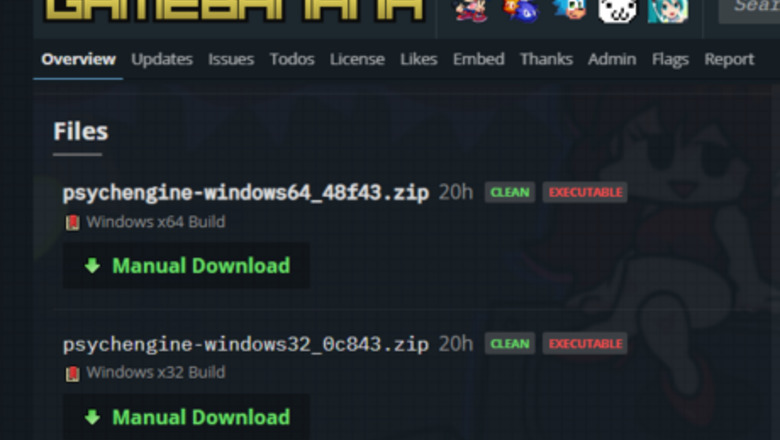
Obtain the tools you'll need to start modding FNF. First, if you don't already have it, you'll need a program like WinRAR or 7zip in order to use other tools. Then, you'll need the "Spritesheet and XML generator" from GameBanana. Finally, you'll need the "Psych Engine" from GameBanana. Download either WinRAR or 7zip to your computer and use their guided installer. You should now be able to use their "extraction" functions on the other tools. Locate the "files” section of the GameBanana pages and click “manually download” on the latest version of the file that corresponds to your PC system. The tools from GameBanana will come in ZIP files. If you have a Windows PC and don’t know if it is 64-bit or 32-bit, you can research “how to check if my system is 64-bit or 32-bit” online. Open the ZIP files for the generator and the Psych Engine. They will contain folders. Move the folders to an easily accessible location (like the desktop) by clicking and dragging them

Decide how you’d like to modify the game. You can add characters, menus, levels, music, fonts, notes, backgrounds and even more. For this tutorial, you will add characters, levels, and music. To add these, you will need "assets".
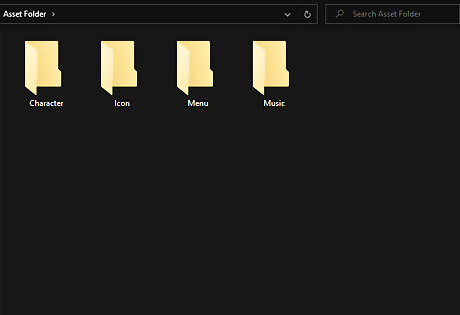
Create a folder on your computer to store your assets. The more organized the better. You should create at least 4 folders. One for your character, one for your character as they will appear in the menu, one for your character’s icons, and one for your music.
Create assets. “Assets” are what make up the game. They include all the visual elements you see and the sounds you hear. To make your own version of the game, you will need to provide your own assets. The assets you will need are OGG and PNG files. You can either create assets or obtain them from some resource, like from online, from a friend, or from a CD. To create assets, you will need talent with music and drawing. You will also need software for music and drawing (a DAW and an image editing program) to convert your music into a OGG file and your drawings into PNG files. There are both free and paid software for creating your assets To get an OGG file from a DAW, create your music, go to your export settings (likely accessed by going to top menu bar, clicking “File”, then clicking “Export”), then export your music as an OGG file To get a PNG file from an image editing software, create your art, go to your export settings (likely accessed by going to the top menu bar, clicking “File”, then clicking “Save as) then save your image as a PNG file If you are familiar with “the Boyfriend” and want his or any other voices in your song, you will need to create a separate OGG file containing nothing but the voices of characters like the Boyfriend or your own custom character. You will need to create poses for your custom character and save each individual pose a PNG file for animation. The minimum number of poses you’ll need for a character is two, but the more you have the more fluid the animation can be and the more expressive your character can be. Every pose of the character will need to be on a transparent background. Different image editing software will have different ways of getting a transparent background. Research online if you are unsure of your specific software’s capabilities Your character can be drawn in any style you like, however, for the menu they will need to be transparent with black outlines. Make sure your character is not colored in. For their icon they can be in any style, but their icon will need to be on a 300x150 sized PNG file. You will need to draw two heads (one normal head, one head expressing that the character is losing) that take up the upper half of the PNG file Save your character and music files to the appropriate folders.
Creating Spritesheets
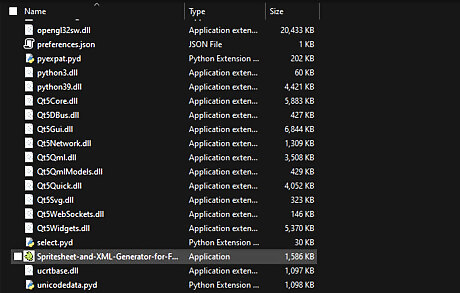
Prepare the spritesheet creator for your character. Open the folder for the Spritesheet and XML Generator. Scroll down the folder and open the EXE application with the green icon. The XML generator program should open, allowing you to create new files to insert in the game.
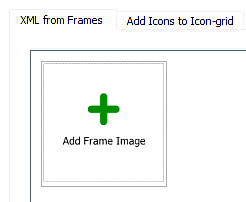
Create the main character sheet that you will see in game. Click the “Add Frame Image” button. This will open a new window. Navigate to the location where you put all the transparent PNG poses for your character. Multi-select EVERY pose you made and click the “Open” button at the bottom of the window. All your poses should now be visible in the XML generator.XML Frame Image.png You can bundle poses into different groups for different functions by clicking the tick box on the poses you want in a group, then clicking the "Set Animation (Pose) Name" button. To keep things simple, however, leave this feature alone for your first attempt at modding.

Generate the main files for your character. Enter your character’s name in the “Character Name” textbox at the top of the XML generator. Then press the “Generate XML” at the bottom. It will open a new window. This will allow you to select where you want the new files. You can place the new files anywhere, but the simplest place will the same place as your character's poses. In the folder where you saved should now be two new files, a PNG and an XML file, both with the name of your character. The new PNG file should have all the poses of your character together, instead of separate (as you made them).

Create the menu character sheet that you will see in the game menu. Repeat the process above, using the transparent menu character poses instead of your normal character poses. Name this character differently, adding “Menu_” before the character’s name. So, for example, if your character's name was John you'd name the menu sprites “Menu_John”. Generate the XML file and place the new files anywhere again (the same folder as the menu poses will likely be the easiest location to use).
Inserting Files
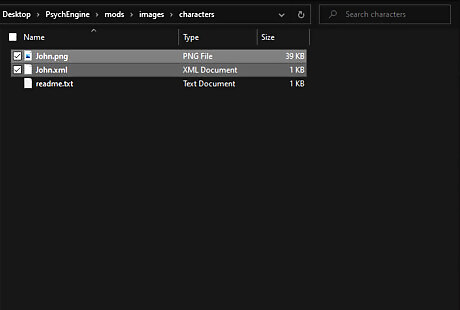
Place your main files in the game. Locate and open the PsychEngine folder. Open another File Explorer window. Locate the folder where you placed the XML and PNG files you generated for your character. Copy and paste those files to the “characters” folder found within the folder structure of PsychEngine>mods>images>characters.
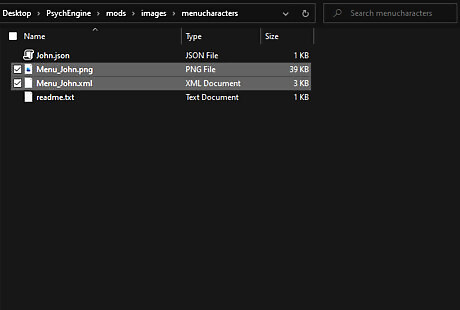
Place your menu files in the game. Locate the folder where you placed the XML and PNG files you generated for your character for when they’re in the menu. Copy and paste those files to the “menucharacters” folder found within the folder structure of PsychEngine>mods>images>menucharacters.
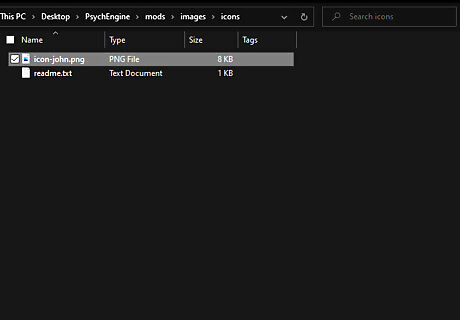
Place your icon files in the game. Locate the icons you made for your character. Place them inside the “icons” folder located in PsychEngine>mods>images>icons. Rename the icon using your character’s name or a nickname, for example, “icon-john”. The important part of the name is the “icon-“ in the beginning, so don’t forget it.
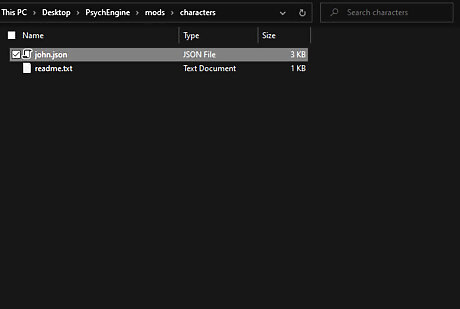
Prepare your character to work in game. Copy the “bf” JSON file in PsychEngine>assets>characters and paste it in PsychEngine>mods>characters. Rename the copy-pasted “bf” file to the same name that you used for your character in the XML generator.
Creating Your Character
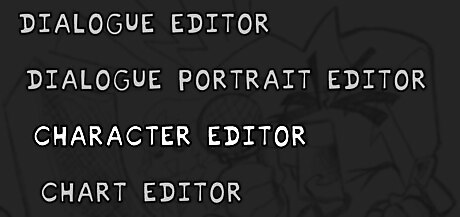
Prepare the character editor. Go to the PsychEngine folder and open the “PsychEngine.exe” application. This will open the game. Press the Enter key on your keyboard to enter the game. You will now be able to navigate through the menus and play the game using your keyboard. Press the 7 key on your keyboard to enter a special menu that allows you edit various aspects of the game. Use the arrow keys to locate the “character editor” and hit enter.
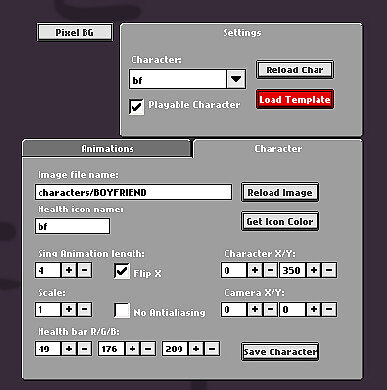
Edit your character into the game. Hit the arrow on the drop-down box under “Character:” in the top box named “Settings” to open up a list of names. You should see the name of your character. Select it, and a flipped image of the Boyfriend will appear. The tick box “Playable Character” under settings should be unticked. Locate the “Image file name” textbox in the bottom box named “Character”. The textbox should say “characters/BOYFRIEND”. Replace “BOYFRIEND” with the name of your character. It should be the same name of the PNG and XML files you generated. Once you’ve replaced the name, hit the “Reload Image” button next to the text box. You should now see your character. If they are an enemy character, they should be facing right. If they are facing left, look for the tick box named “Flip X” and hit it. Between the image file name box and the flip X box there should be a textbox named “Health Icon Name”. Erase the text in the box and type in the name you used to name your icon file. It will likely be the name of your character. Do not include the “icon-“ part of the icon filename.
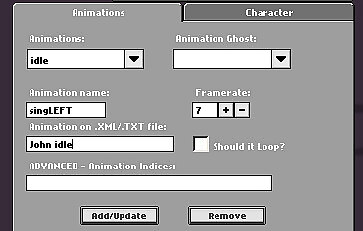
Configure your animations. In the bottom box you can switch between two tabs named Character and Animations. In the animations tab there will be a drop down box named “Animations”. By selecting one of the “sing” animations with the directions in the name, you can make your character move when they sing a note. Once you’ve selected a sing animation like “singLEFT”, the text in the boxes below should change.PsycheEngine animations settings.png Below the “Animations” box will be another text box named “Animation on .XML/.TXT file”. Go back to File Explorer and locate the XML for your character, then right click it and open it with a text editor like Notepad. Copy the text after “name=” up until the numbers. For example, if you named your character john, you should copy “John idle”. Once you have copied the text, go back to the character editor in the game and paste the text you copied into the XML box. If you made a low amount of PNG files for your character’s poses and movement, you might want to adjust the number under the “Framerate” box to be lower. If you separated the poses into different groups in the XML generator, be sure to use the specific group names for the specific poses you want. These group names can be found in the character’s XML file. Click the add/update button on the bottom of the bottom box to add the animation to your character. Make sure you repeat this animation process for “singLEFT”, “singRIGHT”, “singUP”, and “singDOWN”. You can use the same “Animation on .XML/.TXT” text for every sing direction. To test your animations, cycle through your character animations with the W and S keys. The text at the top of the screen will change. Cycle until the text reads “singLEFT” or whatever other sing animations you used. Your character should move, and you can make it move again by pressing the space bar.
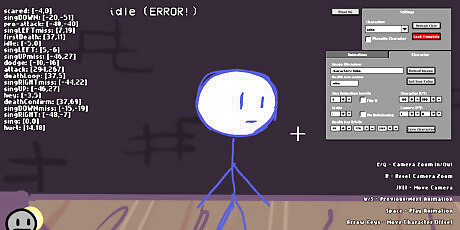
Adjust your character. Go back to the character tab. Zoom out or in using the E and Q keys. Zoom until you can see your entire character. If they are in a strange position, like off the stage, then use the “Character X/Y” controls in the bottom box to fix their position. There will be two sets of +/- signs. Use them to adjust the position of your character. The first set moves your character horizontally, while the second set moves your character vertically. Finalize and save your character. In the bottom box, press the save character button. Save your character in PsychEngine>mods>characters. You should overwrite the old JSON file you placed there earlier. Now you can exit the editor with the Esc key.
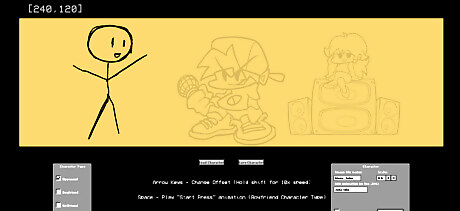
Create your menu characters. In the special editing menu, go to “Menu Character Editor”. On the right will a box named “Character”. Click on the text box inside it named “Imagine file name:” and replace the “Dad” in the “Menu_Dad” text with the name of your character. Click the “Reload Char” button at the bottom of the box to make your character appear. Your character may be too big or too small. Adjust their size by using the +/- buttons underneath “Scale”. You can also adjust their positioning using the arrow keys. Hold down the shift key while pressing the arrow keys to move your character quickly. Once you have adjusted your character to be aligned with the others, press the “Save Character” button in the middle. Navigate to PsychEngine>mods>images>menucharacters and save the JSON file with your character’s name. Press the Esc key.
Creating a Week
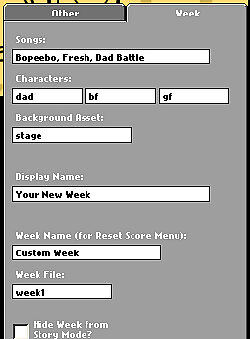
Setup your week. Enter the “Week Editor”. Locate the “Songs” text box and enter the name of the songs you will use in your mod. Separate multiple songs with a comma. Underneath the Songs box will be the Characters boxes. Replace “dad” with your character’s name. If you want, you can customize week names with the “Display Name” and “Week Name” boxes.
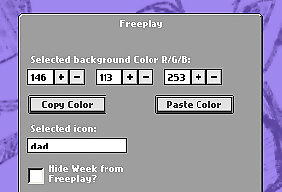
Change the week’s menu icon and finalize the week. Press the Freeplay button in the middle. Inside the Freeplay box will be a Selected icon: box. Change the text from “dad” to the name of your character. Press the Save Week button in the middle. Rename the file to something like “customweek1” then save your week JSON file in PsychEngine>mods>weeks. After it saves, press the esc key.PsycheEngine freeplay editor.png
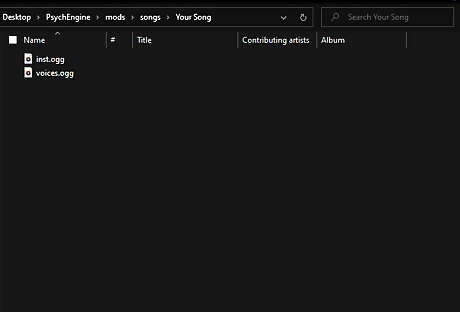
Setup your music. Return to File Explorer, go to PsychEngine>mods>songs, and create folders named after your music. Make sure the name of the folders matches up with the song names you used for the week editor. Copy your music files and paste them into the folders you made. Make sure the right song files go into the right folders. Separate songs cannot share folders. Go into the folders and rename your main song file “inst”. If you have voices name your voices “voices”.
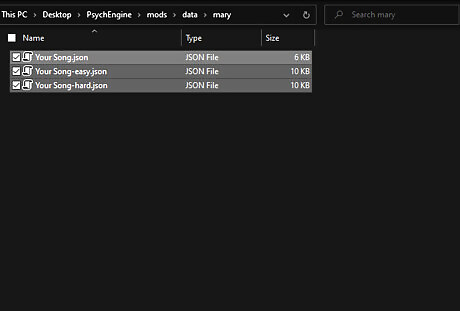
Make your week bootable in-game. Create folders inside PsychEngine>mods>data with the same names as your songs. Go into PsychEngine>assets>data>bopeebo and copy the “bepeebo” JSON file. Paste this into every song folder you made inside PsychEngine>mods>data. Go into every song folder and rename the “bopeebo” file to your song’s name. If you want additional easy and hard difficulties, you’ll need to copy and paste “bopeebo” two more times and rename both copies. For the additional difficulties, you’ll need the song name, then a hyphen, then the difficulty (easy or hard). So, for example, if your song’s name is “red” then you need to name the two additional JSONs “red-easy” and “red-hard”.
Creating a Chart
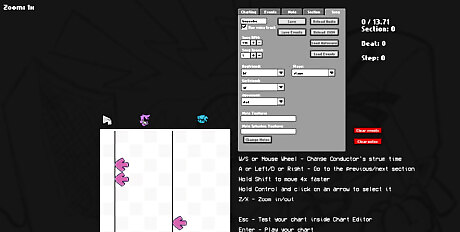
Start up the chart editor. Return to PsychEngine and navigate to the “Free Play” game mode on the main menu. Move through the menu until you see your song and your character’s icon. When the game starts up, press the 7 key on your keyboard to access a new editor that you can use to edit the level.
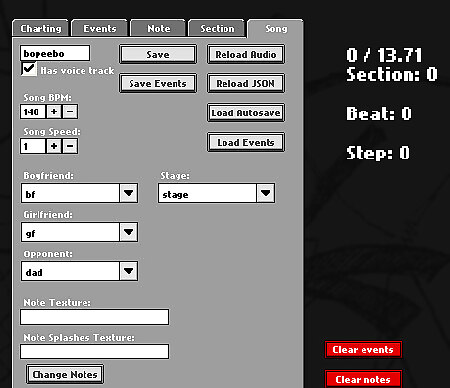
Set up the chart editor. Use the box on the right-hand side to switch to the “Song” tab. Replace the name “bopeebo” in the text box at the top with your own song’s name. Tick the “Has Voice Track” box if you have a “voices.ogg” file in your song folder to play voices, otherwise make sure it is unticked. Adjust the “Song BPM” box by having it match your song’s BPM then hit the “Reload Audio” box to the right. If you press the space button you should hear your song. Press the space button again to stop playback. Press the red “Clear notes” button on the right. This should have erased any arrows from the light grey checkered pattern on the left. You can now edit the notes for the song you will play.

Bring your character into the level. Locate the “Opponent” drop down box inside the large dark grey box on the right. If you hit the arrow scroll down the list of words, you should see your character’s name. Select your character’s name and you should see their icon pop up on the checkered pattern on the left. Your character will also appear whenever you play the level.
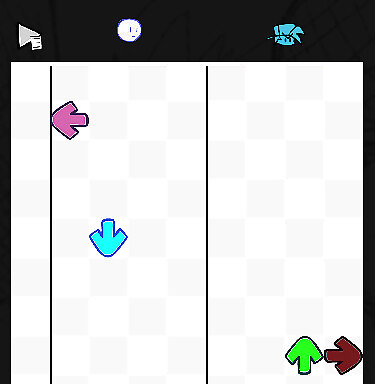
Understand how levels work. Now you can work with the chart underneath the characters. By clicking on the squares in the checkered pattern, you can place arrows or “notes” that the player will need to hit during gameplay. There is a black line that divides two characters and two sets of squares. The two sets of squares belong to the two different characters. When you place an arrow underneath a character’s specific section, they have to hit that arrow during the song. Clicking the squares will allow you to draw or “chart” four different directions of arrows. You can force a character to hit multiple arrows at once by drawing arrows horizontal of each other.
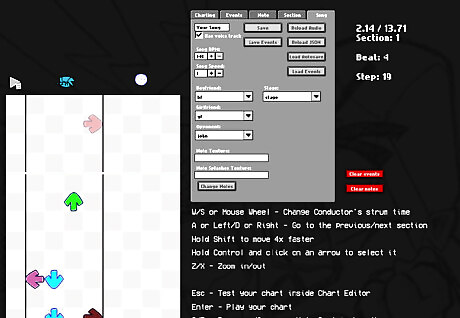
Create your level. Your goal as the chart editor is to place arrows that will play in time with your song’s main melody (or voices if you have them). To do this, use the space bar to play the song and make sure the arrows match with your sound. You can also look at the horizontal white line that moves down as a visual guide. Use the W and S keys to move back and forth through the song. Use the A and D keys to change sections. You can check which section you’re on by looking for “Section” in the upper right-hand corner. Songs are automatically divided into sections and when a section changes, the camera in gameplay will move its focus. Whoever is on the left side of the chart editor will the focus of the camera. The character on the left side will change when you move through the different sections. Generally, songs will only have arrows for whoever is the focus of the camera. This “rule” can be broken, however, if your song demands it or if you think you should have notes on both sides.
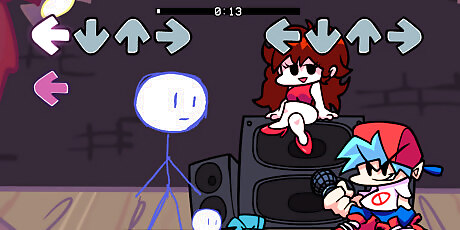
Test and finalize your level. Once you’ve placed your notes, you can test your level by pressing the Enter key. This will allow you to fully play what you’ve made. Press the 7 key at anytime to return to the chart editor. If there was a problem during your test, you can fix it here. Otherwise, return to the Song tab in the right-hand box and click the “Save” button to finalize and save your song. Save the song in the song folder in the PsychEngine>mods>data and replace any file the computer asks about. You can use this same chart editing and saving process to edit and save over other difficulties. Once you’ve saved and returned to the chart editor, press the Enter key again to enter testing, then press the Esc key to bring up the pause menu. Locate “exit to menu” and select it. Your level should now be fully playable through normal means (story mode or freeplay)




Comments
0 comment