
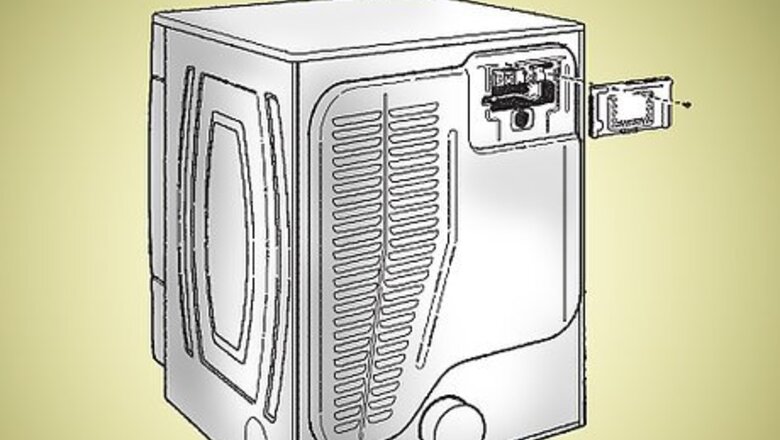
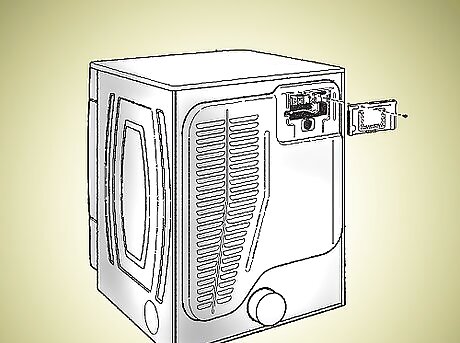
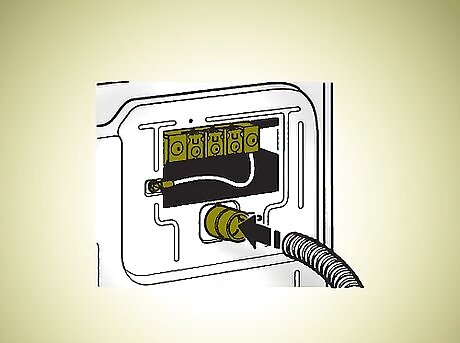
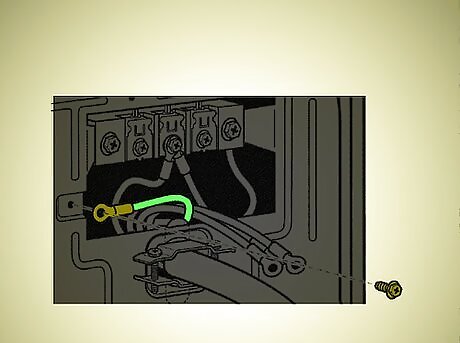
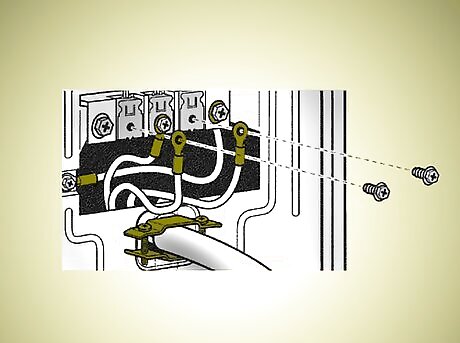
Locate the terminal block (shown here). Remove the hold-down screw and the terminal block cover. Now if you are installing the power supply cord strain relief, go on to steps 2 and 3. If you are installing the direct wire strain relief, go on to steps 4 and 5.
Remove the screws from the strain relief (lower section). Put two clamp section tabs into the hole below the terminal block opening with one tab pointing up and the other pointing down. Secure the tabs with one hand and tighten the strain relief screws so the clamp sections are held together.

Insert the power supply cord into the strain relief. It should lie horizontal, as shown, and fit snugly enough so as to stay in by itself--do not tighten the screws around the cord. Now go on to step 6.
Remove the conduit connector and screws from the strain relief (lower section). Put the threaded portion of the strain relief through the hole below the terminal block opening. Screw the conduit connector onto the strain relief threads.
Insert the direct wire cable into the strain relief. It should lie horizontal, as shown, and fit snugly enough so as to stay in by itself. Tighten the strain relief screw directly against the wire cable, as shown. Now go on to step 6.
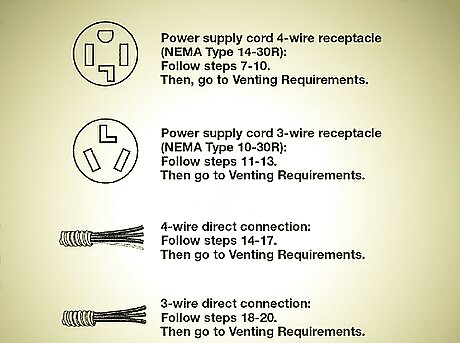
Choose your electrical connection type. For the power supply cord you can use a 4-wire receptacle OR a 3-wire receptacle--follow steps 7-10 for the 4-wire receptacle OR follow steps 11-13 for the 3-wire receptacle. For the direct wire you can use a 4-wire direct connection OR a 3-wire direct connection--follow steps 14-17 for the 4-wire direct connection OR follow steps 18-20 for the 3-wire direct connection. IMPORTANT: Mobile homes require a 4-wire connection and some local codes prohibit 3-wire connections, so make sure you are adhering to the standards for your situation before you make a decision.
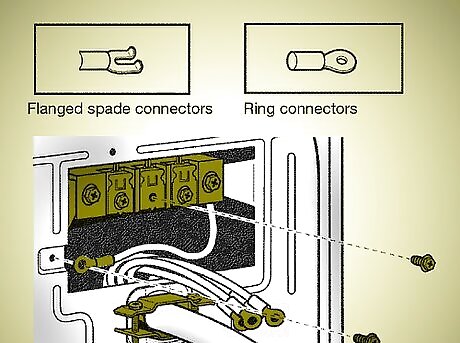
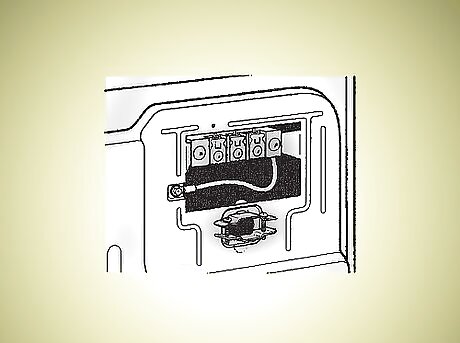
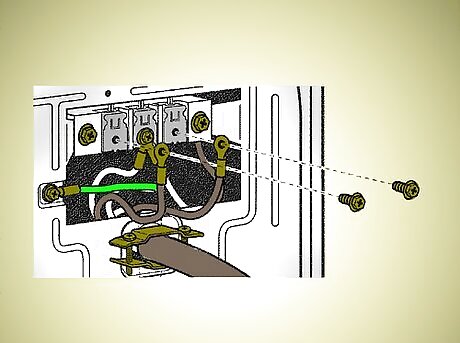
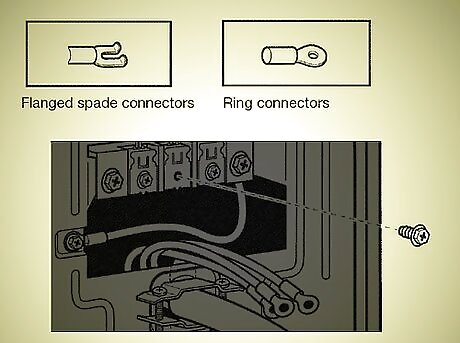
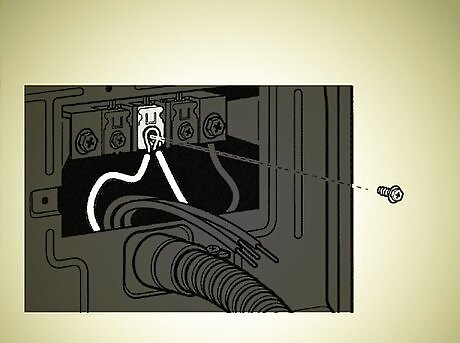
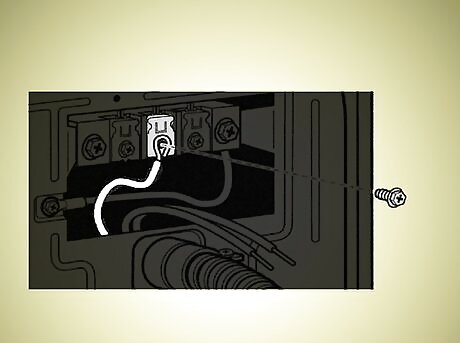
Choose either flanged space connectors or ring connectors. Remove the central silver terminal block screw and take the neutral ground wire from the screw on the lower left, as shown.
Connect the neutral ground wire and neutral central wire (which should be white in color). They should meet in the center of the terminal. Replace and tighten the central screw over top of these wires.
Connect the end of the ground wire (which should be green or bare) to the lower left. Replace and tighten the screw over top of the wire.
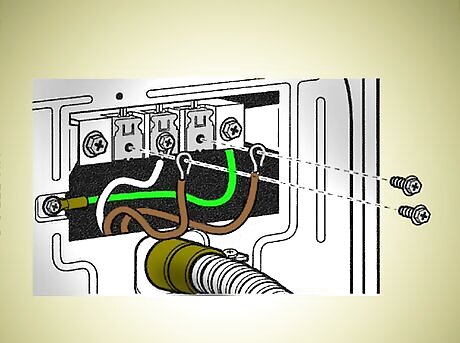
Connect the remaining wires to the sections on either side of the middle screw. Tighten the screws over top of these wires, then put back the terminal block cover (which you took out in step 1) and secure it with the hold-down screw. Now go on to step 21, "Venting Requirements."
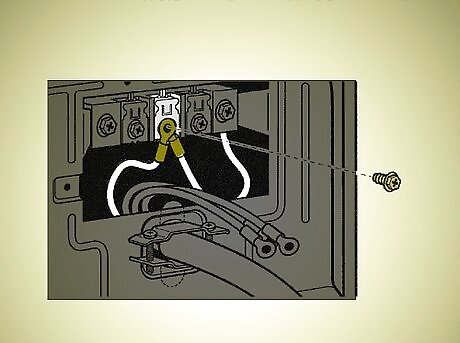
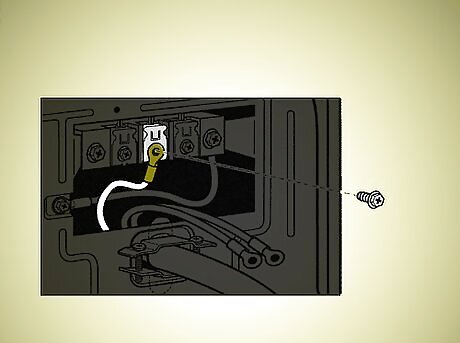
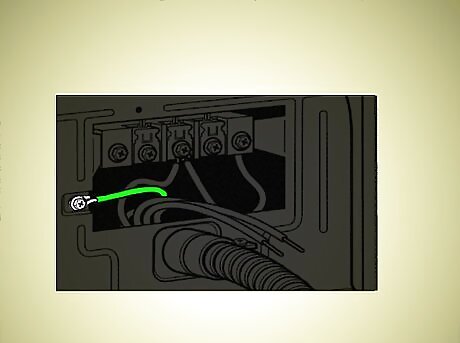
Choose either flanged space connectors or ring connectors. Remove the central silver terminal block screw.
Connect the neutral central wire (which should be white in color) to the center of the terminal. Replace and tighten the screw over top of the wire.
Connect the remaining wires to the sections on either side of the middle screw. Tighten the screws over top of these wires, then put back the terminal block cover (which you took out in step 1) and secure it with the hold-down screw. Now go on to step 21, "Venting Requirements."
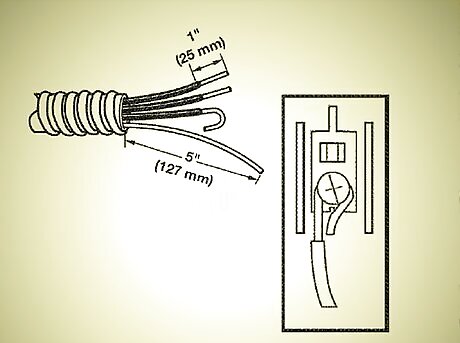
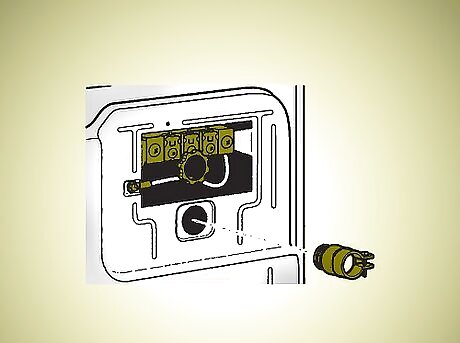
Prepare your 4-wire cable for direct connection. It should be at least five feet in length so you can move your dryer with relative ease. Strip 5" of outer covering from the end of the cable, leaving bare ground wire in its place. Cut 1½" each from the remaining three wires. Shape the wires' ends into hooks, then remove the central silver terminal block screw and take the neutral ground wire from the screw on the lower left, as shown.
Connect the neutral ground wire and the hooked end of the neutral wire (which should be white in color). They should meet in the center of the terminal, with the neutral wire's hook facing to the right. Squeeze the wires together and replace and tighten the central screw over top of these wires.
Connect the end of the ground wire (which should be green or bare) to the lower left. Replace and tighten the screw over top of the wire.

Connect the hooked ends of the remaining wires to the sections on either side of the middle screw. Tighten the screws over top of these wires, then put back the terminal block cover (which you took out in step 1) and secure it with the hold-down screw. Now go on to step 21, "Venting Requirements."
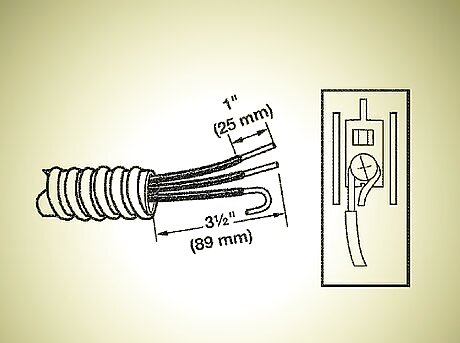
Prepare your 3-wire cable for direct connection. It should be at least five feet in length so you can move your dryer with relative ease. Strip 3½" of outer covering from the end of the cable, leaving bare ground wire in its place. Cut 1" each from the remaining three wires. Shape the wires' ends into hooks, then remove the central silver terminal block screw.
Connect the hooked end of the neutral wire to the center of the terminal, with the wire's hook facing to the right. Squeeze the hooked ends together and replace and tighten the screw over top of the wire.
Connect the hooked ends of the remaining wires to the sections on either side of the middle screw. Tighten the screws over top of these wires, then put back the terminal block cover (which you took out in step 1) and secure it with the hold-down screw. Now go on to step 21, "Venting Requirements."
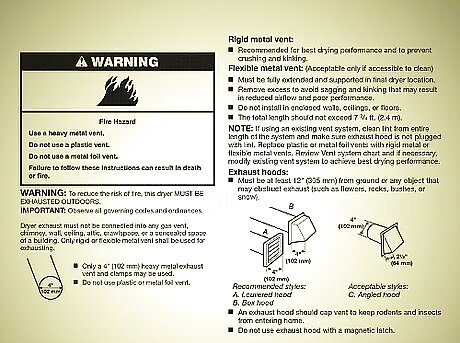
Venting Requirements. This step is more of a list of stipulations, but do not skip reading it--it outlines several potential hazards you want to avoid. First of all, your vent must be heavy metal, not plastic or metal foil. Select the route that follows the straightest/most direct path to the outdoors, with as few elbows/turns as possible. Bent the vent carefully so as not to hinder its effectiveness. Use clamps to seal all joints, and in terms of the vent's "elbows," a 45° angle is much more effective than 90°. Exhaust vents in mobile homes must be securely fastened to a flame resistant portion of the home and the vent's ending should be outside the structure itself. Remember, improper venting can cue moisture damage to woodwork, furniture, wallpaper, etc., so as you move on be sure to follow all instructions exactly.
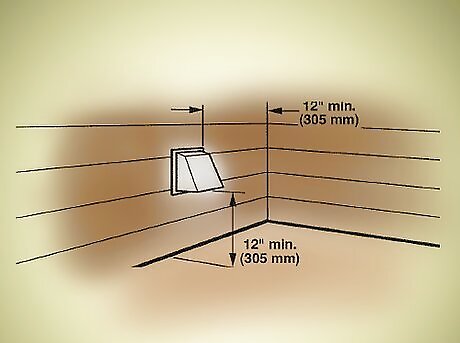
Install the exhaust hood of the vent. Use caulk to seal the outside wall around the exhaust hood, to prevent leakage.
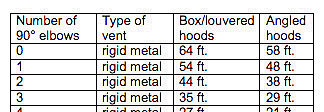
Determine the vent's length/number of elbows needed. Use the following chart: Screen shot 2011 09 15 at 5.50.51 PM.png
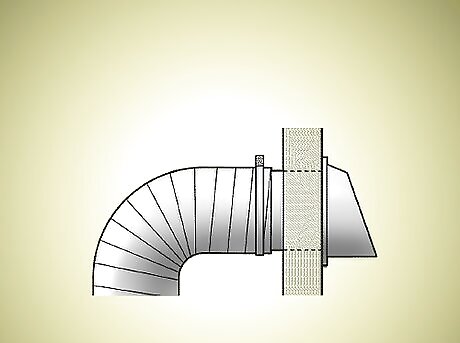
Connect the vent to the exhaust hood. The vent MUST fit inside the hood, secured with a 4" clamp. Run the vent to the dryer location following the venting requirements above.
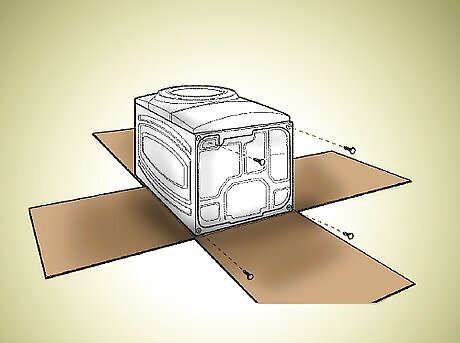
Prepare the dryer for leveling legs. Take a large, flat piece of cardboard (such as a piece from the carton your dryer came in) and gently lay the dryer down onto it.

Screw leveling legs into the dryer's leg holes. Use a wrench to turn these until the diamond marking on the middle of each leg is no longer visible.
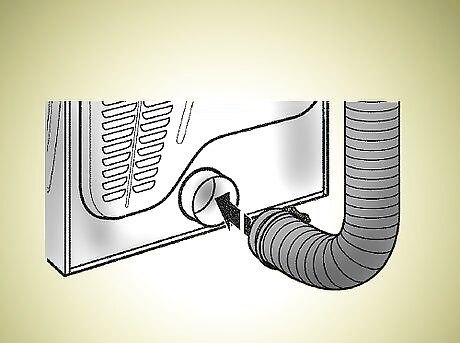
Connect the vent to the exhaust outlet. Make sure the dryer vent fits over the exhaust outlet, and secure the connection with a 4" clamp.

Move the dryer to its final location. Do not remove the cardboard yet, and take extra care not to damage the vent. Once the dryer is in place, you can remove the cardboard and level the legs using a wrench.


Comments
0 comment