
Wall Construction Directions

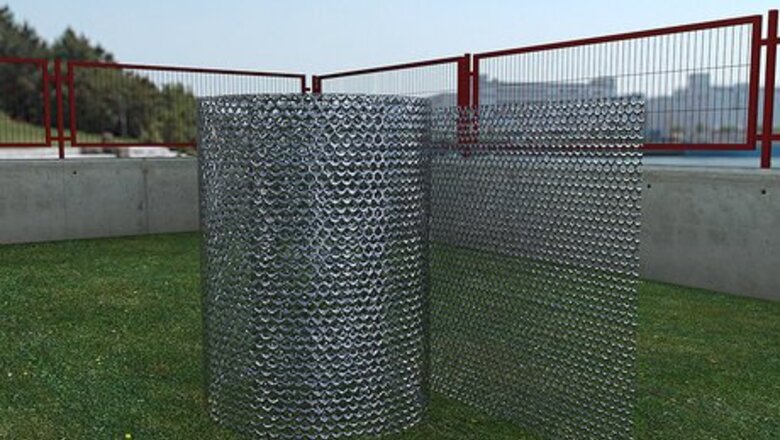
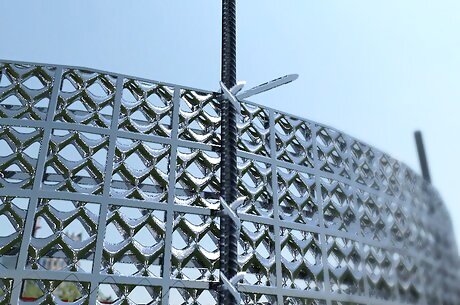
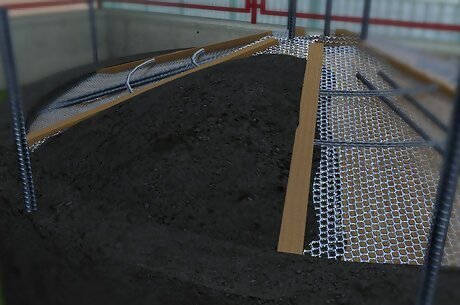
Cut the chicken wire/hexagonal wire mesh using the wire cutters. The tank size will dictate the necessary sizes of the mesh.
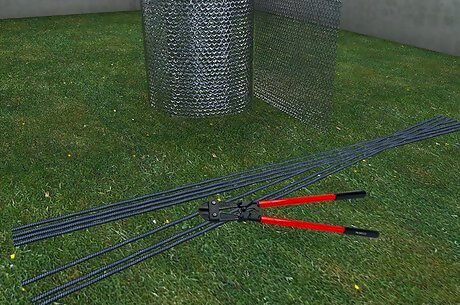
Cut the electro-welded mesh using the bolt cutters. The tank size will dictate the necessary sizes of the mesh.

Lay the chicken wire and electro-welded mesh flat to create layers. The layering should be as follows: 2 layers of chicken wire, 1 layer of electro-welded mesh, 2 layers of chicken wire.

Using wire ties and the pliers, fasten the flat layers of mesh together.
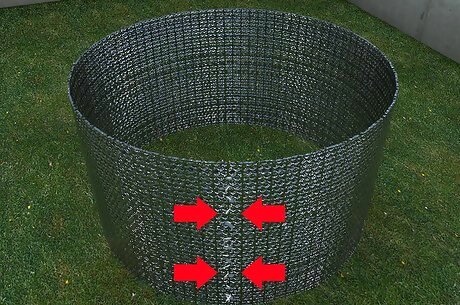
Know that once the mesh layers are securely fastened, roll one end of the mesh to the other and attach the two ends together using the wire ties. This will create the circular body structure of the tank walls.
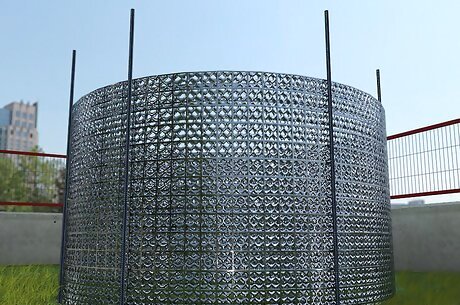
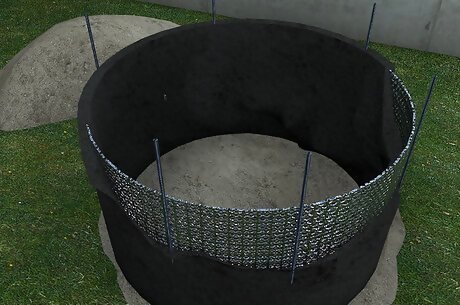
Stand the mesh frame upright on the tank foundation and attach, using the wire ties, the frame to rebar protruding from the tank foundation.
Tie the reinforcement wire near the top of the mesh frame and connect the wire to the ground. Be sure that the wire is in tension. This will prevent the walls from buckling during the construction and concrete curing stages. Four reinforcement wires around the perimeter of the frame are sufficient.

Place scrap pipes as form placeholders for the inflow, outflow, overflow, and drainage pipe locations.

Slap the concrete mortar onto the outside of the mesh frame. The mortar should be applied so that the holes of the mesh are completely filled.
Allow the mortar to cure.

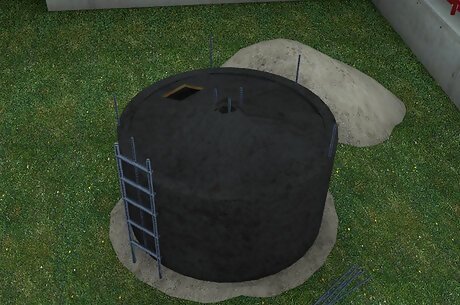
Repeat step 9 with the inside of the mesh frame. Use a ladder when climbing in and out of the tank structure.
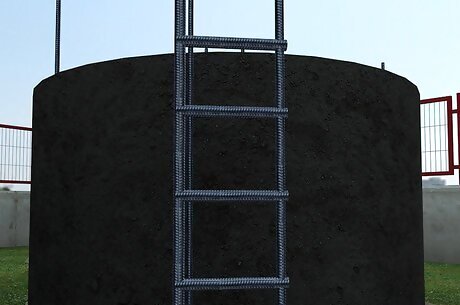
Allow the mortar to cure. Keep the walls wet during the curing process. Once all the mortar has been applied, the walls will be about 2 inches (5.1 cm) thick.
Roof Construction Directions

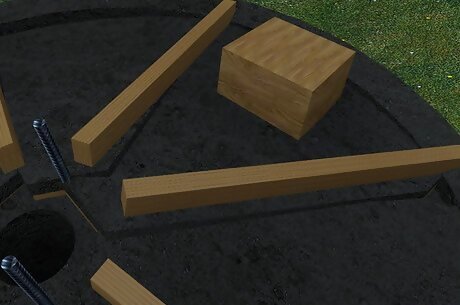
Cut the wood boards so that one edge is curved outward. This can be done while the tank walls are curing. The tank size will dictate the necessary sizes of the forms.

Once the walls are fully cured, position the wood beams inside the tank. One log will be the center pole sticking up vertically from the center of the foundation. Two logs will be cross bars near to the top of the walls to support the wooden roof forms. Additional vertical logs will also be used to support the wooden roof forms; these logs should be placed along the inside circumference of the walls.
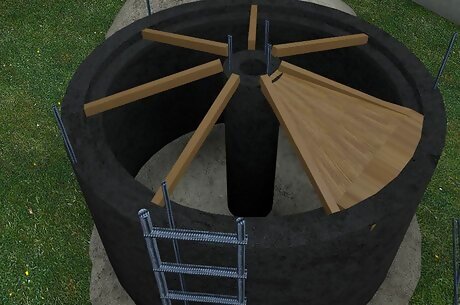
Nail the cut wood board forms to the support poles. The wood will create a domed roof form.
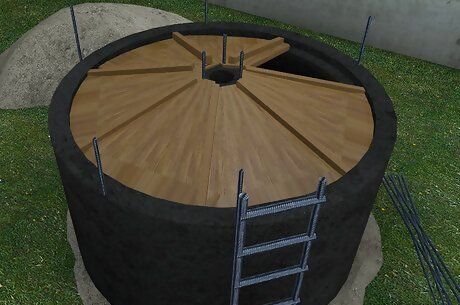
Nail the plywood sheets flat against the wood board forms.
Leave one square space open in the forms. This will provide the tank lid opening.

Lay concentric circle of rebar on top of the plywood sheets.
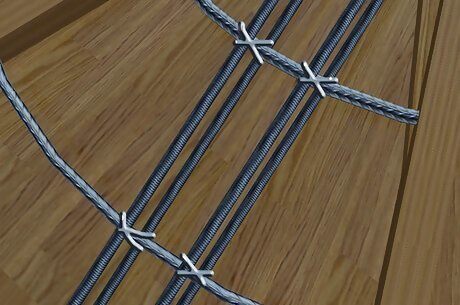
Tie supporting wires to the rebar circles using wire ties. The wires should run from the dome center down to the base of the roof.
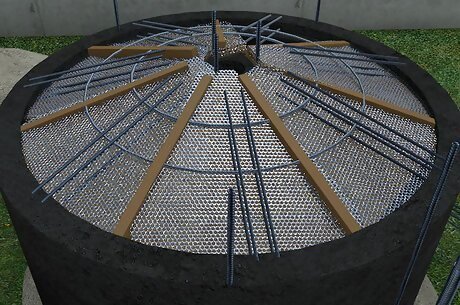
Place and tie chicken wire mesh to the supporting wires.
Slap concrete mortar mixture onto the roof forms. Be sure that enough concrete gets below the rebar circles.
Allow the concrete to cure. Keep the concrete wet during this process.
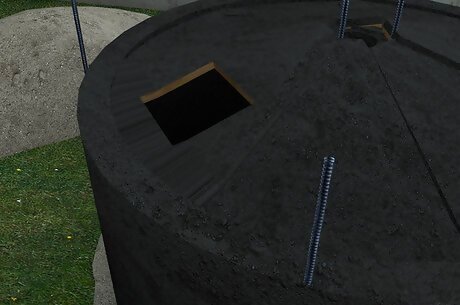
Once the concrete has cured, enter the tank through the open square space.
Carefully remove the wood beams, forms and plywood.

Paint the inside of the tank with the waterproof sealant.
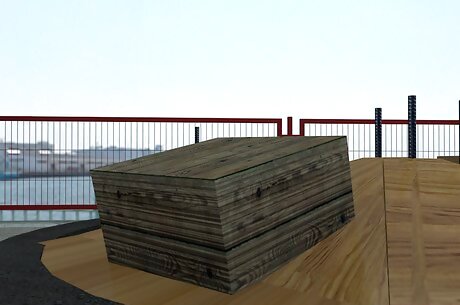
Install the square metal lid into the open space of to roof.

Optional: Paint the walls and roof of the ferrocement tank with any desired color.


Comments
0 comment