views
Checking the Band Names
Check the name of the Wi-Fi network you're connected to. If you're connected to a dual-band Wi-Fi router, you may be able to find out which band you're connected to based on the name of the access point on your iPhone. Here's where to look: Open the Control Center by swiping down from the top-right corner of your screen (for iPhones without Home buttons) or swiping up from the bottom of the screen (for iPhones with Home buttons). Tap and hold the Wi-Fi icon in the top-left corner. The name of your Wi-Fi access point appears below "Wi-Fi" on the left side of the panel. If you see either "2.4GHz" or "5GHz" here, you'll know that you're connected on that frequency. If you're connected at home and your bands are not labeled this way, read on to learn how to change them on your Wi-Fi router.
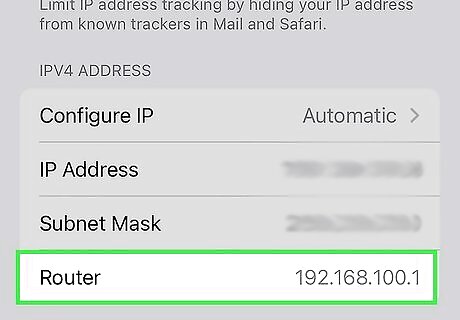
Find your router’s IP address. If you have a dual-band router, the easiest way to tell which band your phone is connected to is to give each one its own SSID, or network name. To get started, find your router’s IP address. On your iPhone, you can find the IP address by doing the following: Go into iPhone Settings App Icon Settings. Open Mac Wifi Wi-Fi. Click the Android 7 Info Information button by your router’s network name. Scroll down until you find the number next to Router in the IPV4 Address section. The router number will look something like 168.123.1.234.
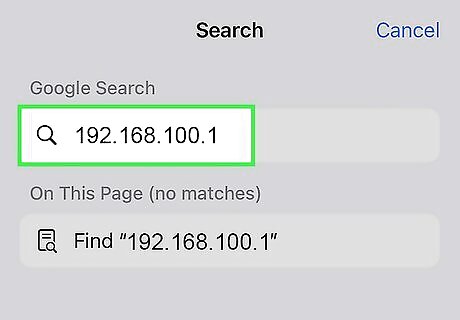
Enter the IP address into a browser. Once you find the IP address, copy and paste or type it into the address bar in your web browser. This will open your router’s webpage, where you can review information about the router and make changes to settings such as the network name.
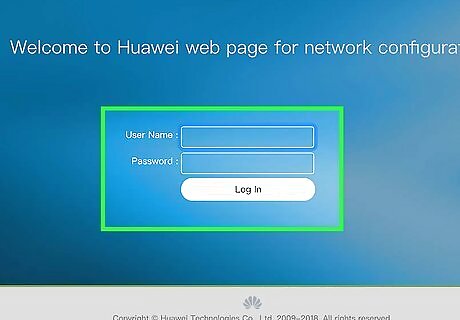
Log in with your router’s username and password. Once you open your router’s page, you may be prompted to log in. If you’re not sure what your username and password are, you can usually find them printed on a sticker on the side of the router. The default username for most routers is “Admin.”
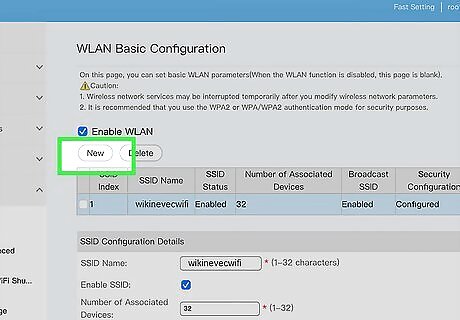
Look for a setting to create separate SSIDs for each band. Every router is different, so there’s no single way to do this. You may need to consult your router’s manual or visit their support website for information about how to configure separate network names for each band. In many cases, these settings will be located under a tab called Advanced Settings or something similar. If your router doesn’t automatically allow you to create separate names for each band, you may need to toggle a setting or check a box that enables this feature.
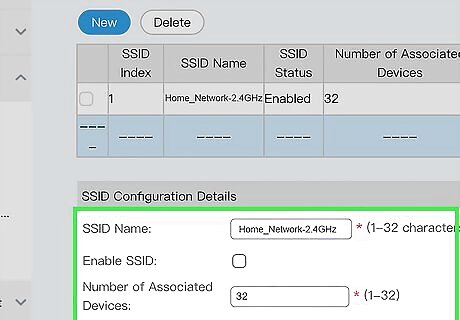
Assign a distinctive name to each band. This way, you’ll be able to tell at a glance which one your phone is connected to at any given time. For instance, you might name the 2.4GHz network “Home_Network-2.4GHz” and the 5GHz network “Home_Network-5GHz.” While this is the easiest way to tell which band your iPhone is connected to, note that Apple doesn’t recommend giving your bands separate names. Using the same name for both allows your phone to automatically transition between bands so that you’re always connected to the strongest signal.
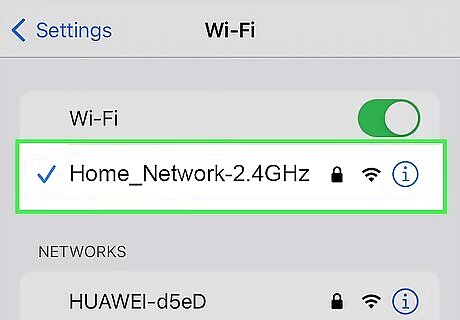
Connect to your preferred band on your iPhone. Open up iPhone Settings App Icon Settings, then select Mac Wifi Wi-Fi. Tap the name of the network you want to join, then enter the password. Once you’re connected, you’ll see a blue checkmark next to the name of the network. Once you separate the bands, you may need to enter the password separately for each band the first time you log in.
Using the AirPort Utility Wi-Fi Scanner
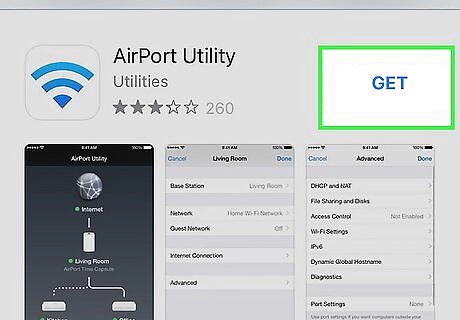
Download the AirPort Utility app. If you have one of Apple’s AirPort routers, you can easily check which band you’re connected to using the AirPort Utility app. You can also get information about other Wi-Fi networks even if you don’t have an AirPort router. If you haven’t already done so, download it from the App Store. Tap the AirPort Utility app icon to open the app.
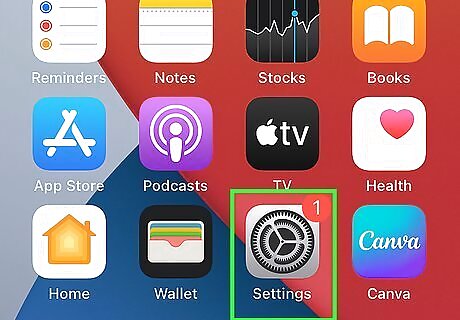
Open Settings. In order to use AirPort Utility to scan for Wi-Fi networks, you’ll need to turn on Wi-Fi Scanning. Start by opening the iPhone Settings App Icon Settings app.
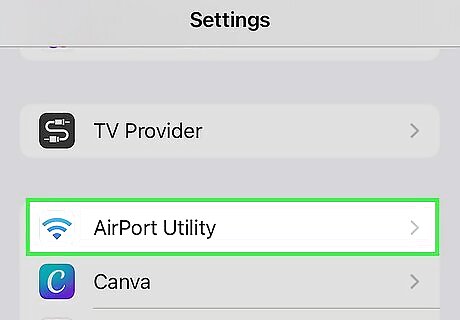
Tap the AirPort Utility icon. In Settings, scroll down to the list of apps and select AirPort Utility. This will open a settings menu.
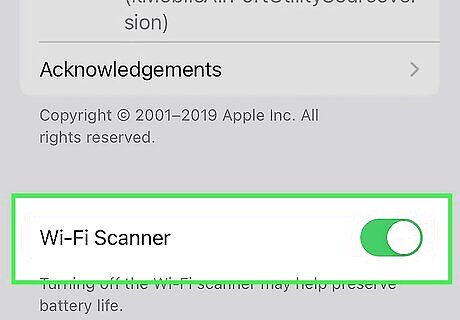
Toggle on Wi-Fi Scanner. At the bottom of the AirPort Utility Settings menu, you should see a toggle button next to Wi-Fi Scanner. Tap the toggle button to turn this setting on. The button will turn green iPhone Switch On Icon once the scanner is activated. Leaving this setting on can drain your battery quickly, so remember to turn it off again when you’re done with your scan.
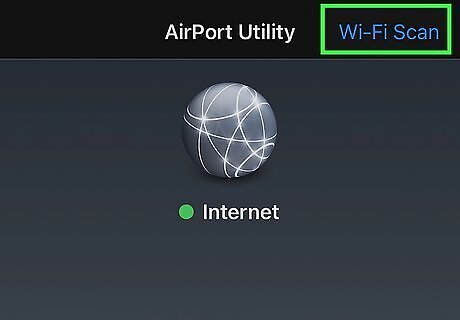
Tap Wi-Fi Scan in the AirPort Utility app. Open the app and tap the blue link in the top right corner that says Wi-Fi Scan. This will open a new screen that will allow you to scan for nearby local Wi-Fi networks, whether or not they are associated with AirPort routers.
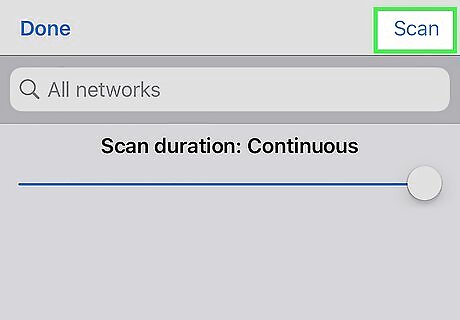
Select Scan in the top right corner. Within a few seconds, you should see a list of nearby Wi-Fi networks.
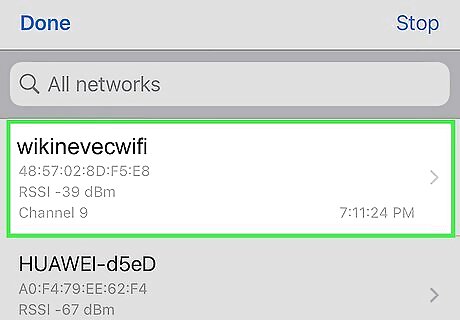
Look at the channel information to determine the band strength. Under the name of each network, you’ll see a variety of data about the network. To figure out if a network is 5GHz or 2.4GHz, look at the number next to the word Channel. If you’re in the U.S., any network on channel 1-11 is 2.4GHz, while any channel number greater than 11 is 5GHz. So, for instance, a channel number of 6 would indicate a 2.4GHz network, while a channel number of 40 indicates a 5GHz network. If you live outside the U.S., the channel numbers may differ. For example, in most parts of the world, channels 1-13 are in the 2.4GHz range, while higher channel numbers are associated with the 5GHz band. In Japan, channel 14 is included in the 2.4GHz band. If you have a dual-band router and both bands have the same network name, this utility will display the bands as two separate networks with the same name.
Changing the 2.4GHz and 5GHz Channels in AirPort
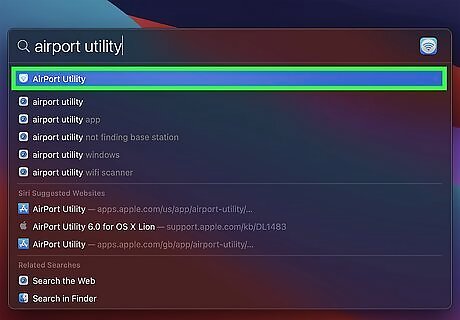
Open the AirPort Utility app on your Mac. If you have one of Apple’s AirPort routers, you can use the AirPort Utility app to set which band your router broadcasts. The AirPort router normally switches automatically between bands, but you can override the Automatic setting so it only broadcasts one band. That way, you’ll always know which band your iPhone is connected to. To find the app, open the Applications folder on your Mac, then open the Utilities folder and double click the AirPort Utility icon.
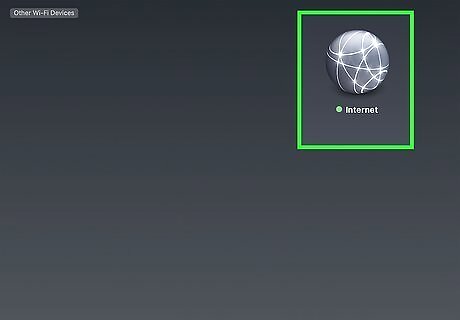
Select the base station you want to edit in the graphical overview. When you open AirPort Utility, you should see an image displaying your router and any other devices connected to it. Click on the image of the router you’d like to make changes to.
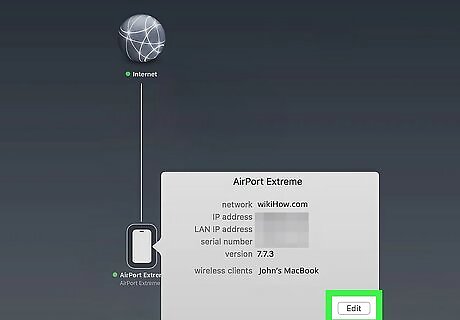
Click Edit. When you click on the router, a window will pop up displaying information about it. Click the Edit button in the lower right corner. At this point, you might be prompted to enter the password for your router.
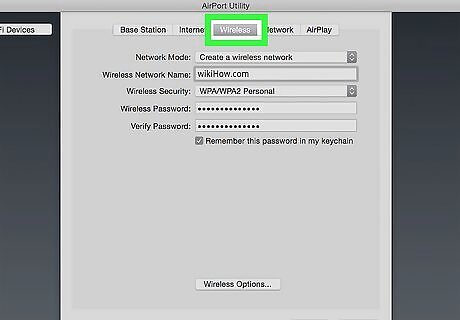
Select Wireless. When the Edit menu pops up, click Wireless.
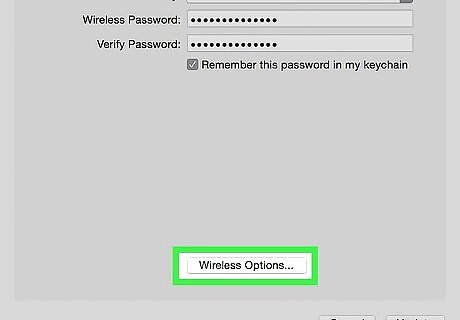
Open Wireless Options. Look near the bottom of the window for the Wireless Options button, then click on it.
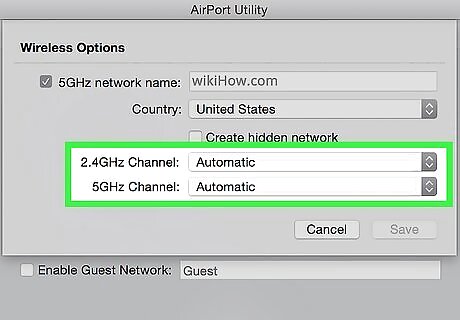
Choose the channel you want your devices to connect to. A dialog box will appear displaying the wireless configuration options. Look for a dropdown Channel menu and select the band you prefer to connect to (either 2.4GHz or 5GHz).
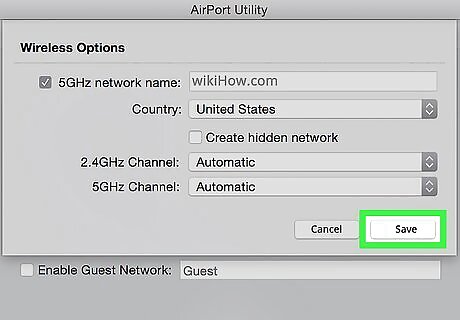
Tap Save. Once you’ve selected your preferred channel setting, click the Save button. This will close the Wireless Options dialog box.
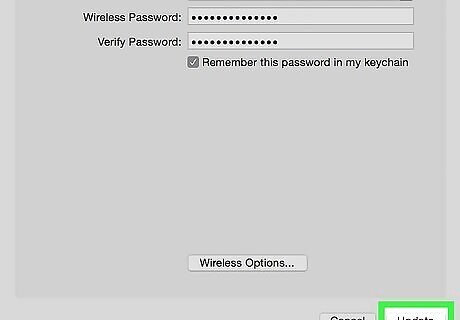
Click Update. This will apply the changes to your router settings. Your iPhone and any other devices on the network will now connect to whichever band you selected.


Comments
0 comment