views
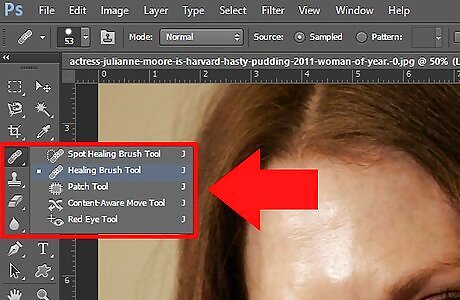
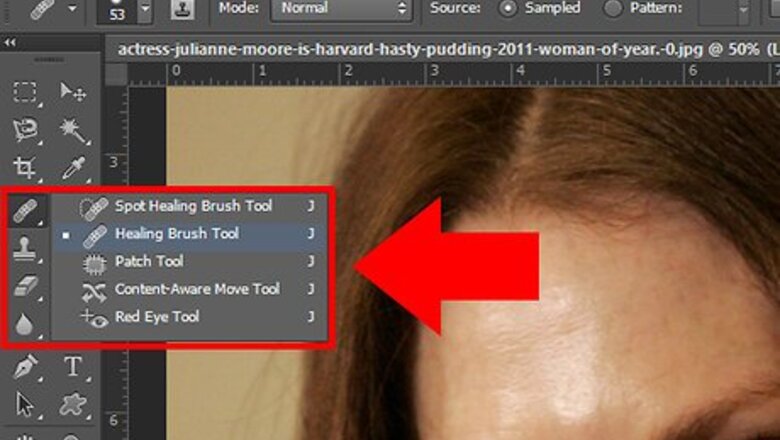
To start, get rid of the obvious blemishes. The healing tool is designed with this in mind. Simply hold ALT and click a clean spot of skin (change the brush size first, if necessary) and then click the imperfection. Repeat on all undesired spots.
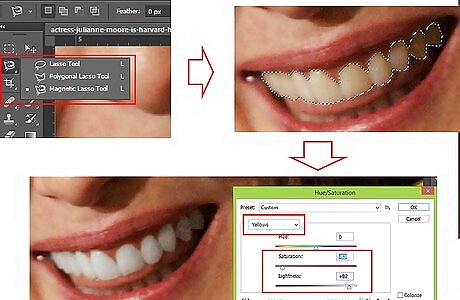
Remove the yellow teeth. Select the teeth with one of the lasso tools and paste into a new layer. Masking helps if you select too much of the area and need to erase parts of the gums/lips. Use the selective color adjustment to remove yellow.
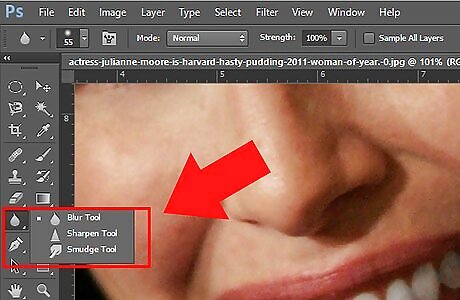
Use the blur tool to even out skin tone. Use the blur tool and paint over the skin, making sure not to go over prominent parts of the face, like the eyes or hair.
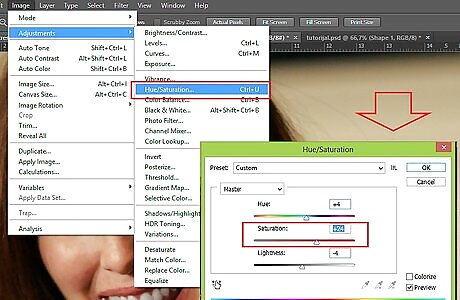
Give the skin a healthy color, again use the selective color adjustment and play with the red tones. This will help get rid of unnatural skin tones. You can also boost the saturation of the entire photo to give it a more vivid look. Click ctrl-U (or command-U on a mac) to bring up the Hue/Saturation adjustment dialog box.
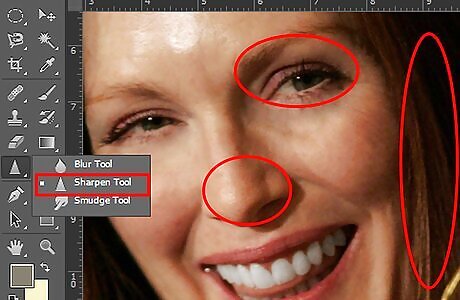
Sharpen key areas, this will help bring the person more to life. Hair, eyes, noses etc often look better with added sharpness. However, do not use too much or it will look grainy. You can sharpen the image selectively using the sharpen tool and changing the brush size.
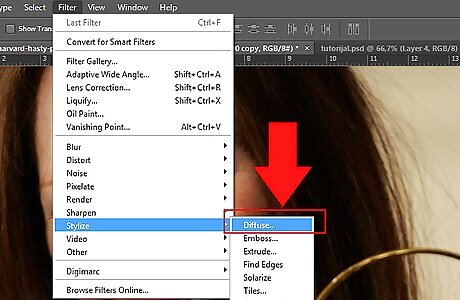
Use the diffuse filter (Filter>Stylize>Diffuse...) helps even out features and gives the person a "softer" appearance. Run the filter and fade it to 40-50%. This will give it that soft glamor shot look.
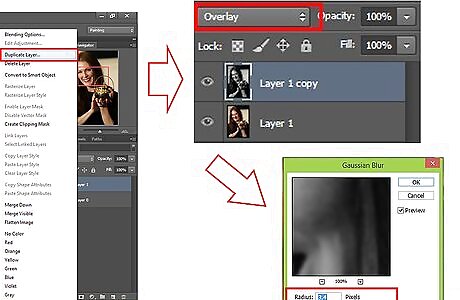
Duplicate the layer (Layer>Duplicate Layer) and then fully desaturate it (Shift-Ctrl-U). Set the blending option (found in the upper-left-hand corner of the layers palette) of the desaturated layer to "overlay". Next experiment with the Gaussian blur filter (Filter>Blur>GaussianBlur...) as desired (A pixel-width of 3-5 should work). This will make most photos even softer look, while maintaining their sharpness.
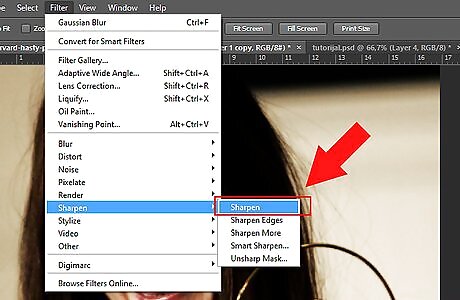
Use the sharpen filter if the image looks a bit too soft or use the sharpen brush to accent dull areas.





Comments
0 comment