
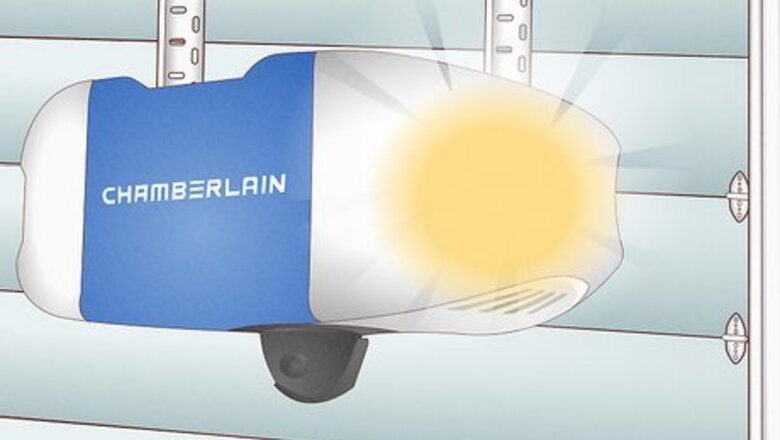
Checking the LED Indicators
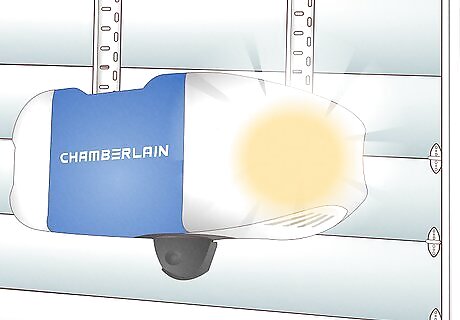
Look on the back of your door’s motor for blinking LEDs. Most Chamberlain garage doors use an LED indicator system to communicate errors and make the diagnostic process easier. An LED light will blink repeatedly to reflect a specific error. In the garage, look at the back of the motor to see if anything is blinking. Some Chamberlain garage door systems may not have an LED indicator system. In this case, you’ll need to troubleshoot some solutions based on the primary symptom (i.e. the door won’t open, the door stops dropping part way, etc.).
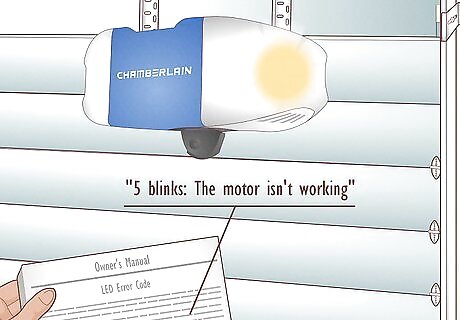
Refer to your manual to find the LED error codes. You can find a full list of diagnostic codes for the different Chamberlain garage door models here. Pull up your manual and then count the number of times the LED blinks. Cross-reference the manual to find the specific problem. Your manual will describe how to resolve it. In most popular models, the indicators will often be as follows: 1 blink: The safety sensors are misaligned or blocked. 2 blinks: The safety sensors have an electrical issue. 3 blinks: The door control wires are damaged or disconnected. 4 blinks: The safety sensors aren’t consistently staying on. 5 blinks: The motor isn’t working. 6 blinks: The motor is on when it shouldn’t be. 7 blinks: The limits for the door haven’t been set yet.
If the Garage Door Stops Dropping Part Way
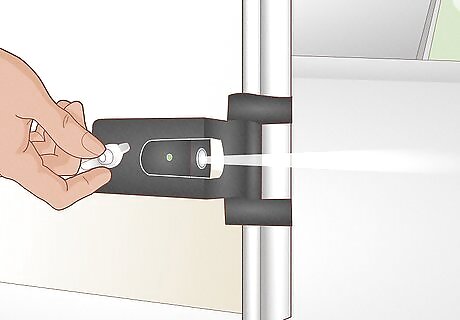
Check the path of the safety sensors. Near the bottom of the garage door, about 4–8 inches (10–20 cm) above ground, there are two sensors pointing at one another (called photo eyes). These sensors turn on when the door is operating to see if anything has entered the path of the door. If they detect something, the door stops for safety reasons. Clear the area between the two sensors and confirm nothing is in the way. The sensors also need to be pointing at one another. If they’re even slightly askew, the vibration from the garage door moving may “break” the connection between the sensors and trick them into thinking something has broken the connection.

Confirm the safety sensors are working as intended. If the sensors themselves aren’t working correctly or they aren’t communicating with the motor, the door may stop dropping as a safety precaution. If you just set up the sensors, double-check the connections and reprogram them as needed per your instruction manual. Do not disable the sensors to get around them. This normally won’t work anyway, but in the case that it does you may end up accidentally hurting someone or damaging your vehicle.

Rebalance the door or adjust the tracks to keep everything level. Look at the angle of the door as it sits on the rails. Does each side sit at a right angle to the track it’s on? If it doesn’t, the door may stop intermittently when it’s moving as it senses the resistance on the tracks. To fix this, disconnect the motor, prop the door open, and adjust the springs in the rails to make the tension identical on each side. Working on the springs in the tracks can be a little tricky if you’ve never done it before. Make sure you prop the door up with bricks, chairs, a table, or small platforms. If the door is stuck off of the ground and you unleash the tension in the springs, the door may come slamming down without a buffer.
If the Garage Door Isn’t Opening
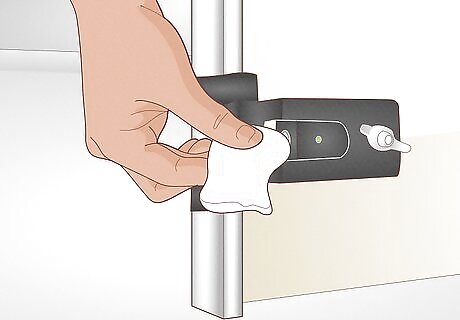
Clean the safety sensors with a dry rag. If the sensors near the bottom of the garage door are caked in dust or dirt, the door may not open since the sensors are telling the motor there’s an obstruction. Simply wipe off the little sensor bulb on each side with a dry rag and test the door again. If it works as intended, the sensors just needed to be cleaned. This is more likely to happen if your door is really old. If you just installed it, misaligned sensors are much more likely. Confirm the sensors are pointed at one another and make adjustments as needed.

Replace the batteries in the remote if they’re old. If the door opens when you use the controls on the wall but the remote isn’t doing anything, swap the batteries out. It’s likely that one of the batteries has simply died, so check that first. If the remote doesn’t respond after you’ve swapped the batteries out for a fresh set, reconnect the remote per the instructions in the manual. Typically, you press a button on the motor while holding down a button on the remote to sync them.

Confirm that all of the wiring is connected correctly. Start by checking the plug where the controls on the wall are plugged in. Test the outlet using a phone charger or a radio to ensure the outlet is hooked up correctly. Then, follow the cable housing up to the motor and ensure everything is connected (for hardwired motors). Then, remove the cover of the motor. Confirm the battery is plugged in and the inverter is hooked up properly. If something isn’t connected, shut the power to the garage off before you touch anything to avoid being shocked. Most garage doors have a backup battery, even if they’re hardwired into the garage’s electrical. The garage door may not operate without that backup battery hooked up.
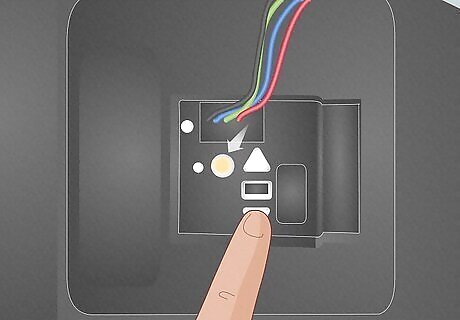
Ensure you’ve programmed the controls properly. The programming process for most Chamberlain garage doors is relatively complicated most of the time, so if you didn’t have a pro install the garage door, it’s possible you missed a step. Go back to the programming instructions in your manual and redo each of the steps. Typically, you must open the back of the remote to access an LED indicator. Then, you press buttons on the remote to put it into program mode. Press the “learn” or “program” button on the motor. From there, you typically program each function separately. If you do not have access to your manual, find your model’s instruction manual online on Chamberlain’s support page.
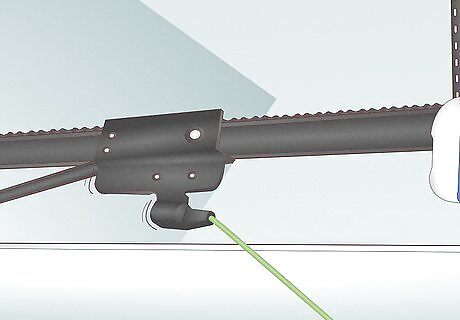
Make sure the trolley is connected to the motor. The trolley is the metal component on the central track that physically pulls the door up (via a motor chain) when the door is turned on. Get on a ladder and inspect the area where the trolley is connected to the rail. If the trolley slides back and forth freely, it’s off of the track. Slide it back onto the motor chain and test the door again. If the motor chain was disconnected but the trolley still doesn’t move, the motor likely failed at some point (which caused the chain to slip partway through operation). Contact a garage door specialist to get it repaired.
If the Garage Door Won’t Open or Close All the Way

Reset and reprogram the limits on the door. Run a full cycle to determine where the door’s limits are currently set. Get on a ladder and locate the “force” or “limit” screws on the back of the motor. Use a flathead screwdriver to make minor adjustments to the open and/or close screw until you’ve correctly set the limits so that the door barely touches the ground when you close it and opens all the way when you open it. If the motor stops responding or working during the limit adjustments, just wait 15 minutes. It probably overheated and needs time to cool. Do not allow anyone to stand remotely near the door when you make adjustments. If the safety system isn’t assembled correctly, the door could slam down if you overdo any limit adjustments.


Comments
0 comment