views
Using Teamviewer File Transfer Browser
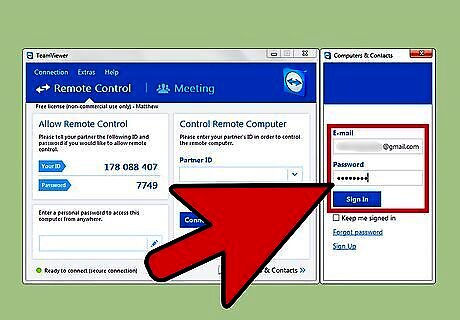
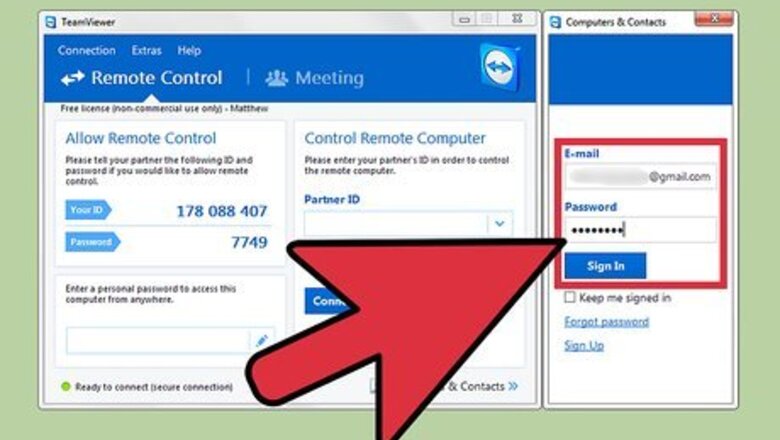
Log into your Teamviewer account inside the program. Locate the TeamViewer icon, and double-click it to run program. Two windows should pop up, one small and one big. The smaller window on the right should say “Computers & Contacts” at the top of the window. This will be the one used to log into your Teamviewer account. Use your email address and password to log in.
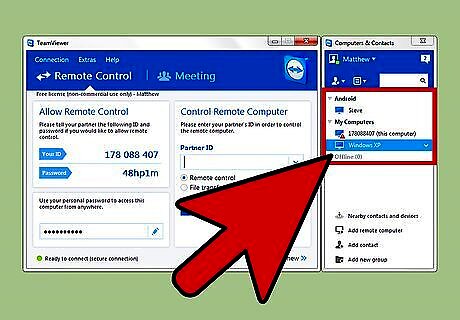
Select a device to connect to. Once logged in, there should now be a list of available devices inside the same window. Under the heading “My Computers,” double-click on the desired system to begin your connection. A new window should open automatically and begin a connection attempt. You should see the desktop of the remote device as soon as the connection is stable. There should also be a small blue-and-white box in the lower right-hand corner of your screen. Please note that you need to have Teamviewer installed on both systems in order to access and control the remote system.
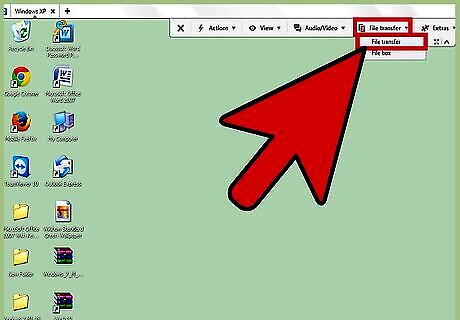
Open the File Transfer browser. At the top of the window should be a series of options available to you in a grayish bar. You are looking for “File transfer,” and it should be on the right-hand side of this bar. Click to open a drop-down menu, and select the top “File transfer” option. This will open the File Transfer browser. The File Transfer browser should now be open in the middle of your page. On the left-hand side of the window you are going to see all the files and folder located on your current device. On the right-hand side will be the files located on the remote device.
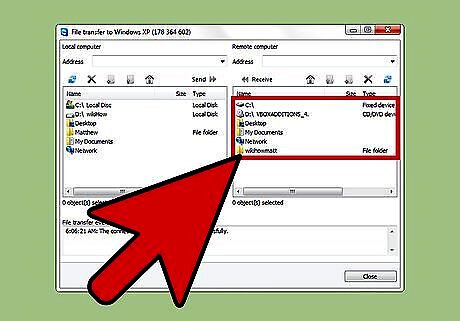
Select which device to transfer files to and from. As you scroll through each device, you are setting a download location for the files you are going to download, so if you are trying to transfer a file from the remote device to your current one, you should browse through and find the remote file using the right-hand side of the File Transfer browser.
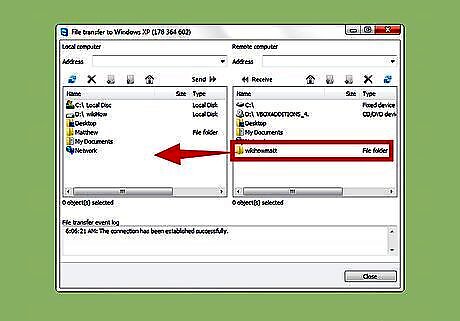
Transfer files. Now browse through and open a location using the left-hand side of the File Transfer browser. When you have located the file(s) you are looking for, simply drag and drop the file to the opposite side. There should be a file transfer animation box that opens. Wait for this to close, and you’re all done. In order to place a file on the remote system, simply reverse the process of the selecting windows and drag-and-dropping to the correct window.
Using Teamviewer File Box
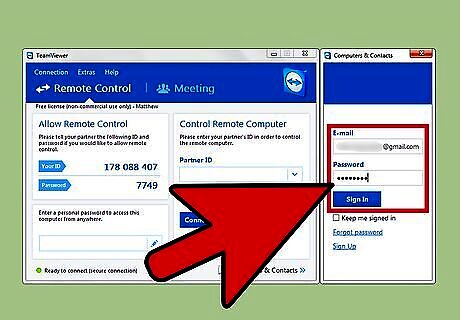
Log into your Teamviewer account inside the program. Locate the TeamViewer icon, and double-click it to run program. Two windows should pop up, one small and one big. The smaller window on the right will be the one used to log into your Teamviewer account. Use your email address and password to log in.
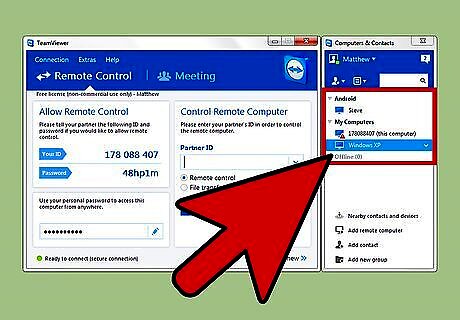
Select a device to connect to. You should see a list of available devices inside the same window after logging in. Under the heading “My Computers,” double-click the desired system to begin your connection. A new window should open automatically and begin a connection attempt. You should see the desktop of the remote device as soon as the connection is stable. There should also be a small blue-and-white box in the lower right-hand corner of your screen. Please note that you need to have Teamviewer installed on both systems in order to access and control the remote system.
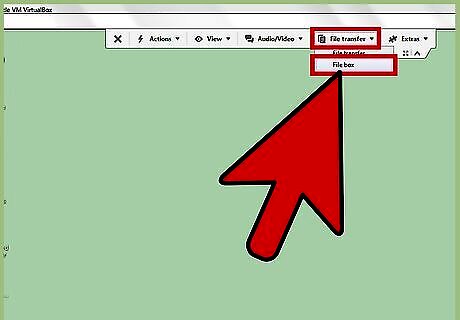
Open the File Box. At the top of the window is a gray bar with options. Look for “File Transfer” and click it to drop down a menu. From the menu, select “File Box.” The File Box will open as a blue-and-white box in the upper right hand corner of the screen. The major difference between the File Box and the File Transfer browser is that the File Box requires the remote system to accept the file transfer on the other side. Please make sure to have someone on the other system, or be prepared to accept the file manually using Teamviewer on your current system.
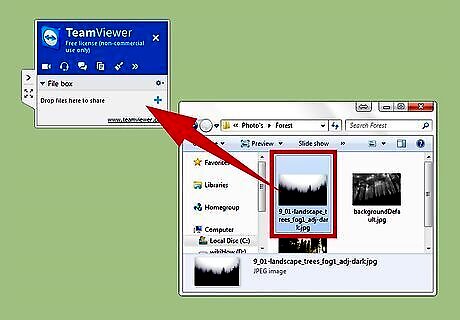
Send files. In order to transfer a file, all you have to do is open a file explorer on your current device, and drag and drop the file inside the File Box. You will want to drag it to the spot that says “Drop files here to share.” If you have dropped multiple items, these will be listed one by one inside the File Box.
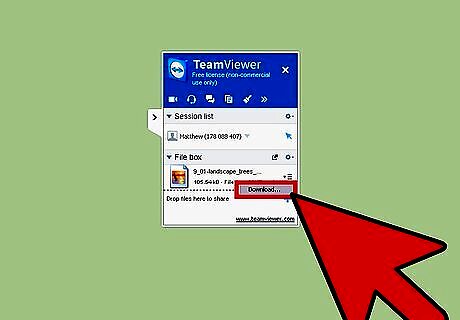
Receive the files. On the other device, you will need to click the 3 vertical bars (hamburger icon) to the right of each file, and select “Download...” from the drop-down menu. You will need to either have someone physically at the remote system to accept the file or you will need to do this yourself using Teamviewer. Once you click the “Download” option, you will be greeted by a “Browse For Folder” box. Select a location inside this box that you would like the file to be saved to, then hit the “OK” button in the lower right-hand corner of the box.
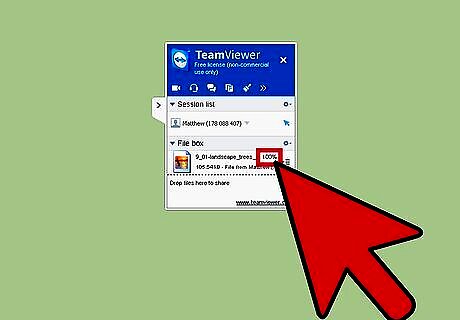
View the transfer progress. Back inside the blue-and-white File Box, you will see a percentage appear to the right of each file as they are transferred to the remote system. Each will read 100% when they are finished.


Comments
0 comment