
X
Expert Source
Marvin WooLicensed Electrician
Expert Interview. 1 December 2021.
This second method is easier when testing direct current (DC) devices, but is also possible to use with alternating current (AC) devices.
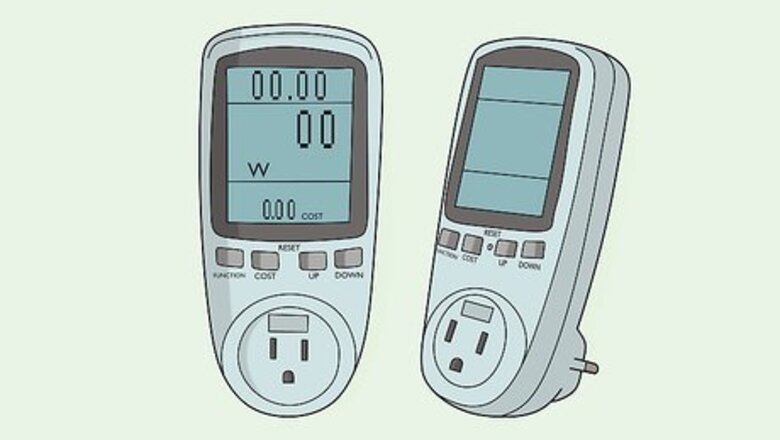
Using a Plug-in Wattage Meter
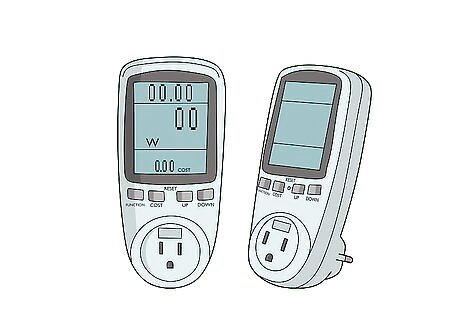
Choose a wattage meter that’s accurate and easy to use. All brands and models of wattage meters work the same way to provide real-time wattage readouts on a digital display. That said, while any meter can test the wattage of a plug-in appliance, keep factors like the following in mind: Accuracy. Some models claim an accuracy range of less than 0.5%, while others have ranges of 3% or more. (with a 3% range, an actual wattage of 600 might read anywhere from 582-618 W). Depending on your needs, high accuracy may or may not be of great importance. Design. Look for a functional design setup with easy-to-understand buttons and digital readouts. Some models come in 2 parts connected by a cord so that you can place the digital readout in a convenient spot—such as on your desktop instead of at the outlet under your desk.

Plug in your chosen wattage meter. Like any other plug-in appliance, connect the meter to a powered electrical outlet, power strip, or extension cord that accepts 3-prong plugs. Most models turn on automatically, but in some cases you may need to push a button or flip a switch. Wattage meters designed for the U.S. market are intended for use in standard 110-volt grounded electrical outlets. You’ll need to buy a special model if you want to test an appliance that plugs into a 220 V outlet, such as an electric clothes dryer.

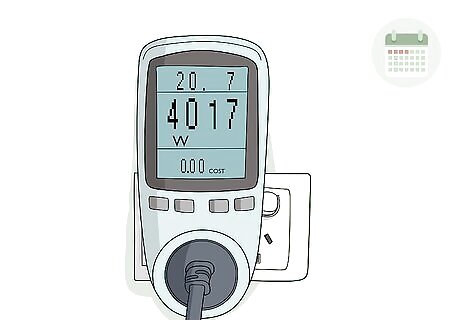
Press the meter button labeled “Watts” or “W” if needed. Most wattage meters can also test for current (in amperes or “amps”) and voltage, and have buttons on the front so you can switch what is displayed on the screen. If the digital readout doesn’t display “0 W” or “0 Watts,” press the appropriate button to change what’s being tested. Consult the product manual if you need assistance.

Plug a device into the meter, but don’t turn it on for a few minutes. Keep the device turned off for around 5 minutes to check for “phantom power”—that is, power usage even when the device is off. Many modern appliances, for instance TVs, draw a small amount of power even when turned off. If the digital display reads “0 W” your appliance does not draw phantom power. Phantom power may not seem like a big deal, but it can add up! A single device that draws 3 W of phantom power all the time may only add something like $0.20 USD per month to your electric bill, but 15 devices all doing that can add $3.00 USD or more to your bill. The easiest way to stop phantom power is to unplug appliances when you’re not using them. Or, hook them up to timers or smart plugs so you can control when they are drawing power.

Turn on the device and compare the wattage readout to the device’s rating. Most meters give real-time wattage measurements, so you should see results immediately. You’ll often see a power spike when you turn on a device, which should reduce to a steadier wattage readout within a few seconds. Compare this steady wattage readout to the wattage rating listed on the device. Look for the wattage rating on a label or tag on the back or underside of the device, often near where the power cord connects. If you can’t find it, check the product guide or search online. As an example of an initial wattage spike, a refrigerator might draw 500 W of power during normal usage, but draw twice that amount for a few seconds when you plug it back in.
Keep the wattage meter in place for several hours or days. Power draw fluctuates all the time, so you’ll get a more accurate representation of an appliances’s average wattage by keeping the meter in place for at least a few hours. Even better, use the meter for at least 3-4 days and check the readout several times per day. Many meters make it easy to display the average power draw of an appliance, in addition to the real-time readout. Check your product manual for guidance. If the device has a noticeably different average wattage readout as compared to its listed wattage rating, contact the manufacturer for troubleshooting guidance.

Unplug the wattage meter and use it with another appliance. Once you’re satisfied that you have a full wattage analysis of the device you’re testing, go ahead and unplug the wattage meter, then the device. Repeat the test on another device in your home to start building a fuller picture of your total power usage. Alternatively, if you really want to focus on the wattage of a single device—an air conditioner, for instance—keep it plugged into the wattage meter full-time.
Testing Volts and Amps to Get Watts

Set your multimeter to read voltage for DC or AC. Many multimeter models have a switch or button that sets them for either AC (alternating current, like plugged-in appliances) or DC (direct current, like battery-powered devices) testing. They also typically have a dial you can turn to the labeled setting for voltage (V). While the primary tools—a multimeter and a clamp meter—are the same when testing both AC and DC electronics, DC testing is generally easier for the average DIYer. If you’re not confident in your ability to test AC (or DC) electronic devices, hire a licensed electrician to do the testing for you. Both multimeters and clamp meters (which specifically measure electrical current) are widely available at home improvement retailers. You may even be able to find a combined multimeter-clamp meter device.
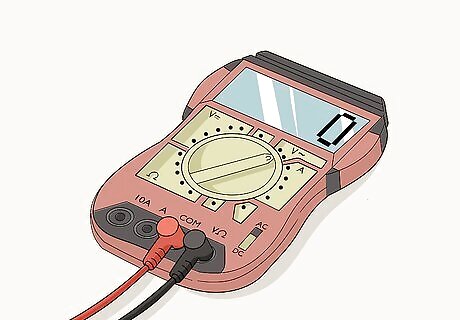
Secure the red and black probe leads into their same-color plugs. All multimeters come with a pair of probe leads (wires with probes at the end)—one red, one black. Plug both of them into their color-coordinated and clearly marked spots on the multimeter. Turn on the multimeter at this point, if you haven’t done so already.
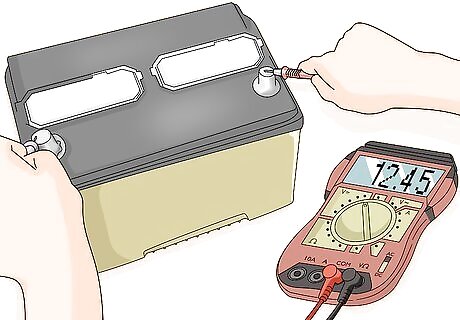
Touch each probe tip to the item's same-polarity power terminal. In other words, touch the positive (+) probe to the screw, clamp, or other connector where the positive power cable connects to the electronic device (for AC) or the battery (for DC). Do the same (at the same time) with the negative probe. With a car battery (DC power), for example, touch the red probe tip to the red, positive (+) terminal on top of the battery, and the black probe tip to the black, negative (-) terminal. For an AC power device like a stereo or an air conditioner, you must be able to properly identify the positive and negative power cables and their terminals. If you’re not sure you can do that, do not attempt to touch the probes to the wiring. A DC device can be on or off when you do this test. An AC device must be on.
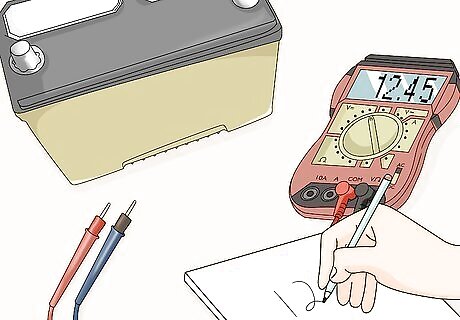
Write down the voltage reading displayed on the multimeter. You should get a nearly instantaneous voltage reading with little to no fluctuation. After you record the reading, pull the probes away from the device and set the multimeter aside. When testing a DC battery as the power source, the reading you get should correspond to the battery’s listed voltage. For example, a car battery should give you a voltage reading at or very close to 12 V. For an AC device, check the label on the product, the user’s guide, or the manufacturer’s website for the listed voltage. If your readout does not closely correspond to the listed voltage, there is most likely a problem with the device you’re testing (AC or DC) or its battery (DC).
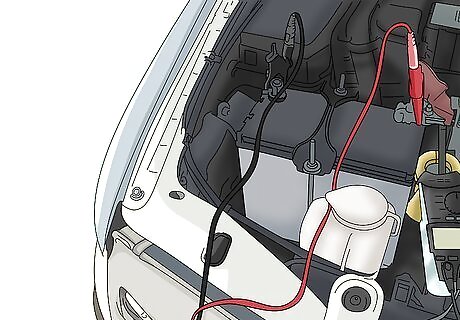
Place the clamp meter’s clamp around the positive power cable. The clamp works like a large carabiner clip. Press in one side so that you can clip it over the power cable running from the power source to the device you’re testing. If possible, center the clamp around the cable so that the cable isn’t touching the clamp. For a car (DC power), clamp around the cable running from the red (+) terminal on the battery. For an air conditioner (DC power), clamp around only the positive power cable running into the device. It’s not dangerous to clamp around the wrong cable, but you won’t get an accurate reading.
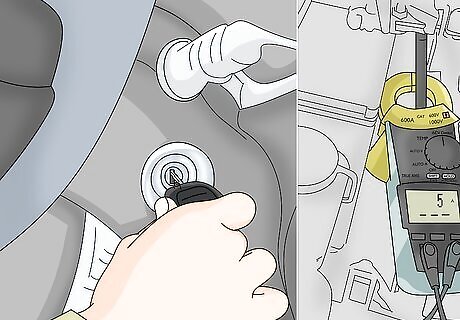
Turn on the clamp meter and the device you’re testing. The clamp meter probably turns on with a simple switch or button. If the item you’re testing isn’t already drawing power, turn it on now. If you’re testing a car, you have 2 options, both of which you can test with the clamp meter. You can turn the key halfway in order to draw power from the battery without starting the engine, or turn the key the whole way to start the engine. The amperage readings you get may vary in these 2 situations.
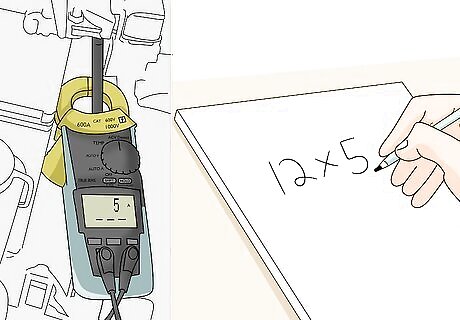
Write down the amp measurement on the clamp meter’s display. It may take around 5 seconds for the reading to appear. Once you’ve jotted down the reading, remove the clamp meter and set it aside. If you’re testing your car, for example, you might get an amp reading of 5 A while the vehicle is running.
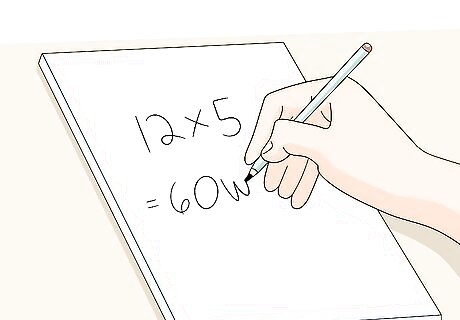
Multiply the volt (V) and amp (A) measurements to get watts (W). Remember that power (measured in watts) is the product of voltage (volts) and current (amperes). This means that some quick multiplication gives you a wattage reading for the device you’re testing. For example, if your car tests gave you readings of 12 V and 5 A, your wattage test result would be 60 W (12 x 5 = 60).


Comments
0 comment