views
X
Research source
These simple motors rely on magnetic fields that repel against each other and cause an interior armature to spin.[2]
X
Research source
As a result, the direction these motors turn can be changed by reversing the magnetic polarity.[3]
X
Research source
These instructions will teach you how to reverse a simple DC motor, such as one found in a radio-controlled car, toy train, or hobby robot, using a toggle or slider switch.[4]
X
Research source
Testing Your Parts
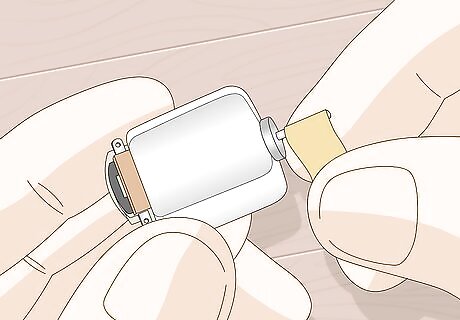
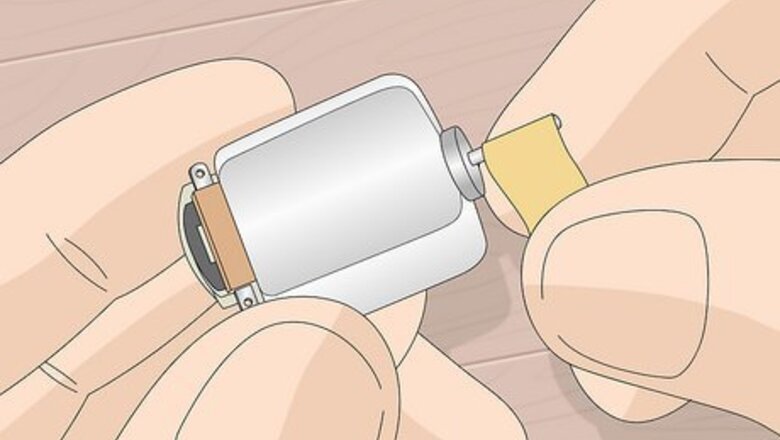
Tape the shaft. Attach a piece of masking tape to the rotating shaft of the motor, creating a small flag. This will allow you to easily tell which direction the shaft is turning.
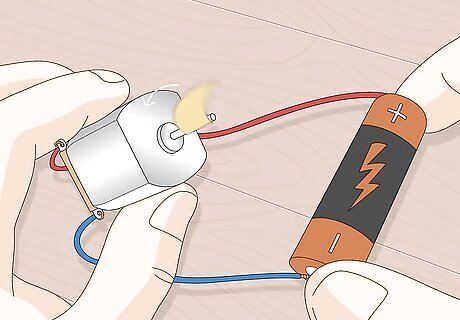
Test the motor and battery. Temporarily attach the motor to a battery to make sure everything is operational. If the motor has wires already attached, connect the white wire to the positive end of the battery and the black wire to the negative end. If the motor does not turn, it's possible that your battery is not sufficiently powerful to run the motor. Try a battery with a higher voltage. Similarly, if the motor is turning faster than you want it to, try a lower voltage. Note that a battery which is too powerful can cause your motor coils to melt. It's a good idea to check the rating on your motor before you start hooking up batteries.
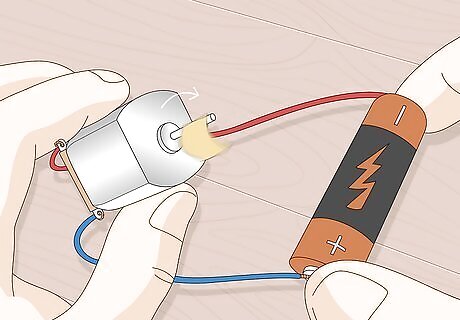
Reverse the wiring. Disconnect the wires from the battery and reattach them on the opposite ends of the battery (i.e. white to negative, black to positive). Reversing the polarity should cause the motor shaft to turn in the opposite direction. If the motor does not turn in the opposite direction, it may be that the motor you have selected is not suitable. While most DC motors are easily reversible, some are not.
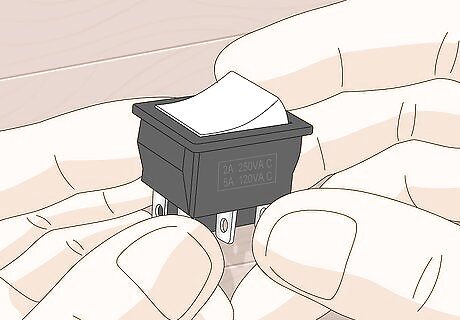
Check your switch. In part 2, you'll be installing a double pole, double throw (DPDT) switch that will allow you to change the direction of the motor. These switches can be purchased inexpensively at many electronics or hobby stores. Before proceeding any further, check the rating on your switch to make sure it can handle the power of the battery you'll be using. A switch which is not rated highly enough may melt as a result of having too much electricity sent through it.
Installing a Switch
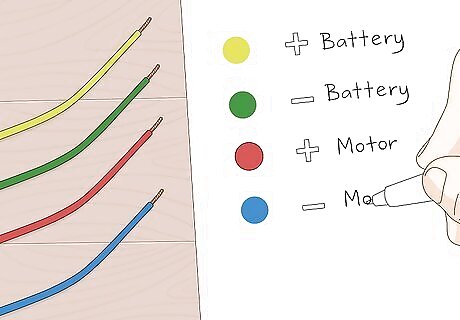
Assign wire colors. To help you remember which wire is supposed to be attached where, it's a good idea to get four different colors of copper wire, and write down which color of wire you'll be using for each connection. You'll need one color for the positive terminal of the battery, one for the negative battery terminal, one for the positive terminal of the motor, and one for the negative terminal.
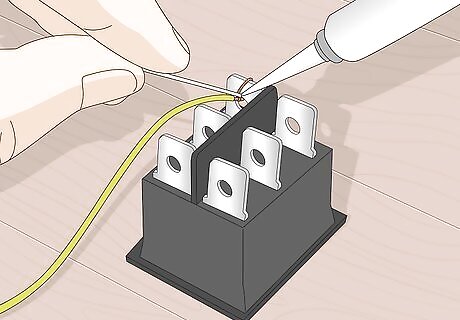
Connect the positive power wires to the switch. Position the switch so that, looking down at it, you have two vertical rows of three terminals each (i.e. so that the switch could be moved up and down, not left to right). Then, using a soldering iron, attach a long piece of wire to the top-left terminal of the switch. This wire will eventually connect to the positive terminal of your battery. After firmly attaching the first wire, take a small piece of wire of the same color (e.g. white), and run it from the top-left terminal, where you've just attached your battery wire, to the bottom-right terminal of the switch. Attach with solder.
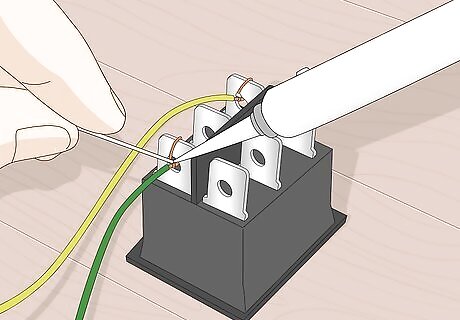
Connect the negative power wires to the switch. Take a long piece of wire of another color (e.g. black), and solder it to the bottom-left terminal of the switch. This wire will eventually connect to the negative terminal of your battery. Then, take small piece of wire of the same color, and run it from the bottom-left terminal, where you've just attached your battery wire, to the top-right terminal of the switch. Attach with solder.
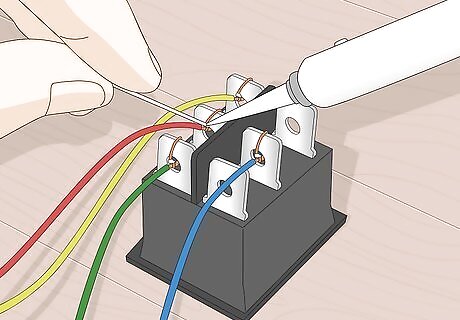
Connect the motor wires to the switch. Attach one piece of each of the two remaining colors of wire to the two center terminals with your soldering iron. These wires will run to the positive and negative terminals of the motor itself. For example, if your remaining wires are yellow and blue, attach a yellow wire to the center-left terminal and a blue wire to the center-right terminal.
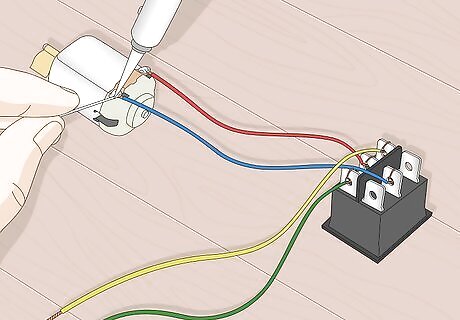
Connect the motor wires to the motor. Take the wires attached to the center terminals of the switch and attach them to the motor, using your soldering iron. The wire attached to the center-left terminal of the switch should be attached to the positive terminal of the motor, the wire attached to the center-right terminal of the switch to the negative. Before proceeding any further, make sure the switch is in the central (off) position. Otherwise you may give yourself a shock or burn when hooking up to the battery.
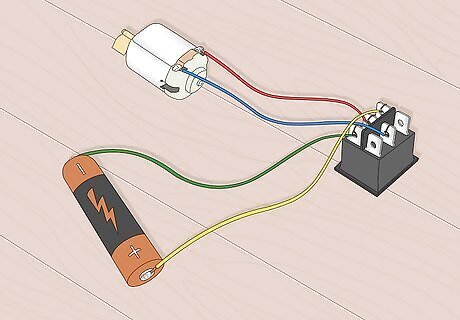
Connect the power wires to the battery. Attach the long power wires to the battery, with the one soldered to the top-left terminal of the switch going to the positive end of the battery, and the bottom-left to the negative end. Depending on your battery, you may be able to wrap the ends around your terminals, or you may have to simply press them against the ends. Attach the ends of the wires to the battery terminals using electrical tape. Do not leave any of the wiring exposed, as it may become hot while in use.
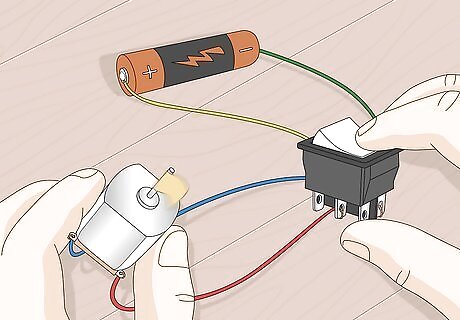
Test your switch. Your reversal switch should now be operational. When the switch is in the central position, the motor should be off. The up position should make the motor move forward, and the down position should make it move backward. If you find that the up down positions of the switch makes the motor move in directions opposite to what you would prefer, simply re-orient the switch, or you can switch the wire connections to either the battery or motor terminals. Don't switch both the motor and battery terminals, or you'll be right back where you started!






Comments
0 comment