views
Note: This works best with items against a regular, simple background that can be easily covered over. While skilled artists can remove many items from photos, you need a background that you can easily replicate for the best results.
Selecting and Deleting Items
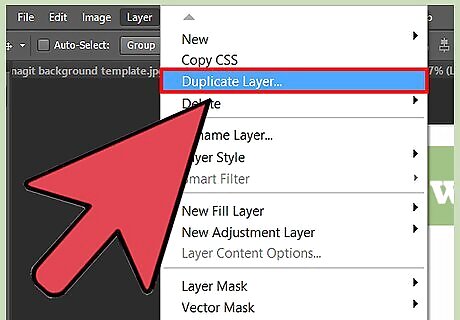
Open and duplicate your image to prevent any permanent damage to the photo. You can either open the image in Photoshop and choose "File" → "Save as Copy," or you can click "Layer" → "Duplicate Layer" to create a backup version of the original in case you make a mistake. While you could turn on the Eraser Tool (E) and start removing, this should be a last resort -- it is a difficult and time-consuming way to remove items in Photoshop.
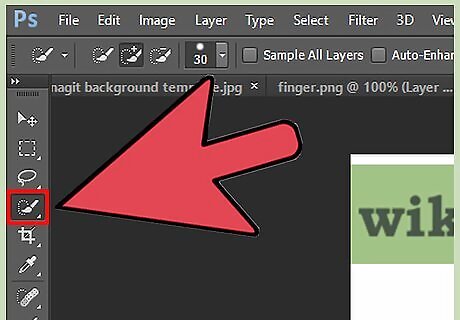
Use the Quick Selection Tool to select the item you want removed. This tool, resembling a brush with a dotted line near the bristles, should be the 4th tool down on your toolbar. If you can't find it, click and hold the Magic Wand button and it should appear. Click and drag the Quick Selection Tool over the item you want to be removed and it will select it for you. If you just want to delete the item without covering it up, hit Delete to remove it. Use the [+] keys to make the brush smaller or bigger. Smaller brushes will select more precise areas. If you make a mistake, hold Alt (PC) or ⌥ Opt (Mac) and click on an area to remove it from your selection.
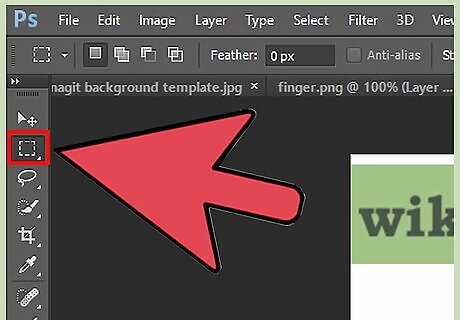
Use other, more precise selection tools if the object is too complex for Quick Selection. You have a variety of options available to select items, depending on how precise you must be. If the background behind the object is simple, and the item is well defined (different colors, easy to see lines, etc.), then the Quick Selection Tool will work. But if you want to cut out something precise you can use the following tools: Shaped Selections: The second icon on the toolbar, these are basic geometric shapes that you can use to make selections. Hold shift while clicking to get perfect squares and circles instead of rectangles or ellipses. Lasso Tools: These tools are mostly for manual selection. You click once and then drag the mouse, and the lasso follows you, making a selection when you join the ends together. Clicking again sets a point down, allowing you to make sharper angles. The Polygonal Lasso is for straight lines only, while the Magnetic Lasso tries to follow the shape of the image. Pen Tool: The icon resembles an old-school fountain pen. Pen tools make adjustable "paths," meaning you can adjust your selection as you make it. You place points down to form a "skeleton" outline of the object. You can then right-click and choose "Make Selection" to move on."
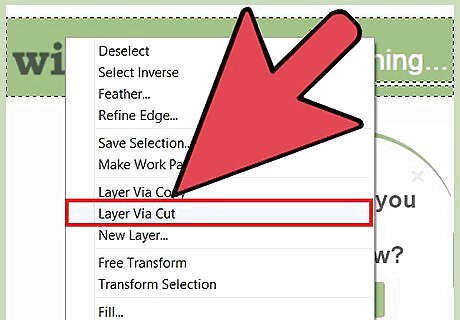
Right-click on your selection and choose "Layer via Cut" to save a copy of the item you're removing. This will eliminate the item from your image, but create a new layer based on your selection. If you want to save the item you're removing, you can simply click and drag this layer into a new Photoshop Window to isolate it, or just turn it invisible in your original image to erase it for now. If you're not planning on covering over the spot, or are just trying to work quickly, use "Select" → "Refine Edge" to first get your selection as close to the item you're removing as possible.
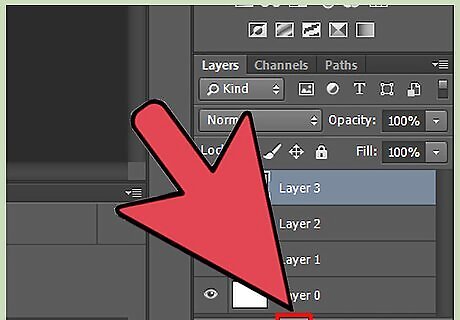
Use a layer mask to temporarily erase items, allowing you to reinstate them later if you need. Layer masks will delete items while still leaving the picture information (the color, shade, shape, etc.) intact in your photoshop document. As long as you save the photo as a .psd file, you will be able to undo anything erased in layer masks. To use one: Click the layer you want to erase things from. In the bottom of the layers palette, select the square icon with the circle in the center. If you hover over it should say "Add Layer Mask," or something similar, depending on your version. Click on the white box that appears. Use the Brush Tool (B) and black ink to "erase" the items you don't want. Anytime you "paint" on the layer mask, it will erase the corresponding image on the layer. Color the mask back in with white to undo your changes.
Using Content-Fill To Cover up Holes
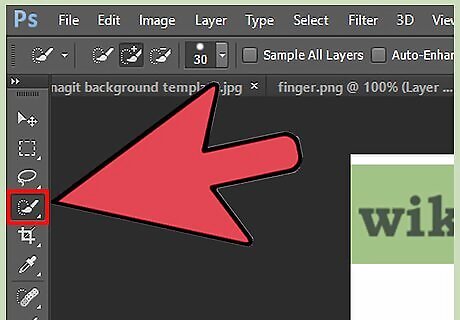
Select your item using the Quick Selection Tool. While you can use any tool you want, this is usually the easiest. Don't worry about getting a perfect selection -- just a roughly outline of everything you're removing should do.
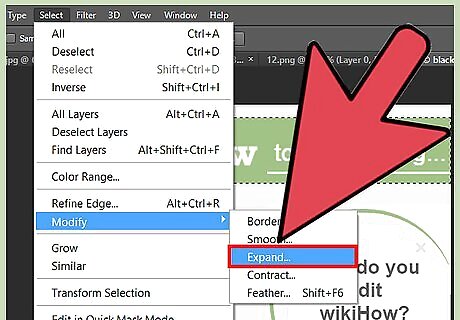
Expand your selection so that you have 5-10 pixels on either side of your item. Do not delete the item immediately. Instead, use "Select" → "Expand" to grow the selection by a few pixels so that the background is visible all around the item. If there are not enough pixels around the item to expand, or if the background is uneven, you can still use the patch tool to cover up holes.
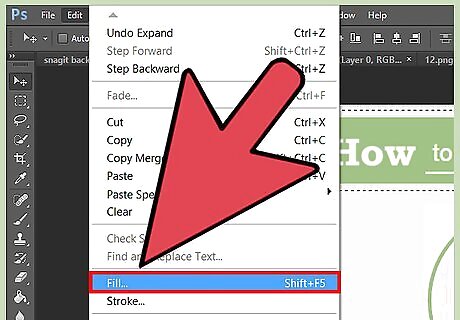
Select "Edit" and then "Fill" from the top menu. This will bring up the Fill menu, which will take your selection and randomly fill it in with pixels from somewhere else in the image.
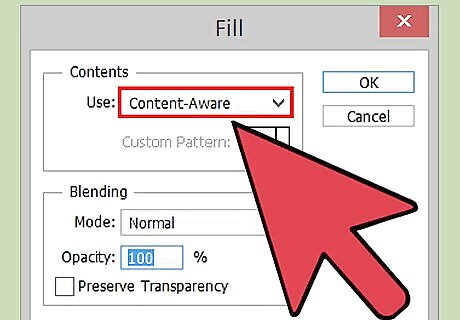
Select "Content-Aware" from the drop-down menu. It will be the first menu in the Fill window. Make sure "Color Adaption" is also checked, then hit "OK." Your area should fill in with nearby pixels for a smooth transition.
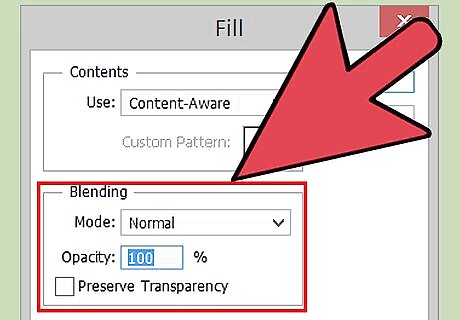
Re-do the Fill with new Blending and Opacity settings to fit your picture. Every time you click "Okay," Photoshop will randomly select new pixels. So keep trying if it doesn't work the first time. While the blending settings likely won't change too much, play with them slightly to get your exact picture exactly how you want it.
Using Patch Tools to Replicate Backgrounds
Use the Patch Tool to replace an item with a background from somewhere else in the image. If the item you're removing has a different or uneven background, you can still replace it. Imagine an image where someone is standing by a fence. You want to remove him, but you also need the fence to be intact and straight "behind" him when you replace him -- not some random assortment of pixels. This is where the Patch Tool comes in.
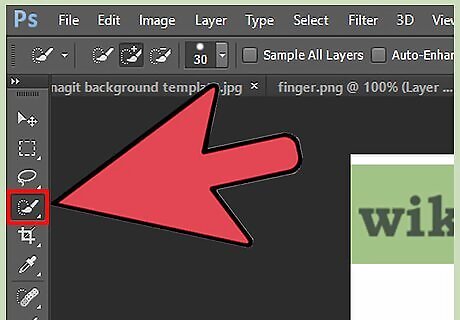
Use the selection tools to select your image like normal. You can use any tool you want here. In general, the closer you can get the selection to the item the better, as you want to minimize the background surrounding your item.
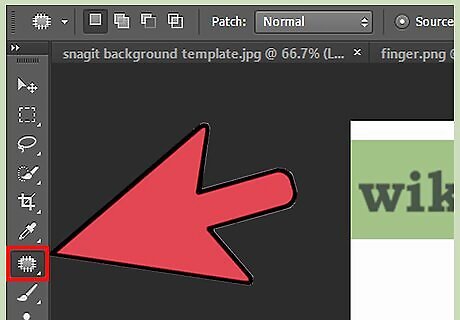
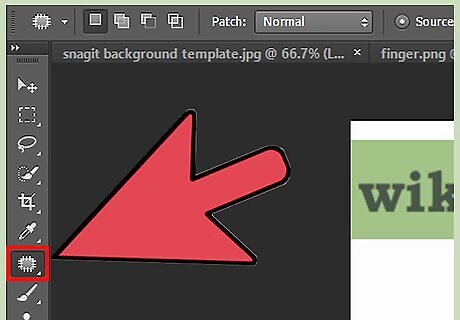
Select the Patch Tool (J) and click on your selected item. Don't un-click yet. For now, find an area in the photo that resembles the photo you're looking for.
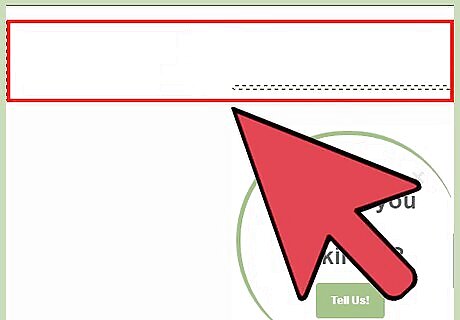
Drag your selection to the area you want for a background and let go of the mouse. The patch tool will analyze the area you let go of the mouse, then copy it over where your removed item used to be. Try to find an area where all of the major lines match up seamlessly. You can use other layers as well, as long as you select "Sample All Layers" from the top bar. You can click and select on other open Photoshop windows as well to pull background from another image.
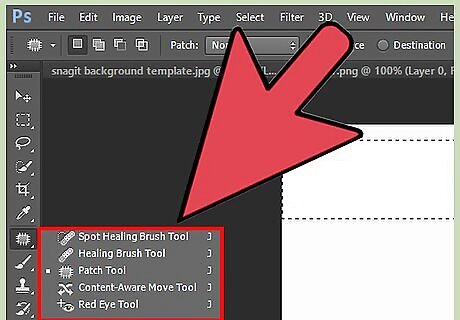
Use the rest of the Patch tools to perfectly retouch your image after removing items. These tools are seventh from the top of the toolbar. You can also press J to cycle through your "Patch Kit." As you hit J, watch the tool change in the upper left-hand corner. You have a variety of options, all of which are meant to help you seamlessly remove items from the image. While this method is concerned mostly with the Patch Tool, the rest are great for fine-tuning your image after removing the item: Spot Healing Brush Tool: Touches up the center of where you clicked with the pixels from the outside. For example, you could drag the brush along a power line in a shot and the brush will replace it with the blue sky surrounding it. Healing Brush Tool: Replaces the area you're clicking with another area of the shot. To select the area you want to replace, Alt/Opt-click with the Healing Brush Tool on. Now, anywhere you click will be replaced by pixels from where you Alt-clicked. Patch Tool: Fills in the area around your removed item with pixels from any area of the photo that you choose, or even other layers or photos. Content Aware Move Tool: Allows you to copy and paste an item into an area with a similar background (like moving a pic of a bird from one side of the sky to the other), filling in both spots automatically. Red Eye Remover: Works just as advertised. Zoom in for the best results.







Comments
0 comment