
Planning a YouTube Ad Campaign
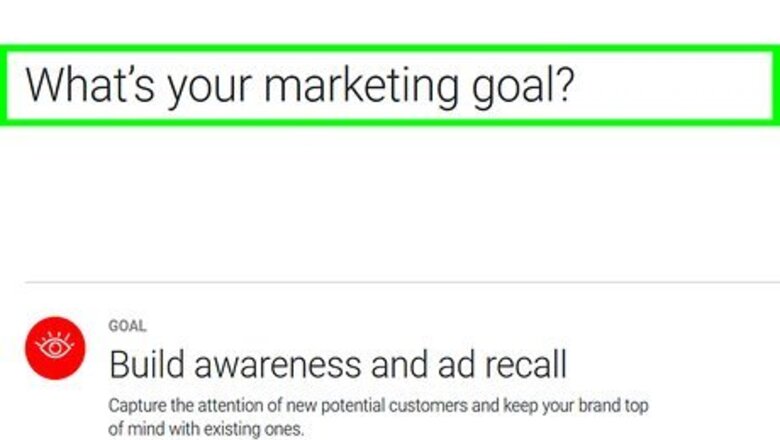
Decide on a goal. Before you begin an ad campaign on YouTube or otherwise, first you need to decide on a goal for the Ad campaign. Do you want increase your brand awareness? Do you want to increase traffic to your website or app downloads? While setting up your ad campaign, AdWords will ask you about the goal of your campaign.
Decide on a location. What areas are you capable of doing business in? Are you running a local business, or can you do business anywhere? Do you only have stores in select cities, or can you ship to anywhere in the US? While setting up an ad campaign, AdWords lets you target specific areas.
Decide on a target demographic. After you decide on a goal for your ad campaign, you need to figure out who you are trying to reach. Are you appealing to the general public, or does your product appeal to a specific demographic. Are you trying to reach a specific age group, or gender? Does your ad campaign appeal to a specific lifestyle or interest? AdWords lets you target different age groups and genders, as well as different interests and lifestyles.
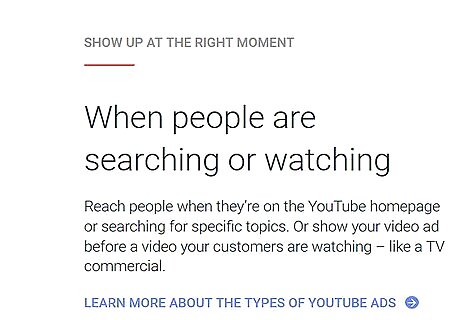
Choose some keywords. Ads on YouTube appear in two places. They can appear before or during a video, or they can appear in the search results along side other videos. To make sure your video is targeting the right people, you words users can search to display your video ad in the search results.
Decide on the duration of your ad campaign. Before you begin an ad campaign, you need to decide how long it's going to run. Is it an on-going campaign that will run indefinitely? Is it a seasonal campaign? Are you trying to capitalize on a popular trend?

Decide on a budget. Now that you have finished all the pre-planning, it's now time to decide on a budget for your ad campaign. This should include the cost of video production as well as the cost of advertising. Are you advertising exclusively on YouTube, or are you advertising in other places like Facebook, or traditional media? How much do you want to spend on advertising on each? On YouTube, you typically pay $0.01 - $0.23 per view, and you won't pay unless an user watches the video all the way through.

Film a video advertisement. After you set a budget for an ad campaign, you can now start filming your video. YouTube requires that skippable video ads be between 12 seconds through 6 minutes in length. No skippable ads can be between 6-20 seconds. You can either hire a professional production company, or you can film it yourself if you have the equipment needed to film a professional video. Read "How To Make a Commercial" and "How to Make Professional Quality YouTube Videos" for more information.
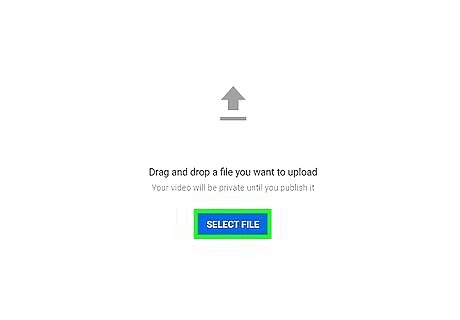
Upload your video to YouTube. Before you can use a video as an advertisement on YouTube, you need to upload it to your YouTube account. You should upload the video to a professional YouTube account, rather than a personal account. YouTube will not accept video ads uploaded to other videos streaming services.
Setting Up an AdWords Account

Go to https://adwords.google.com/ in a web browser and sign in. You can use any web browser on PC or Mac. At this time, AdWords requires you to go through setup process of starting a new ad campaign as part of the account setup process. It does not give you the option to do a YouTube ad campaign. You can either create an ad campaign as part of a larger ad campaign, or create a new campaign as part of the setup process and remove it later. If you are not signed in, click "Sign In" in the upper-right corner and sign in with the email address and password associated with your Google account.
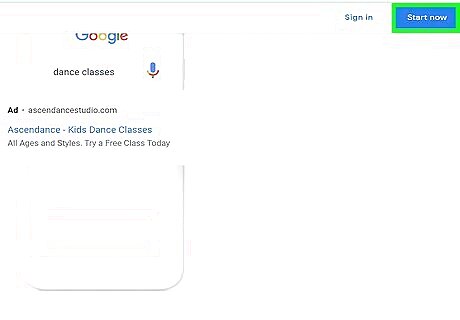
Click Start Now. It's the green button below the header that says "Get your ad on Google today".

Type your business email and website and click Continue. There are two lines on the first setup page. Use the top line to type your business email. Use the second line to type your business website. Click Continue when you are done.
Type your budget and click Save. The next step in the setup process is to set up your first campaign. The second page contains a number of boxes that guide you through the process of setting up your first ad campaign. The first box allows you to set your budget per day. Type a number for how much you would like to spend each day on advertising. Click the blue button that says "Save" when you are done.
Select a location and click Save. The second box is for selecting a location. You can click the radial button to select the country where you reside, or click "Let me choose" and type a city, state, or zip code in the bar. Click the blue button that says "Save" when you are done.

Select a network type. There are two types of networks. Search Network is for Google searches, and Display network displays ads in websites. For YouTube, display network is the best option. Click the blue button that says "Save" when you are done.
Type keywords and click Save. To select keywords, either click the suggested keywords in the list, or type a keyword in the bar below the list and click Add. When you have selected all the keywords you wish to select, click the blue "Save" button at the bottom of the box.
Set a bid and click Save. Your bid is how much you are willing to pay to get your ad seen. You can select to have AdWords set your bid automatically, or enter a bid manually. If you are just starting out, AdWords recommends that you select to have AdWords automatically set your bid.
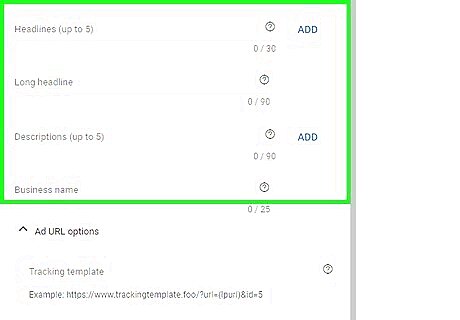
Type the text ad and click Save. There are four lines for your text ad. The first line is for your website. The second and third line are for two separate headlines for your ad. The last box for a brief description for your ad. Click the blue botton that says "Save" when you are done.
Click Save and Continue. It' the blue button at the bottom of the page. This button takes you to the payment part of the setup process.
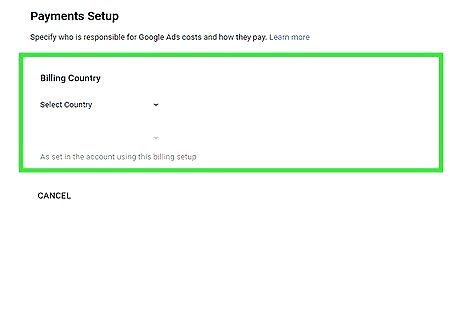
Type your payment and contact information. The final page of the setup process requires you to type your business information. You will need to type your business address, a contact name and phone number, as well as type the credit card information needed to pay for your ad campaigns. Click "Finish and create ad" when you are finished. It's the blue button at the bottom of the screen. You can now access the AdWords control panel. To pause or remove an ad campaign, click the ad campaign in the sidebar to the left and click the checkbox next to the ad under "Ad groups". Click "Edit" and select "Pause" or "Remove".
Create a YouTube Ad Campaign
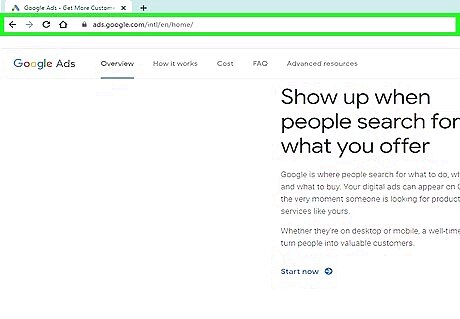
Go to https://adwords.google.com/ in a web browser and sign in. After you have created an AdWords account using the steps above, you can access the control panel when you log in to AdWords using your Google email and password.

Click Go To and type "New Campaign". It's in the upper-right corner of the AdWords control panel. This displays a search bar. Type "New Campaign" in the search bar. This displays a list of pages. Click "New Campaign" in the list when you see it.
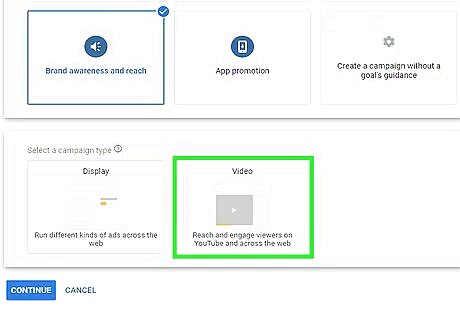
Click the Video button. It's next to an icon with a video camera in the button. The video option is for engaging viewers on YouTube and other places on the web.
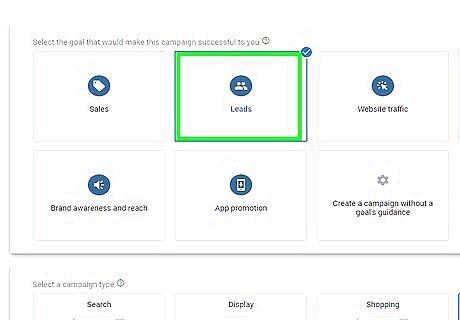
Select the goal of the campaign. There are four types of guided goals offered through AdWords. If you don't have a specific goal in mind, select "Create a campaign without a goal. The four guided goals are as follows. Leads: This goal is for collecting information from potential customers to drive subscriptions and sign-ups. Website traffic: This goal is for driving up website traffic and clicks. Product and brand consideration: This goal helps influence people to consider your product or brand while researching your specific category of brand or product. Brand awareness and reach: This goal helps you build name recognition.

Select a campaign subtype. Campaign subtypes vary depending on the goal you select. Campaign subtypes include the following: Drive Conversions: This subtype is available for the "Leads" and "Website traffic" goals. It helps to drive clicks and relative conversions on your website. Standard Awareness: This subtype is available for the "Brand awareness and reach" goal. It helps reach viewers on YouTube and across the web with compelling videos. Outstream: This subtype is also available under "Brand awareness and reach". It is designed to reach people on the smartphones and tablets. Standard consideration:This subtype is available under the "Product brand and consideration:" goal. This subtype is designed to connect users to your brand through videos that drive interactivity. Shopping: This subtype is also available under "Product brand and consideration". It is designed to promote similar products along side your video ads to encourage people to learn about your products and shop on your website.

Click Save and Continue. It's the blue button at the bottom of the page. This takes you to the Campaign creation page.
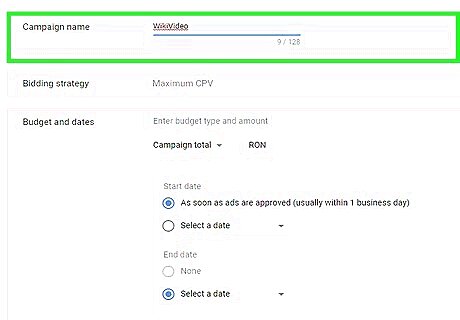
Type a name for the campaign. There is a line at the top of the page labeled "Campaign name". Use this line to type the name of your campaign.
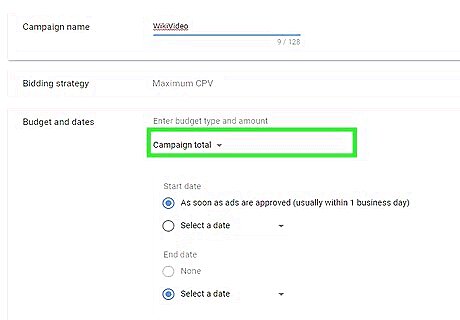
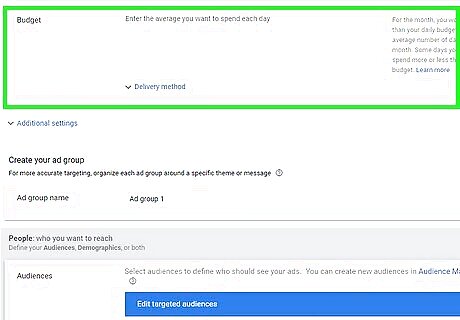
Set a budget for your ad campaign. To set a budget, type a number in the line next to the dollar sign. Select "Daily" or "Campaign total" in the drop-down menu below "Type". Under "Daily", you can also select a delivery method. "Standard" spends the same amount throughout the duration of the ad campaign. "Accelerated" spends more money at the start to drive up views quickly.
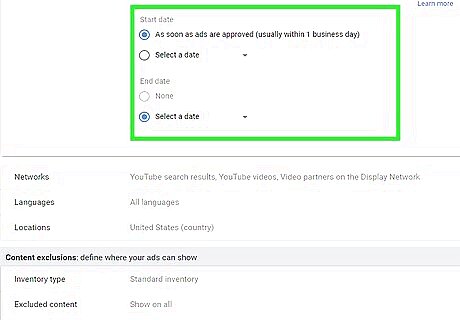
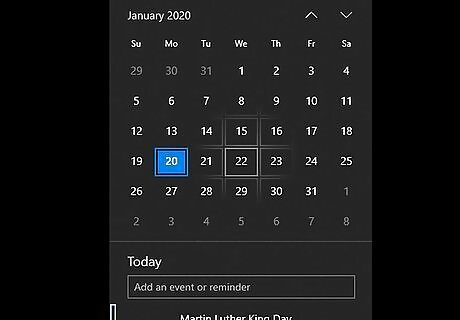
Select a start and end date. To select a specific start and end date, click "Select a date" next to "Start date" and "End date", and then click the drop-down menu to select a date from the calendar. You can also select "As soon as ad is approved" under "Start date" and "None" under "End date".
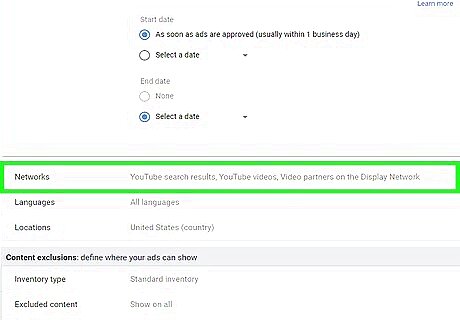
Select a network. There are two network types for YouTube. "YouTube search results" only displays the video in the search results on YouTube. This option does not display the ad before or during a YouTube video. "YouTube videos" displays the video in the search results and on other YouTube videos.

Select a language (optional). It is set to "All languages" by default. You can leave it as the default, or use the line to type the language your customers speak.
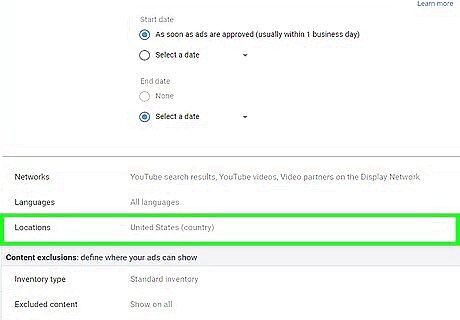
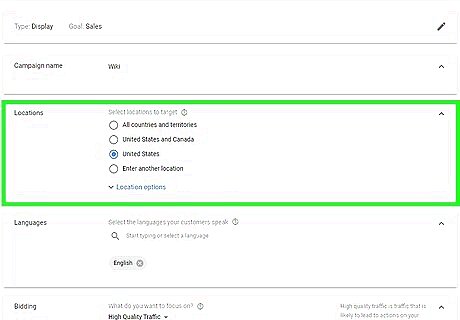
Select a location. You can click the radial button to select the country where you reside, or click "Let me choose" and type a city, state, or zip code in the bar.
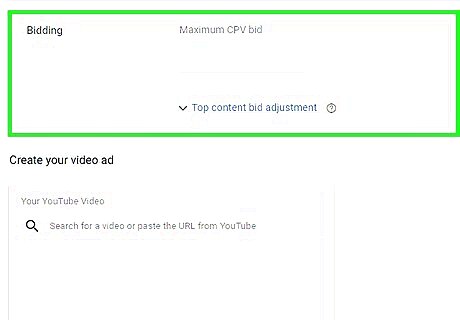
Select a bidding strategy. There are two types of bidding strategies for YouTube videos. You can select "Maximum CPV" for the maximum you are willing to pay per view. Maximum CPM sets the maximum you are willing to pay per every thousand times your ad is shown.

Set the content filter. The content filter allows you to exclude what type of content you don't want your ad to be shown along side. You can select the standard filter, or you can select specific sensitive content you don't want to be associated with, or select a digital content rating. You can also opt out of Embedded YouTube videos, Live streaming, or Games.
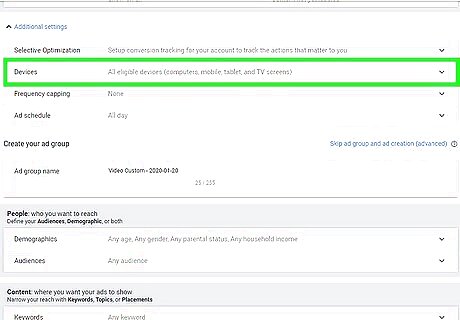
Select devices. There are two types of devices you can select. All devices displays the ad on any and all devices. "Specific targeting for mobile devices" allows you to target specific devices and operating systems.
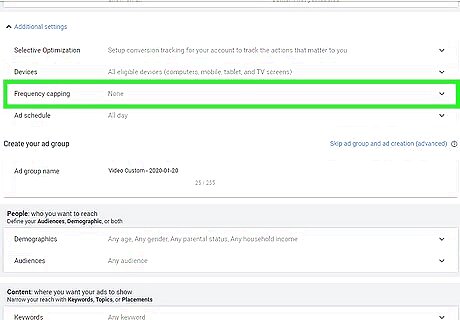
Select frequency capping (optional). This option allows you to limit the number of times an ad can appear to the same user.
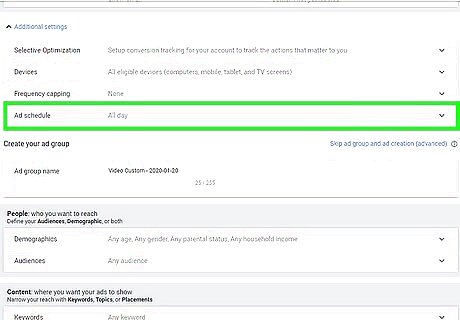
Set an ad schedule (optional). Setting an ad schedule allows you to control what hours your ad appears during the day.

Type the name of an ad group. You created an ad group as part of the AdWords account setup process. You can type the name of that ad group, or type the name of a different one. If you don't want to create a new ad group click "Skip ad group and ad creation".
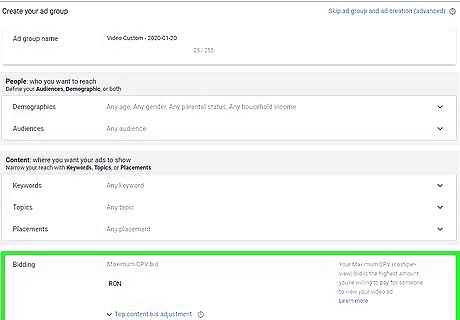
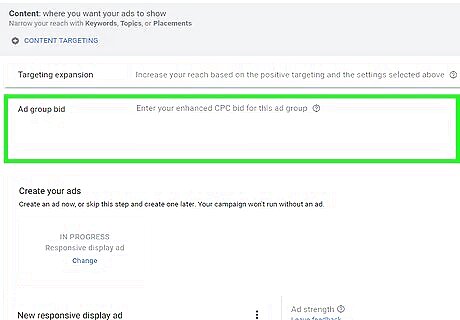
Type the maximum bidding for your ad group. Depending on what you selected earlier in the setup process, you can select the maximum CVP or CPM.

Select your demographics. By default, all demographics are selected. If you wish to target a specific demographic, click the drop-down menu and check the demographic(s) you want to target. You can select demographics by gender, age group, parental status, and household income.

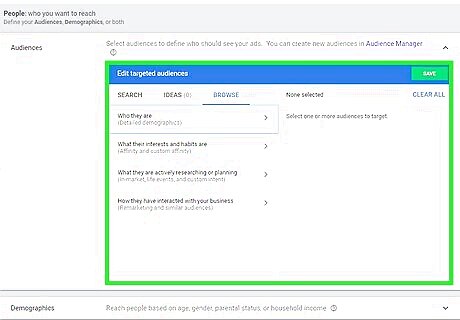
Select a target audience. When you click the the "Audiences" drop-down menu, it displays three more drop-down menus. These drop-down menus include a variety of checkboxes. Click all checkboxes that apply. The sub-menus are as follows: What their interests and habits are: When you click this drop-down menu, it displays a variety of check boxes that include customer affinity items such as; "Banking & finance", "Home & Garden", "Beauty & Wellness", "News & Politics", "Media & Entertainment", "Sports & Fitness" and more. What they are actively researching and planning: This drop-down menu includes two sub-menus. "In-market audiences" and "Life events". The later includes three selections; "College Graduation", "Marriage", and "Moving". "In-market audiences" includes categories such as; "Apparel & accessories", "Autos & Vehicles", "Baby & Children's products", "Consumer electronics", "Education", "Dating Services", "Financial services", "Home & Garden", "Sports & Fitness", "Software" and more. How they interact with your business: This sub-menu currently has no selections at this time.

Select the content for your ad to display along with. This section allows you to narrow your reach and decide what kind of content you want your video to show along side. There are three content types; "keywords", "topics", and "placements". Keywords: Click this drop-down menu and then type or paste your chosen keywords in the box labeled "Keywords". Your keywords are the search terms that people type in the YouTube search to discover your video ad. Topics: This drop-down menu includes a variety of checkboxes for topics. These topics include; "Arts & Entertainment", "Books & Leisure", "Beauty & Fitness", "Autos & Vehicles", "Computers & Electronics", "Business & Industrial", "Food & Drink", "Games", "Hobbies & Interests" and more. Placements: This sub-menu allows you to target where you ad will run. Type a term or keyword related to your video in the bar at the top of the sub-menu and then select from a list of suggested placements for your ad. Placements fall under 5 categories; "YouTube Channels", "YouTube Videos", "Websites", "Apps", and "App categories". Click a category and then click all the channels, videos, websites, and apps you want your ad to run on.
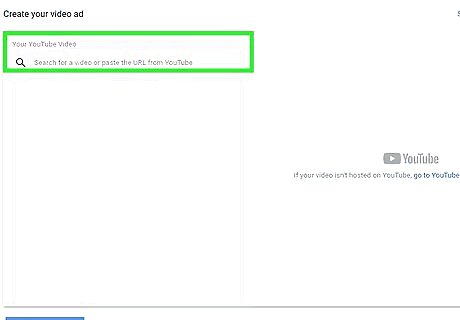
Copy and paste the video ad URL. There is a bar under the the section labeled "Create your video ad". Use this bar to paste the URL for your video ad. You video ad must be uploaded to YouTube. Other video streaming formats are not allowed.

Select a video ad format. There are four types of video ad formats. In-stream ads, Video discovery ads, bumper ads, and Outstream ads. In-stream ads: These ads appear before, after, and during a video. Users can skip these videos after 5 seconds. Video discovery ads: These ads appear along side other videos in YouTube search results, and on the YouTube homepage. Bumper ads: These are short video ads (6 seconds or less) that appear before, during, or after another video. Users cannot skip these ads. You pay for these videos based on the number of times the video is shown (Maximum CPM). Outstream ads: These ads appear on other websites. They automatically play on mute at the top of websites and in article text on mobile devices. Users can unmute these ads or dismiss them.
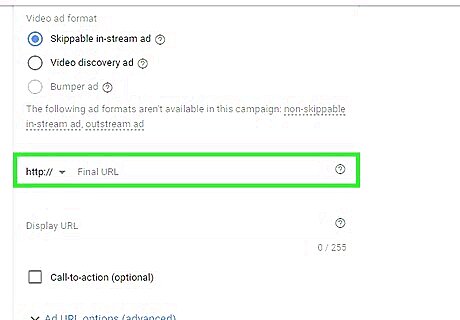
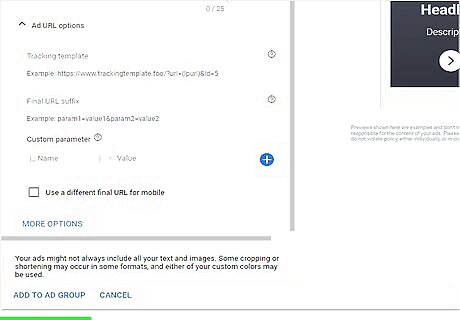
Type a final URL and Display URL. The Final URL is the the web address users are taken to when they click on your ad. The Display URL is the web address users see in your. If you have a vanity URL, you can type it in the Display URL. Otherwise, you can use the final URL in both the Final URL and Display URL lines.

Upload an image (optional). By default, YouTube will automatically generate an image from your video. If you want to upload a video of your own, select "Upload and image". Click "Choose File" to browse and select an image to upload.

Type an ad name. The final bar at the bottom of the webpage is where you type the name of your ad.

Click Save and continue. It's the blue button at the bottom of the page. Click this button when you finish filling out the form. It takes you to the confirmation part of the process.
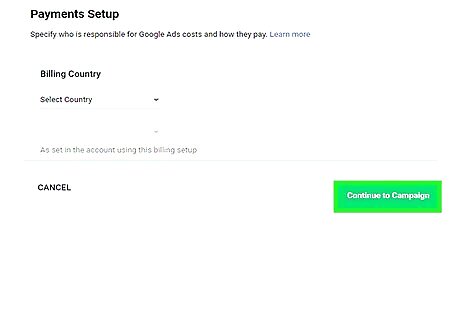
Review and click Continue to Campaign. Review the information on the confirmation page. If everything is correct, click "Continue to Campaign". Your ad campaign now will go through an approval process. This usually takes about a day. You ad will start running after the approval process, or at the specified start date.


Comments
0 comment