
First Ring
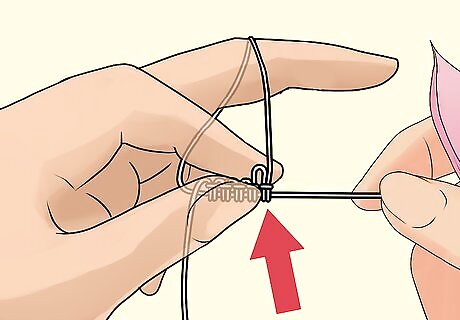
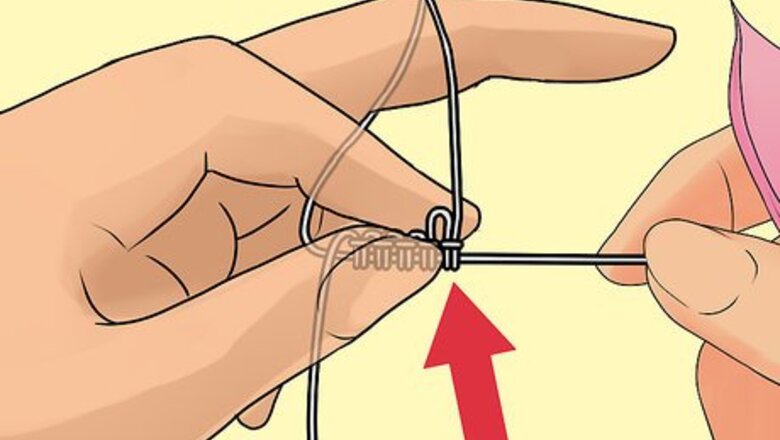
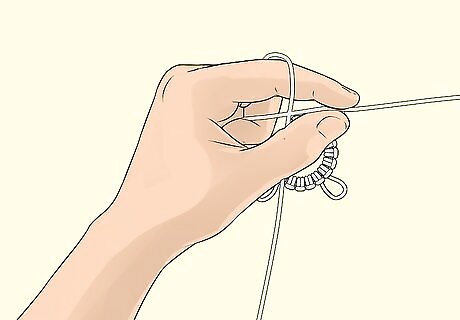
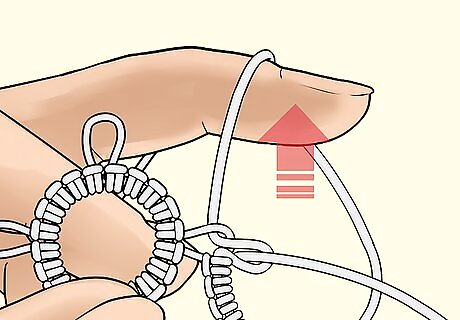
Be aware that the working stitch always comes between the thumb and forefinger. In figures 12, 13, and 14, the fingers should come where the arrow points in the illustration. The drawings are made in this manner (with the fingers away from the working stitch) so that all the steps are clear.
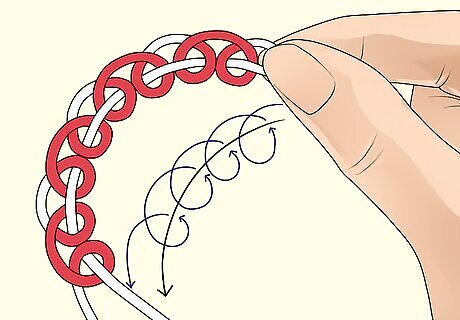
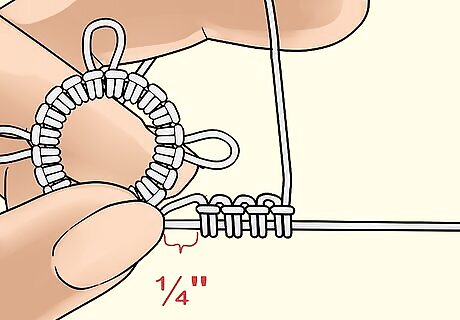
Start the first ring. Make four double stitches (ds).
Make the first half of a double stitch (ds). However, as you slide it into position, stop about ⁄4 inch (0.6 cm) from the preceding double stitch (ds).
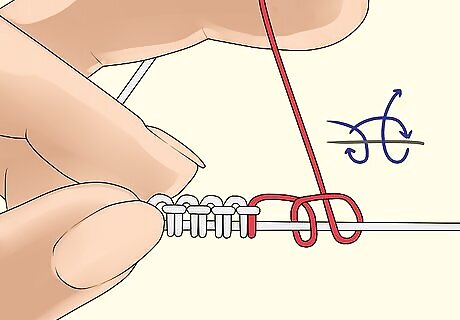
Complete the double stitch (ds).
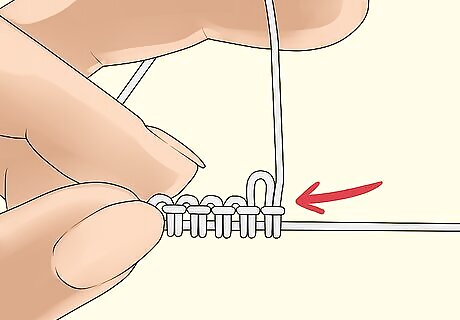
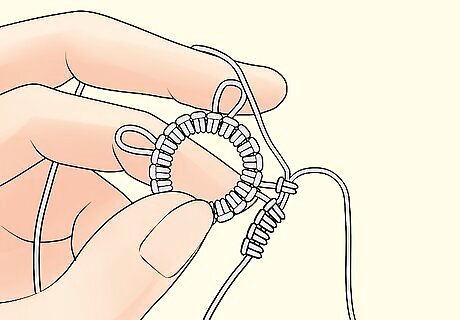
Draw the entire stitch close to the first four stitches. The little loop formed from the space left between the stitches is a picot (p).
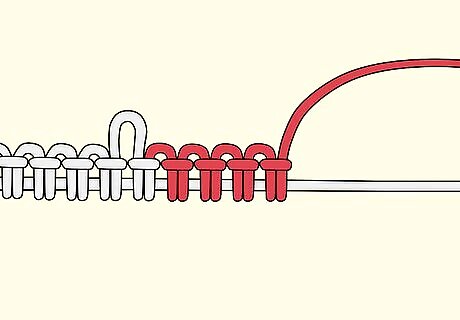
Make four more double stitches (ds).
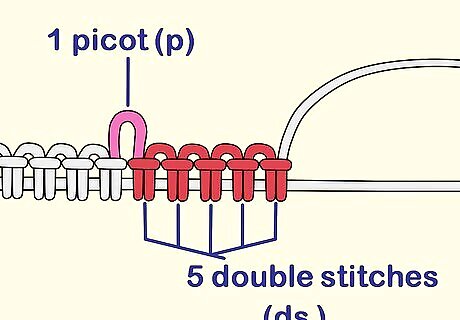
Note that what was just created is written "1 picot (p) and 5 double stitches (ds)". A picot refers only to the loop and does not include the double stitch which fastens the loop.
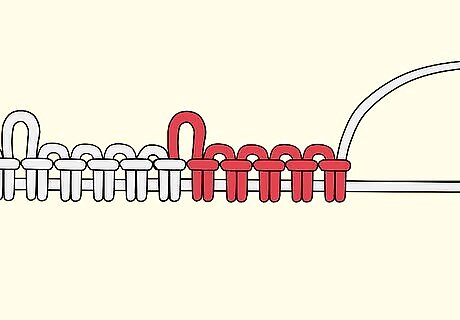
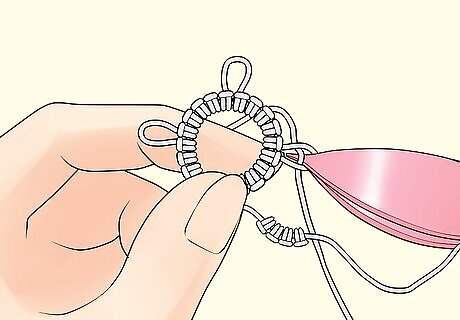
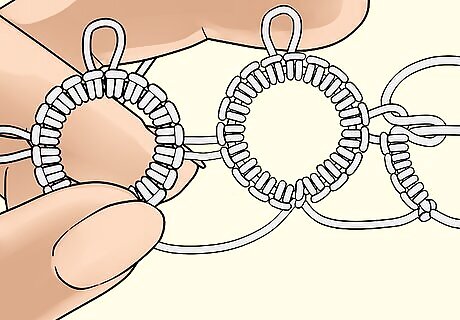
Make another picot and five double stitches (see previous step).
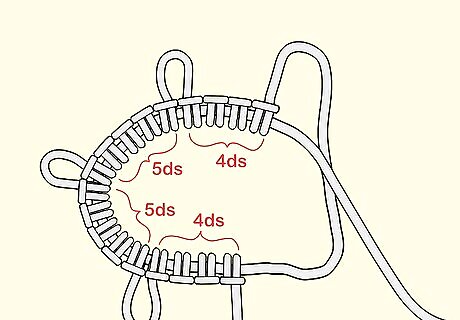
Make a picot and four double stitches.
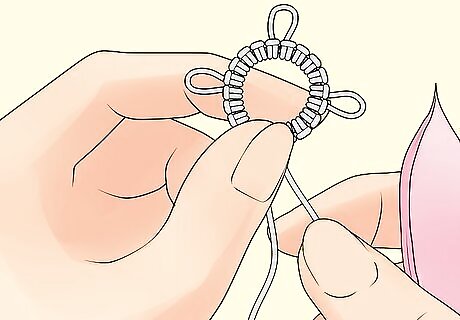
Hold the stitches securely between thumb and forefinger of the left hand. Draw the shuttle thread tight so that the first and last stitches meet, forming a ring.
Second Ring and Joining
Wind the thread around the left hand in position for another ring.
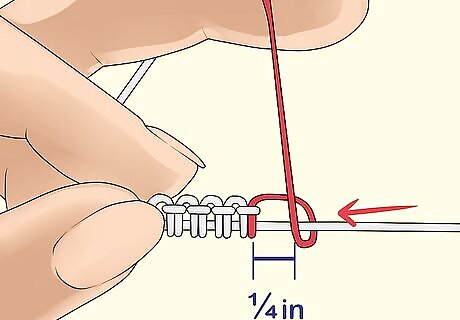
Make 4 double stitches 1/4 of an inch away from the ring just made.
Insert the pointed end of the shuttle through the last picot of the previous ring and catch the thread encircling the left hand.
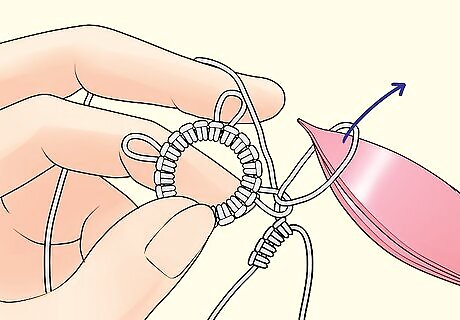
Pull the thread through until there is a loop large enough to insert the shuttle.
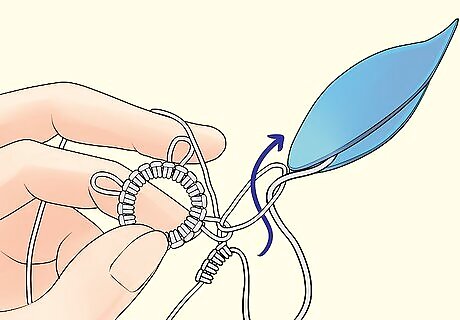
Pull the shuttle through the loop and draw the shuttle thread tight.
Slowly raise the middle finger of the left hand to draw up the loop. This joins the new ring to the old one and counts as the first half of the next double stitch.
Complete the double stitch.
Repeat steps 6 to 10 under the first ring (previous section). Continue in this manner for each succeeding ring, repeating all of the steps in this section.


Comments
0 comment