views
Making a Lightweight Solar Oven
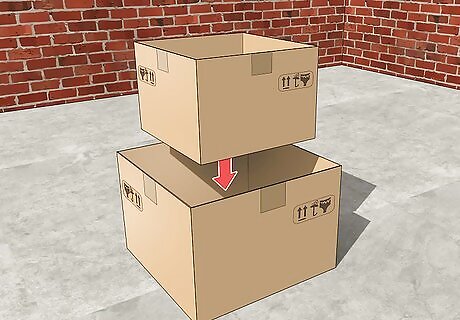
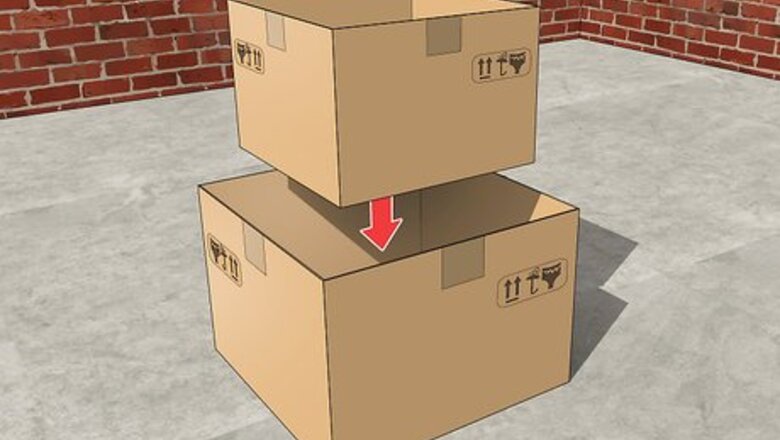
Place a cardboard box inside a larger cardboard box. Remove the tops of both boxes, and place the small one inside the larger one. Make sure there is at least a gap of 1 inch (2.5 cm) between the boxes. Glue the smaller cardboard box into place by squeezing glue onto the bottom and then pressing the smaller box firmly into the larger box.
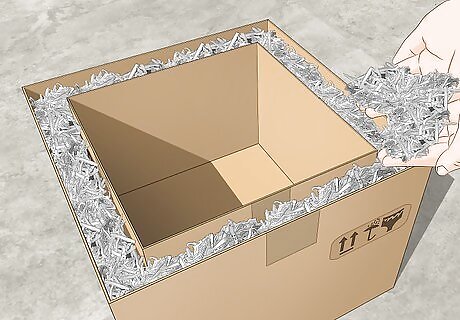
Fill the gap between the boxes with shredded newspaper or torn fabric. Tear the newspaper or fabric into strips, crumple them, and stuff them into the gap between the two boxes. Make sure to entirely fill the gap so there is no empty space. The paper or fabric will act as insulation, which keeps the heat trapped inside the oven.
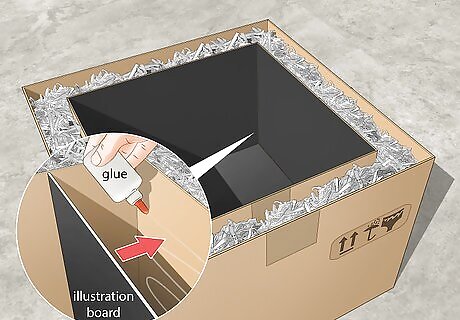
Line the inside of the smaller box with black construction paper. Cut pieces of black construction paper that are the dimensions of the walls and bottom of your cardboard box. Use glue to paste them in. Black absorbs heat very easily, so it will keep your oven toasty.
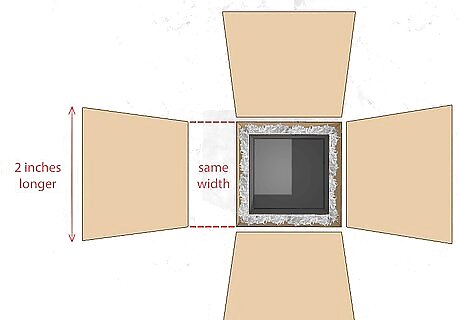
Cut trapezoids from cardboard. The narrow side of the trapezoid should be the same width as one side of your large box. This is the side you will attach to the box. The wide edge of the trapezoid should be 2 inches (5.1 cm) wider than the small edge. Use a utility knife to cut the cardboard. Place your cardboard on a scratch-proof surface, like the garage floor to cut it. Always cut in the direction away from your body, to avoid accidentally cutting yourself.
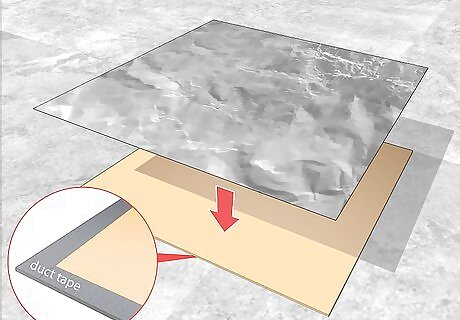
Cover each square of cardboard with a reflective surface. You can use aluminium foil, mylar, a mirror, a metallic auto-shade, or another reflective surface. This will reflect the sun’s rays into the solar oven and heat up your food. Tape the foil or other material securely to the cardboard using duct tape or cement glue. Now that the cardboard is covered in foil it can act as a reflector. If you're using aluminium foil, smooth it out so that it has as few wrinkles as possible.
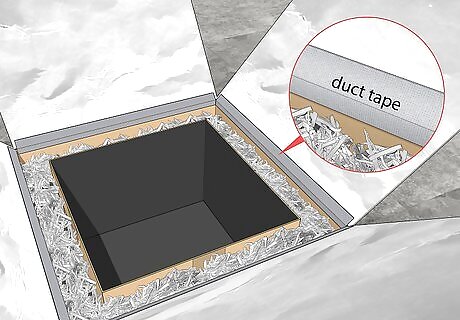
Attach each reflector to each of the top edges of the big box. Use duct tape to securely tape the each reflector to each side of the big outer box. Don’t worry that they flop over. You will prop them up.
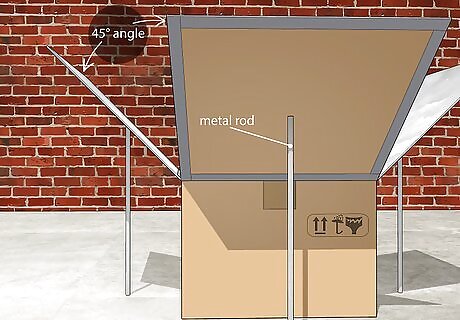
Prop each reflector up at around a 45 degree angle. You can buy thin, sturdy metal rods at a hardware store. Stick the rods into the ground underneath the reflectors. Prop the reflectors on the rods, and glue them into place. If you’re operating your solar oven on a windy day, take extra care that the rods don’t blow over by sticking them more deeply into the ground.
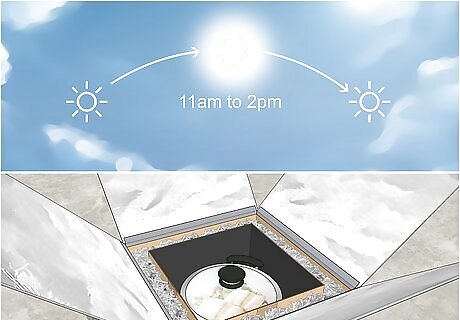
Position the oven in full sun, and put your pan of food inside. For best results, use your solar oven between 11am and 2pm. That’s when the sun is at its most intense. You can use your solar oven any season of the year, as long as its sunny out. The sun moves throughout the day, so if you’re cooking something that’s going to take a few hours, make sure you don’t put the oven someplace that will be shady in an hour.
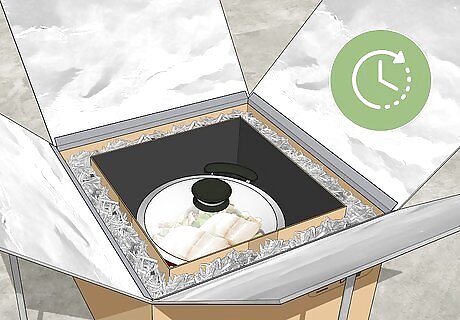
Wait a long time for your food to cook. Don’t be surprised when your food takes way longer to cook than it would in a conventional electric oven. A solar oven is at a much lower temperature, so it will slow-cook your food, kind of like using a crock pot. You may need to reposition your box several times during cooking to catch the sun. Measure the internal temperature of your meat with a meat thermometer, which you can stick into whatever you’re cooking. Make sure meat gets up to at least 170 °F (77 °C), which is the temperature that kills germs.
Constructing a Heavy Duty Solar Oven
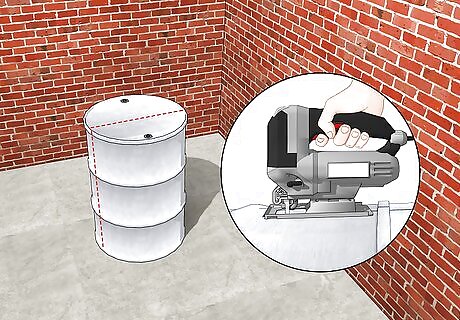
Cut a large metal drum in half vertically with a jigsaw. An oil drum will work well for this purpose. Be sure to use a metal-cutting blade; when you’re done, the half-drum should look like a cradle. You only need half of the drum to make the oven. You can discard the other half.
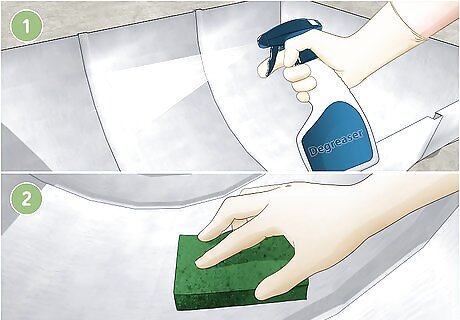
Clean the inside of the half-drum with a degreasing soap. Put some degreasing soap onto a scrub brush. Thoroughly scrub the inside of the half-drum with degreasing soap and water. Pay extra attention to the corners and crevices, where grease can accumulate.
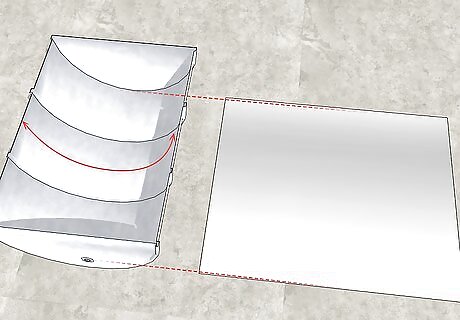
Cut a large rectangle of sheet metal to fit the curved interior of the drum. The long side should be as long as the long side of the drum. The other should equal the curved width of the interior of the drum. You can measure the curved interior with a flexible measuring tape, and then mark it out on the sheet metal. Use tin snips to cut sheet metal. Always wear safety goggles and protective gloves when cutting sheet metal. For the large rectangle: one side be as long as the long side of the drum, the other should equal the curved length of the interior. You can measure this with a flexible measuring tape.
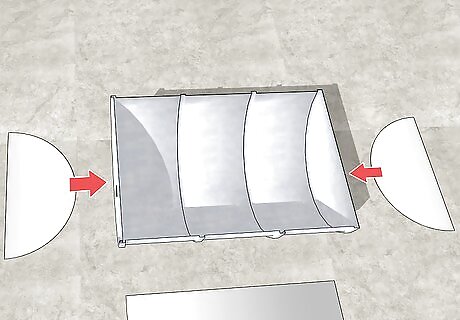
Cut two half circles to fit inside the ends of the drum. Cut a string the length of the radius of the end of the drum. Tie a marker to the end of the string. Hold the string onto the sheet metal, and swivel the marker around to draw a circle. Cut out the circle and cut it in half. Cut using tin snips, wearing safety goggles and protective gloves.
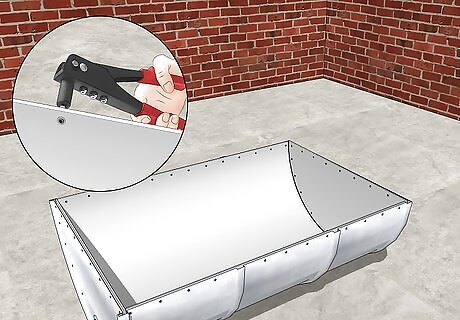
Attach the sheet metal to the inside of the drum. Drill holes through both the sheet metal and the drum with a ⅛ inch (.32 cm) drill bit, then apply ⅛ inch (.32 cm) pop rivets with a rivet gun. Slide the rivet into the nozzle of the rivet gun. Place the rivet into the hole you have drilled and squeeze the trigger of the rivet gun.
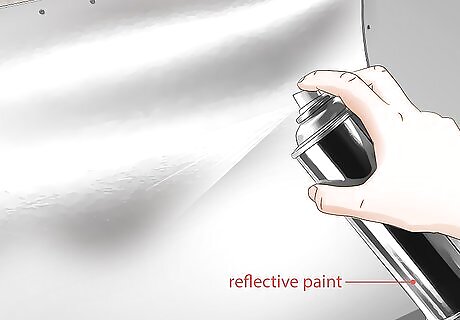
Paint the inside of the oven with a reflective paint rated for barbecues. This will maximize the amount of heat inside the oven. You can buy reflective paint at a hardware store or online. Make sure that you wear gloves and non-fancy clothes when you’re painting, and that you paint in a well-ventilated place, preferably outside.
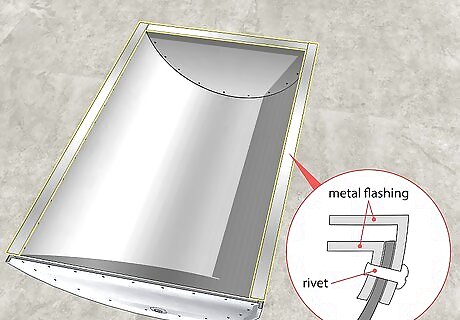
Create a metal lip with flashing around three top edges of the oven. This will hold the glass top, which you will slide in and out through the open side. The easiest way to create a lip is with six pieces of metal flashing: Make a flashing “sandwich” by putting on two layers of flashing so that the glass can slide between them, instead of sliding on the uneven edges of the barrel. Place a strip of thick cardboard in between the two layers of flashing to hold them apart while you drill through both layers and attach the flashing to the drum with pop rivets. Remove the cardboard and repeat until 3 of the top sides of the drum have flashing sandwiches.
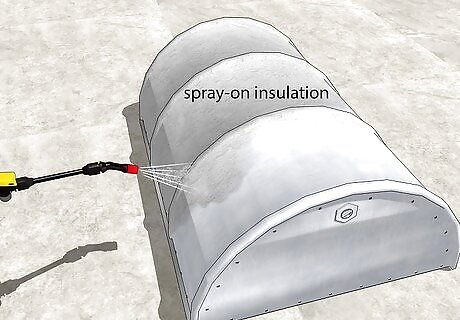
Flip the half-drum over and apply spray-on insulation to the outside. Wear gloves and do this outside because spray-on insulation is very sticky! Apply a thin, even layer over the entire oven. Spray-on insulation expands a lot, so start with a thin layer, and wait for it to dry before applying more.
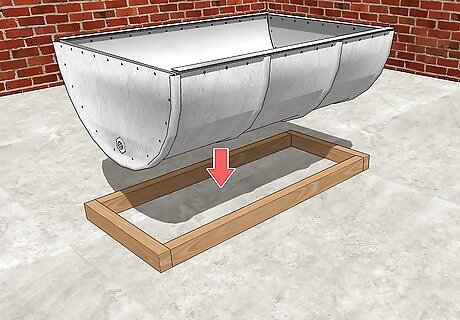
Attach a base to the bottom of the oven to keep it from tipping over. Drill and screw the drum to a piece of wood or a square aluminium frame with wheels, depending on whether you want your oven to be stationary or portable. In the northern hemisphere, you should angle your oven southward. At the equator, face your oven directly upward.
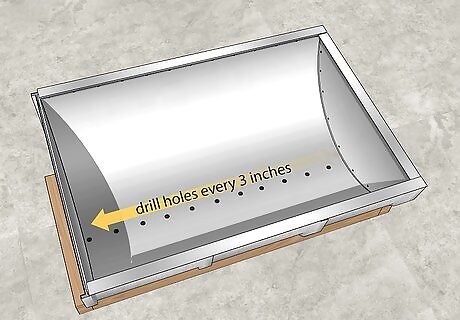
Drill drainage holes in the bottom of the oven. Drill a small hole about every 3 inches (7.6 cm) in a straight line across the bottom of the oven. Make sure to pierce the insulation. The small holes will allow condensation to escape the oven.
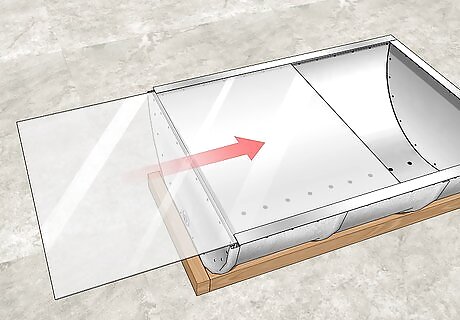
Slide a custom-sized sheet of tempered glass into the metal lip. Tempered glass is tougher than regular glass, and it comes with the sharp edges ground off. That means you can use it as is, without having to sand. The glass should be about ⁄16 inch (0.48 cm) to be thick enough to be sturdy. You’ll have to custom order the glass at a hardware store based on the dimensions of your solar oven.
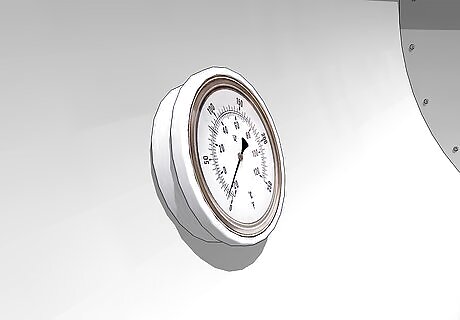
Insert a thermometer into the oven, if you want. A wood stove thermometer is a good choice because it has magnetic backing and can withstand high, constant heat. Because the drum is metal, the magnetic thermometer will stick to any part of the oven. You can check the thermometer to see how hot your oven has gotten, but to really make sure that your food has cooked sufficiently, you should use a meat thermometer.
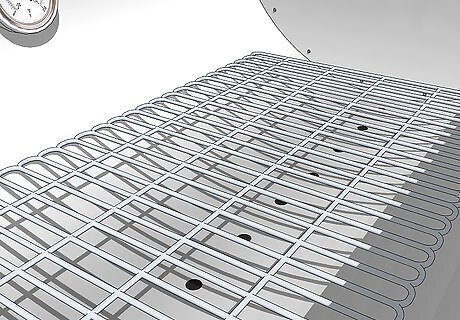
Place aluminum racks on the bottom of the oven. Place one or two rectangular grills into the oven so that you can position your food, just like cooking in an electric oven. This is helpful because without the grill, the bottom of your oven is curved, making it tricky to place any pans in the oven. You don’t have to secure the grills into place. You can just place them into the bottom of the oven.
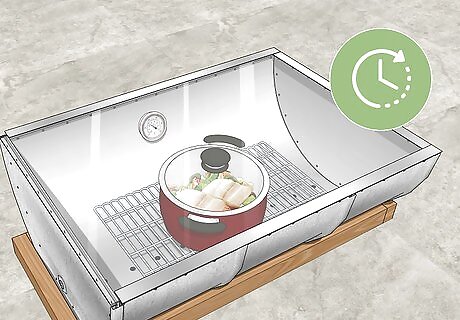
Cook your food on a sunny day. Place food in the oven and let it sit for many hours. To cook meat, follow a similar process as you would if you were using a crock-pot, or some other kind of slow-cooker. To roast a chicken, for instance, you might need about 5 hours. Test the meat’s internal temperature with a meat thermometer to make sure it gets to 170 °F (77 °C), the temperature that kills germs. Most solar ovens reach a maximum heat between 250 °F (121 °C) and 350 °F (177 °C). However the size, materials, and insulation of your particular oven will determine how hot your oven gets. Depending on your location, you should angle your oven in different directions to make the most of the available sunlight.





Comments
0 comment