
Marking Layout Lines

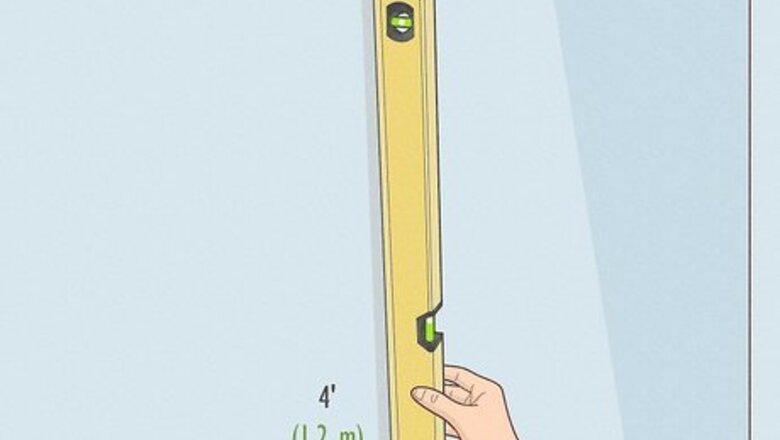
Use a 4-foot (1.2 m) level to check that your walls are plumb. Take a long level and place it up right against your walls. Look at the bubble in the tube to check if the wall is plumb, which means it’s perfectly vertical. Place your level onto different sections of the well to check that it’s plumb all around. If any parts of your wall aren’t plumb, make a note of any dips or angles that you’ll need to shim or make alterations for to make sure the cabinets are level. For instance, if the bottom portion of your wall slopes outward a bit, you may need to add shims, which are small wedges used to make small adjustments, when you install your cabinets so they’re even.

Mark a level reference line about 48 inches (120 cm) off the floor. Take a ruler or tape measure and measure the distance from the floor to the center of your wall. Mark an even line all across the wall with a pencil, marker, or chalk. This will serve as a simple reference point for you to take more measurements. Make sure the line is even all around so your future measurements are accurate! You could also use a laser level for a simple way to create an accurate reference line.

Measure down to the floor from the line to find your highest point. Use your ruler or tape measure and measure straight down from the reference line down to the floor. Take multiple measurements along the line and look for the highest point of your floor. Once you identify it, make a small marking on your wall so you can remember where it is. Finding your floor’s highest point is super important for installing your cabinet evenly.

Mark a level line 34.5 inches (88 cm) above the highest point of the floor. Measure up from where you marked your floor’s highest point and use a pencil, marker, chalk, or laser level to mark a line across your wall. Make sure the line is even so your cabinets will be level when you install them. This layout line marks where the tops of your base cabinets will be once they’re installed.

Measure and mark a line 17–18 inches (43–46 cm) above the layout line. Use your ruler or tape measure to measure up from the layout line you just marked. Mark the layout line for your upper cabinets with a pencil, marker, or chalk. This line also marks the bottom edge of your upper cabinets.

Locate and mark the studs on both layout lines. Find your wall studs with a stud finder or by knocking to locate solid spots where studs are located. Use your pencil, marker, or chalk to mark all of the wall studs located in your layout lines.

Add markings for any appliances and fixtures you’ll install. If you’re planning to add appliances such as refrigerators or any fixtures, measure them first so you know how much space you need to leave open. Mark their measurements on your walls so you can install your cabinets around them.
Hanging the Upper Cabinets

Drill cleats into studs beneath the layout line of the upper cabinets. Cleats are essentially small shelves that you can use to support your cabinets while you’re installing them. Place a straight cleat just beneath the layout line for your upper cabinets and drill 2-inch (5 cm) drywall screws through them into every other stud so they’re firmly attached and can hold the weight of your cabinets. Add a cleat for every cabinet you plan to install so their weight is fully supported when you hang them. Attach cleats along the length of your upper cabinet layout line.

Align and clamp the frames of your upper cabinets together. Place your upper cabinets together on your floor. Line up the edges of the frames and clamp them together firmly and securely. Go with either ratchet or screw clamps. Squeeze clamps won’t be strong enough to hold the cabinets in alignment.

Mark stud locations and drill holes through the back. Line up your cabinets against the wall and mark the locations of wall studs on the back. Take a drill and create pilot holes into the back of the cabinet where the studs are located. Drill pilot holes at both the top and bottom of your cabinet so they’re ready to go when you hang them. Make sure the pilot holes are large enough to fit your 2-inch (5 cm) screws.

Drill the upper cabinets together with 2-inch (5 cm) screws. Fit the screws onto your drill and drive them through both of the frames you have clamped together so they’re connected. Drill screws into the tops and bottoms of both frames so they’re securely fastened.

Lift the cabinets up onto the cleats. Have another person help you or use a cabinet jack to carefully lift the cabinets from the floor. Gently place them onto the cleats and push the cabinets flush against your wall. It can be tough to lift the cabinets on your own, and you could damage them if you drop them. Try having a friend lend a hand so you can do it safely.

Drive screws through the back of the cabinets. Use 2-inch (5 cm) screws and drive them through the upper holes you created in the back of the cabinet and into the wall stud behind them. Then, drive screws through the bottom holes to firmly attach the cabinets to your wall.

Remove the cleats and shim the cabinets if you need to. Unscrew and carefully remove the cleats from your wall since your cabinets are now attached to the studs. Check the cabinets to make sure they’re even along your walls. If there are any uneven sections, add shims to the space between the wall and your cabinets until they’re flush and even.
Connecting the Base Cabinets

Position the first cabinet in the corner and make sure it’s level. Choose a corner to start installing your base cabinets. Move your first corner cabinet into place and use your level to see how evenly it sits. Make a note if the cabinet is uneven. You may need to add shims later if it is.

Mark any plumbing lines and drill holes to fit them in the back of the cabinet. If you have any plumbing lines that need to run through your cabinet, push your cabinet against the line and mark the location on the back. Then, use a drill to create holes large enough to fit the lines.

Shim the top and face of the cabinet so it’s level. Push your cabinet flush against the wall and place your level across the top of it. Add shims beneath the cabinet or in the space between the wall and the back of it as necessary until the top and face are even and stable.

Drill wood screws through the back of the cabinet into the wall studs. Drive the screws right through the back of the cabinets and into the wall studs behind them. Drill a screw into each of the studs so the cabinet is firmly and securely connected to your wall.

Align each additional cabinet evenly and install them. Once the corner cabinet is installed, place another one next to it. Check to make sure it’s level and add shims as necessary until it is. Drive screws through the back of the cabinet into the wall studs behind it. Then, move on to the next one until all of the base cabinets are installed.
Attaching Doors, Drawers, and Trim

Screw the cabinet doors into place. For traditional hinges, drive small screws through the hinges into doors. If your cabinet doors snap into place, install them into the proper slots. Open and close the doors a few times to make sure they’re firmly and securely attached. Your cabinet doors likely came with special screws for you to use, but if you don’t have them, try looking up the cabinets online to see what screws you need to use. If any of the doors are hanging unevenly, remove and adjust the hinges, and reattach the doors to straighten them out.

Fasten the toekick trim with 1-inch (2.5 cm) brads. Toekick trim covers the small gap between the base of your cabinets and the floor. Fit the toekick into place and drive small brads, also known as brass fasteners, into it to secure it.

Set the drawers in their tracks and push them into place. Align the tracks on the bottom of a drawer with the tracks in the drawer-slot of your cabinet. Slide your drawer onto the track and push it all the way into your cabinet. Add any additional drawers following the same method.


Comments
0 comment