
Setting up Your Needlepoint Materials
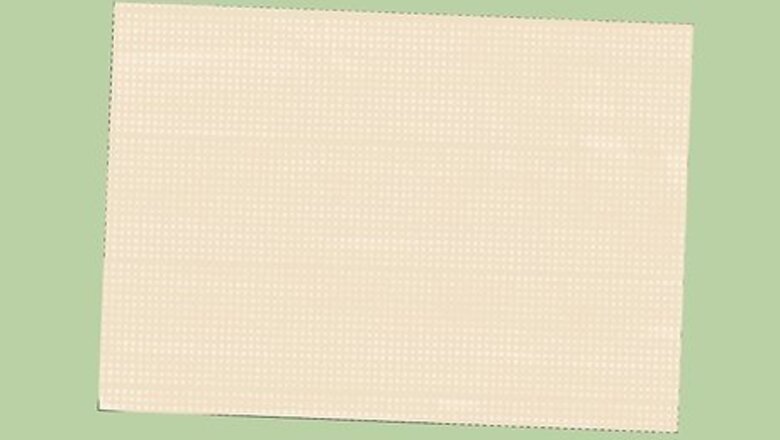
Choose a canvas and mounting materials. Visit a craft supply store to find a canvas and a frame or stretcher bars and tacks. You can purchase a blank canvas if you plan to draw your own needlepoint design onto it, or you can buy a canvas that already has a design printed on it. Choose a frame that will be large enough to hold your canvas. A premade needlepoint design is the best option if you are new to needlepoint.
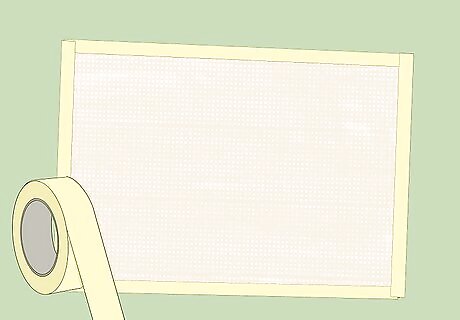
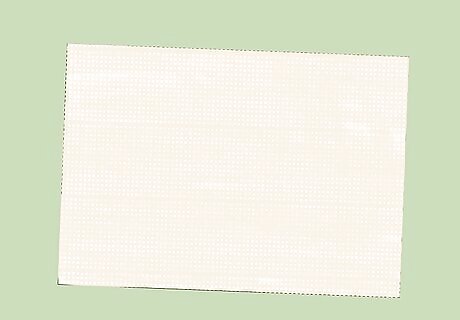
Bind the edges of your canvas with masking tape. Always wash your hands before you touch the canvas to avoid getting any dirt or grime onto it. This will keep the edges from unraveling while you work. Use 1 in (2.5 cm) wide or smaller tape. Fold the tape along the edges of the canvas to cover them completely from end to end. You can also hem the edges of the canvas with a sewing machine to prevent them from unraveling.

Mount the canvas in a frame to hold it taut while you work. Unscrew the edges of the frame and place 1 piece onto a flat surface, such as a table. Lay the canvas on the frame and tug the edges of the canvas to open it up completely. Then, place the other side of the frame over the top of the canvas and secure the pieces together to hold the canvas taut. You can also use stretcher bars and tacks to secure your canvas. Avoid working on loose canvas. This may increase your chances of distorting the fabric when you pull stitches taut.

Thread a needle with an 18 in (46 cm) length of embroidery floss. Hold the thread in one hand and the needle in the other (eye up). Then, insert the tip of the thread into the eye of the needle and pull it through by about 4 in (10 cm). You can use any type of embroidery floss, thread, or yarn you like to do needle point. However, a multi-strand embroidery floss is recommended since you can pull it apart as needed for thinner stands. If you have a hard time threading the needle, insert the tip of the thread into your mouth and wet it with your saliva. This will stiffen the thread and make it easier to push through the eye of the needle.Tip: Make sure to select a needle that you can insert all the way through your canvas with ease. Check to see if the manufacturer has recommended a needle size on the canvas label.
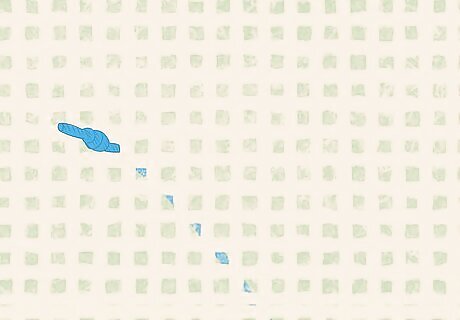
Secure the thread to the canvas with a waste knot. Tie the knot near the end of the long piece of thread. Then, insert the needle into the canvas on the right (front) side about 1 in (2.5 cm) from where you want to begin stitching. Then, bring the needle back out through the wrong (back) side of the fabric where you want to create the first stitch. Make sure that you attach the waste knot in the same row that you want to start stitching. You will cut the waste knot after you stitch over the area around it, so don’t worry about it being visible.
Working Basic Stitches
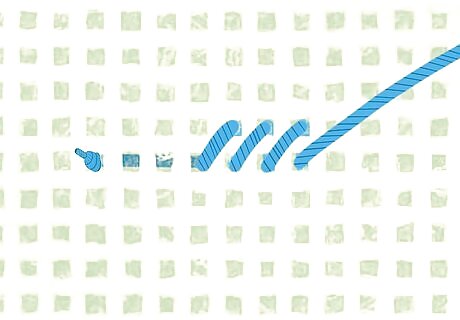
Do a half-cross stitch for a simple stitch that covers a small area. Insert the needle through the wrong (back) side of the canvas. Choose a space at the top left of your canvas or at the top left of a block of color. Bring the needle through a space on the right (front) side of the canvas that is diagonally-adjacent to the stitch on the right side. Then, repeat the same stitch to create a stitch alongside your first stitch. Work from left to right in a row across the canvas, and then work the stitch back along the row in the opposite direction. As you sew the second row, the second diagonal stitch should go through a space that already has thread going through it. This will help to reduce the visible canvas behind the thread. Cross stitch is a subset of embroidery. You use embroidery floss to make embroidery and cross stitch. The word cross stitch refers to the fact that it's worked in X's or crosses. You make a grid of X stitches in cross stitch, whereas embroidery is more free-form and does not follow a specific grid pattern.
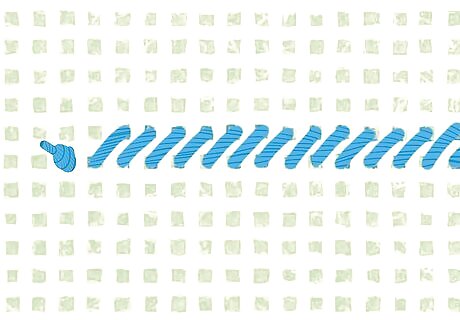
Use the continental stitch to provide more coverage over an area. Insert the needle into the space where you want to begin working the continental stitch. Then, bring the needle up diagonally and down through the stitch adjacent and to the right of that stitch. Then, come up through the next space in the row beside where you started the stitch. Continue to work across the row going from right to left. Then, work back along the next row going from left to right. Make sure to insert the needle through spaces that already have 1 stitch in them on your second row.Tip: The continental stitch is very similar to the half-cross stitch, except you work it going from right to left instead of left to right.
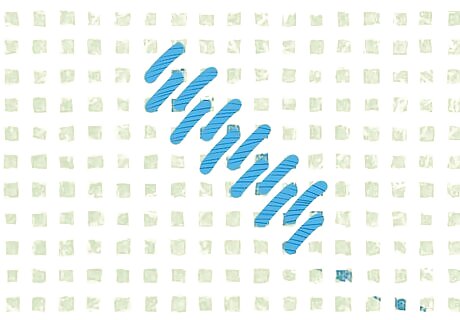
Try basketweave stitch to provide full coverage over large areas. Work this stitch diagonally starting at the top right hand corner of the area. Bring the needle down through the space that is diagonal to this space. Then, bring the needle back up through the space that is diagonally adjacent to this stitch, and repeat the stitch. This stitch creates a pyramid like stitch design. It allows good coverage of the canvas with the least distortion and should be used in large areas.

Do the brick stitch for a vertical stitch with good coverage. Insert your needle through the canvas where you want to begin the stitch. Bring the thread all the way through the canvas and pull it taut. Then, insert the needle into the second stitch up from where you brought the needle out. Bring the needle back through the canvas next to where you started the first stitch. Use a thick thread, yarn, or multi-strand piece of embroidery floss to create the brick stitch. You can also try the Bargello or long point stitch for a more advanced vertical stitch.
Completing a Project

Work on the smallest or most detailed area first. Always start with the smallest, most detailed areas when you do needlework projects. This will be easier than trying to go in and stitch those areas later. Then, stitch the larger areas that surround the more detailed bits. For example, if you have a section that is only about 1 in (2.5 cm) wide, start here rather than the section that is 4 in (10 cm) wide.

Change the thread when you run out or need to switch colors. Insert the needle into the right side of the project. Then, push the needle through the back of the nearest 3 to 4 stitches and snip the thread near the stitches. Then, thread your needle with your next color or with the same color if you have more of this that you need to work. Create a waste knot, and keep stitching!
Block the canvas if it has become distorted. Blocking your needlepoint is a way to reshape the canvas and give it a more structured look. Remove the canvas from the frame and dampen it with water, such as by spritzing it with a spray bottle. Then, lay it on a pillow or towel with the right side facing down. Pin it down with tacks or pins at 1 in (2.5 cm) intervals all the way around. Allow the canvas to dry completely before removing it. The canvas should take only a few hours to dry, but you may want to leave it out overnight to be sure.
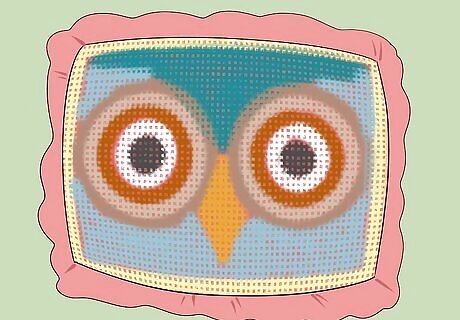
Sew the finished design onto an item. You can turn your finished needlework into a pillow, sweatshirt, purse, or wall decoration. Trim the canvas as needed and then use a sewing machine or needle and thread to sew the canvas onto your item. For example, you could sew your finished needlework project onto a pillowcase, a sweatshirt, or the side of a canvas bag.Tip: Make sure to hide the raw edges of the canvas, such as by folding them under and sewing a straight stitch across them.


Comments
0 comment