
This article will show you how to create and administer your own Flickr photo group for everyone.

Go to Flickr.com. If you are logged in, it will take you to your 'Home' page. If not, sign in. Click on "Group".
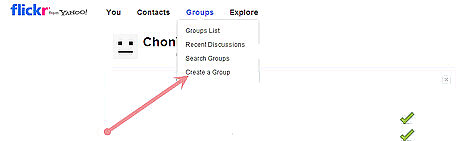
From Groups, scroll down to Create a New Group.

Choose the type of group setting (private, public (invitation only), or public). This article shows you how to create a public group.
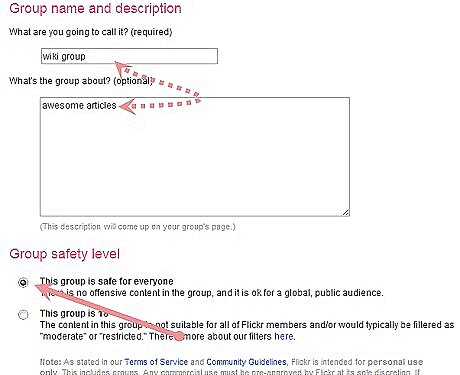
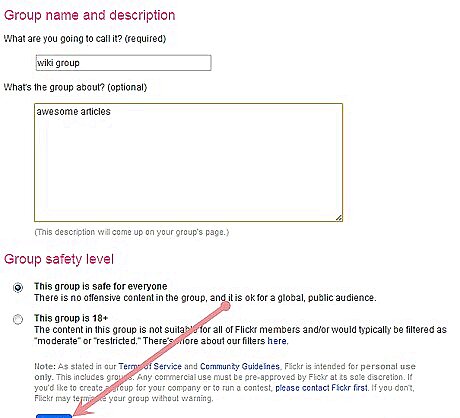
Name your group and select the Group Safety Level (whether it is age-restricted (18+) or not). Try to use a group name that would make sense to people searching for your interest or for the types of photos you'll be grouping in it. Press Next.
Click on "Groups" above to see your groups. Your new group should now appear. Go to your group's Administration page (click on the tab Administration located under your group's name) and make any needed administrative type decisions.
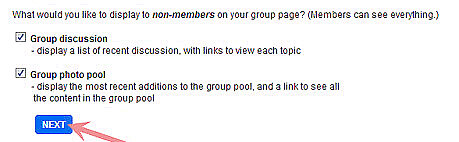
Control the viewing level of those visiting the group. Under Privacy you can select what you want to display to non-members.
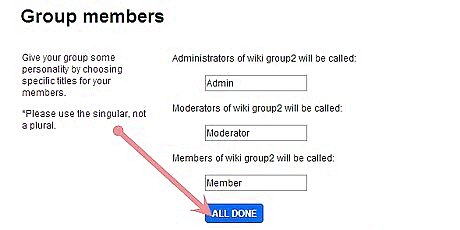
Select what you want the different levels of members to be called (under Membership).
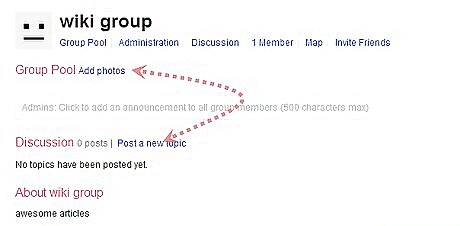
Start making your group interesting. Click on Add Something? located on the group home page. This will take you to your photostream and you can start selecting photos from there for the group. Up to six photos can be added at a time and you can use the Search box to find relevant tags on your photos. Look at the drop-down box under the words Your Photostream; it will show you that photos can be retrieved from: All your items Your sets Photos uploaded on a certain date Your groups Geotagged or non- geotagged items.


Comments
0 comment