views
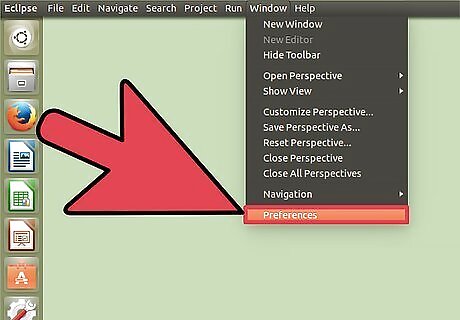
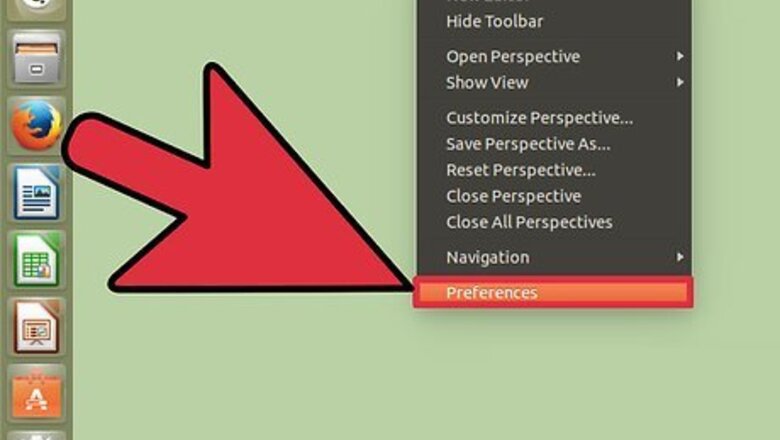
Open the Eclipse program. Click the Window option in the top tool bar and then click Preferences.
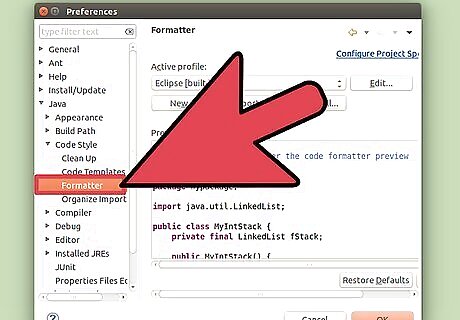
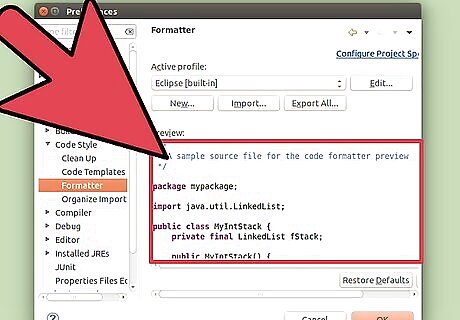
Using the left side of the box, expand the Java option, then expand Code Style and finally click Formatter.
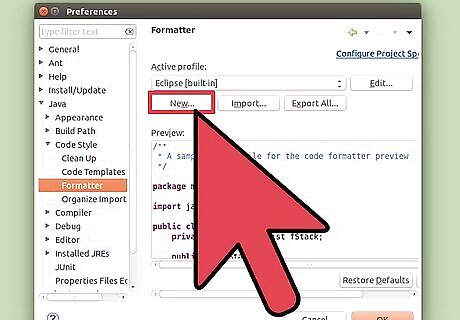
Notice the active profile should be set to “Eclipse [built-in]” you cannot edit this setting, so make a new one by clicking the “New...” button underneath.
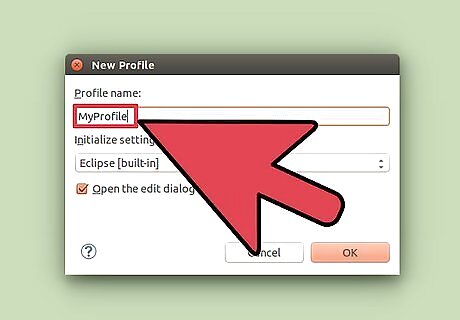
Enter the “profile name”. Pick a name that is significant to you so that you will remember what it is. The “Initialize setting with the following profile” option should have “Eclipse [built-in]” selected. The “Open the edit dialog now” should also be selected. Now click “OK” to create your new format settings.
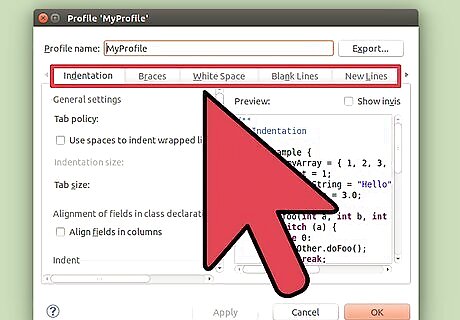
Observe are now presented with the “Profile ‘name you selected’” box. There will be 8 tabs, named as follows: Indentation Braces White space Blank lines New lines Control statements Line wrapping CommentsThere will be an “Apply” and “OK” button at the bottom. You should make sure that you hit the “Apply” button every time you make a change so that it will know it is definitely saved and applied to your format settings.
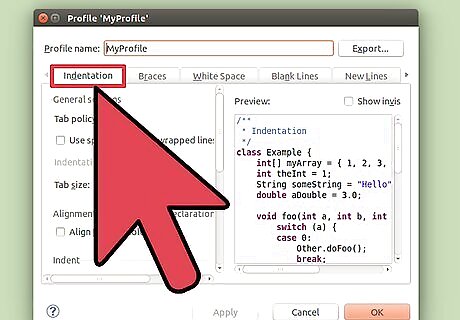
Refer to the picture at the right to see the INDENTATION TAB. Indentation is very important because it makes a program more readable if done properly. In the General Settings area, you can change the size of the tab, which you can set depending on whether you want to save space or if you want to differentiate the different sections more easily. According to coding conventions, you should leave all the boxes in the Indent section checked (Empty lines box does not matter). Do not forget to click Apply.
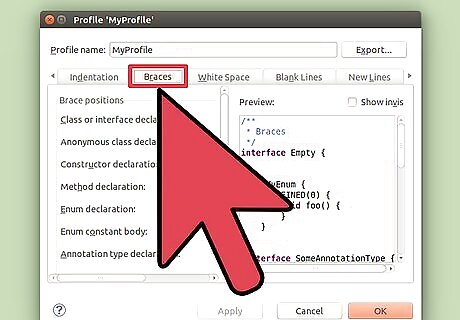
Click on the BRACES TAB, and refer to the picture to the right if necessary. The braces settings are fairly simple and are based on personal preference. Most people either use the “Same line” or “Next line” position. You should use the same position for every option. Do not forget to click Apply.
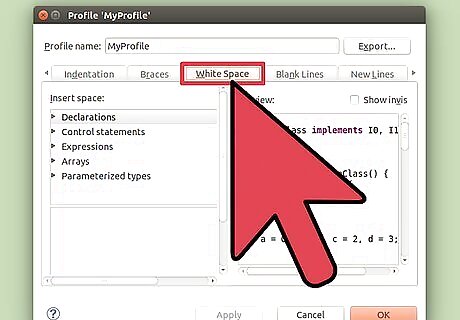
Click the WHITE SPACE TAB. Use the picture to the right for reference. Once again, this tab is for personal preference and ease of reading. There are many options to expand, read through and then select or deselect according to your preference on where you want a space (means one click of the space bar) to be added or removed. Do not forget to look in the preview window to see the change and click Apply often, seeing as there are many options in this tab.
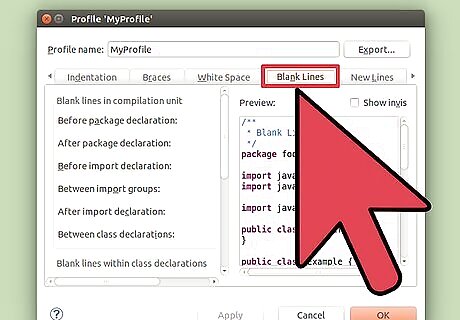
Click the BLANK LINES TAB and use the picture as a reference. This tab allows you to specify the number of blanks lines before or after different declarations. The standard is usually either 0 or 1 depending on the option. If you use more than 1 blank line, it is just wasting space. Choose the options according to you preference. Do not forget to select Apply.
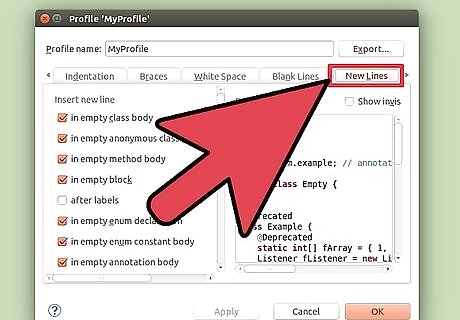
Look at the picture to the right and then click on the NEW LINES TAB. This tab is purely for user preference, so choose options as you desire. Do not forget to click Apply.
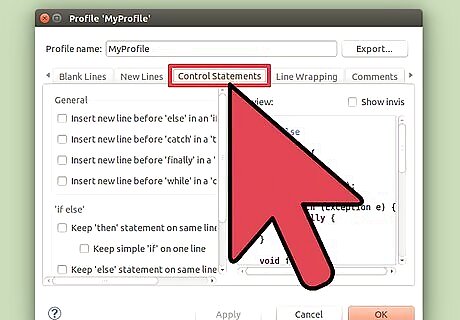
Observe the CONTROL STATEMENTS TAB is for your personal preference. Refer to the picture to the right, while selecting the boxes. The document is easily read with or without the added space after a control statement. To limit the length of your document leave the boxes unchecked. Do not forget to click Apply.
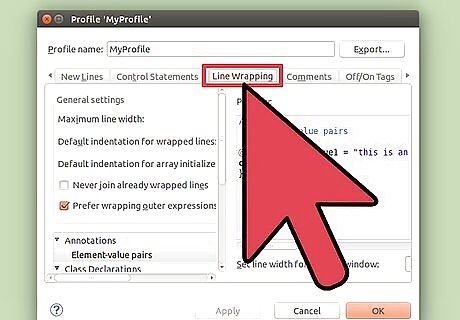
Click the LINE WRAPPING TAB and see the picture to the right. In the “Line width and indentation levels” section choose how many characters wide your document can be and how wide you want the indent to be for the wrapping of the line(s). Below, click each option and choose the “Line wrapping policy” and “Indentation policy” accordingly. You want your document to have the littlest amount of wrapping as possible, so that it is easy to read. Do not forget to select Apply often, since there are a lot of options.
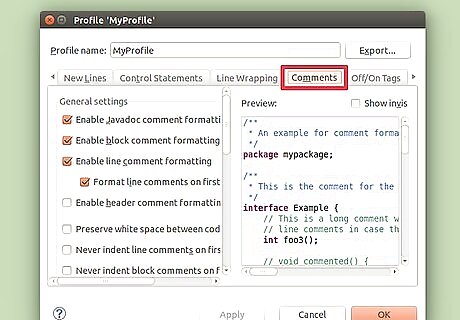
Set the options in the COMMENTS TAB. This is the last tab to set and the picture to the right is for reference. The options that begin with “Enable...” should be selected. The other options can be selected for personal preference. Selecting all the options that will “Remove blank lines.” is reccomended. Do not forget to click Apply.
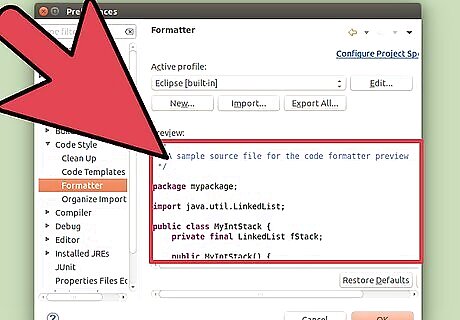
Check out the sample program. As an example, to show you how the format will work, there is a sample program (click on the picture at the right) shown with the formatting distorted (i.e. wrong indentation, extra spaces, etc.).
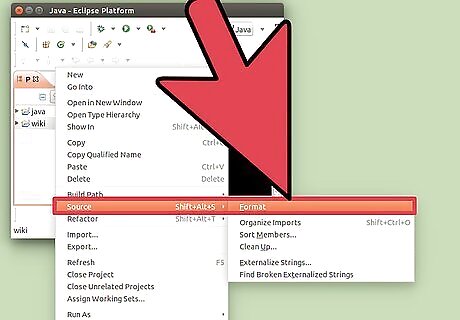
Format the currently selected document. Click on Source in the top tool bar and then click Format or as a shortcut you can click “Control + Shift + F”.
Click on the picture to the right. Here you can see that the indentation has been restored, excess space has been removed and brackets are placed as per the users preference. Your document will not, necessarily look like the example as you've used your own personal coding style preference.


Comments
0 comment