views
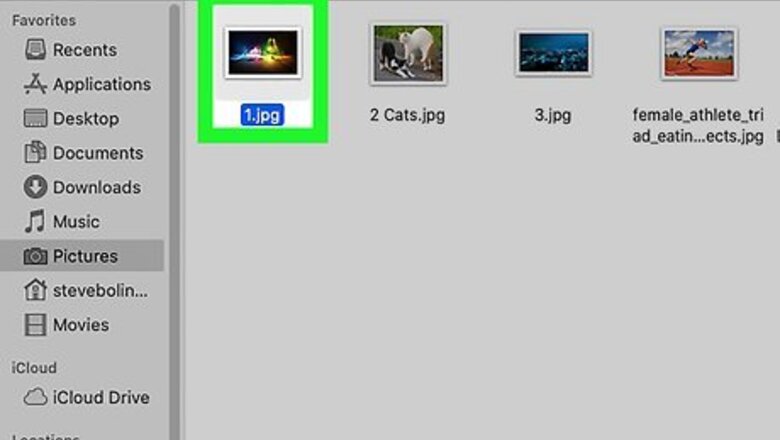
- Right-click (or control-click) an image. Click "Set Desktop Picture".
- Open "System Settings" → "Wallpaper" → select a wallpaper. Click the drop-down menu to adjust the display option.
- Images must be in JPEG, PICT, TIFF, PNG, or HEIC format to be used as desktop wallpaper.
Using the Context Menu
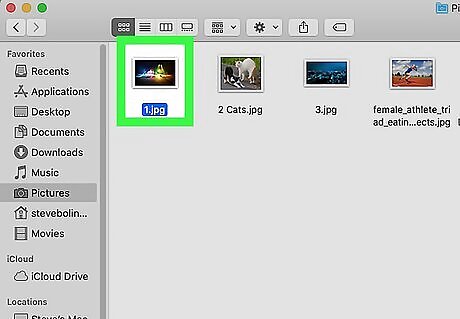
Right-click an image file. This is the fastest way to set the background. Locate the image in the Finder and right-click the folder. On a one-button mouse, hold down control and click to control-click. Make sure the image is in a supported format: JPEG, PICT, TIFF, PNG, or HEIC.
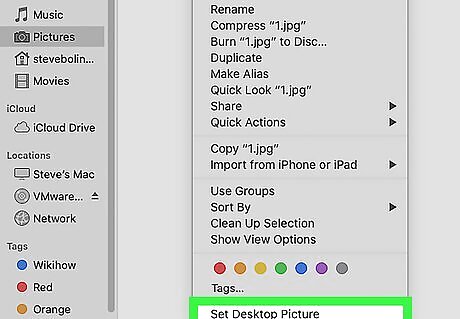
Click Set Desktop Picture. This option is at the bottom of the drop-down menu. Your desktop should change automatically, though it may take a moment for a high-resolution image. You can also use this method to set a wallpaper picture from Safari or Google Images. Find an image, right-click, and click Set Desktop Picture.
Using System Settings
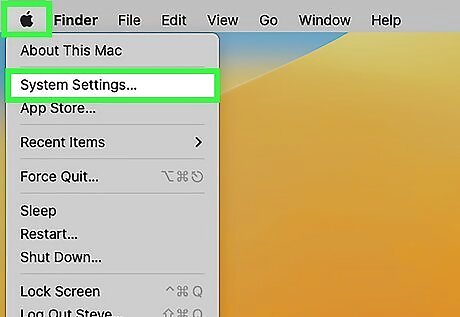
Open System Settings. Click the Apple menu on the top menu bar and select System Settings. On Monterey and earlier, this will be System Preferences.
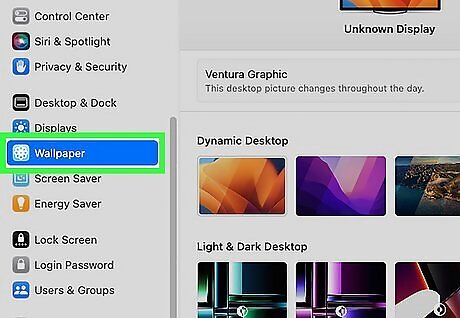
Click Wallpaper. This will be in the side panel. On Monterey and earlier, click Desktop & Screen Saver and then Desktop.
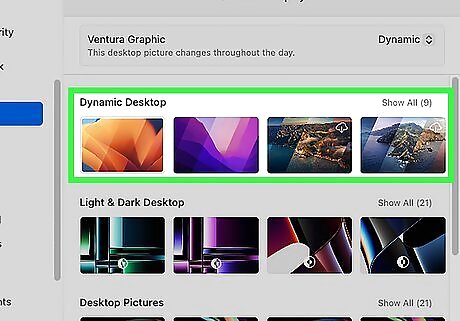
Choose a wallpaper from Mac's gallery (optional). You can browse the categories: Dynamic Wallpapers, Light & Dark Wallpapers, Pictures, or Colors. Clicking a wallpaper will apply it immediately. Dynamic Desktop: this wallpaper will change gradually throughout the day depending on your location. You must have Location Services turned on for this to take effect. Light & Dark Desktop: these wallpapers switch from light to dark when the sun sets. If you have Dark Mode enabled, the desktop picture will default to a dark still image. Desktop Pictures: these pictures stay static and still throughout the day. Colours: select a color to use as a solid background for your desktop. Click + to select a custom color.
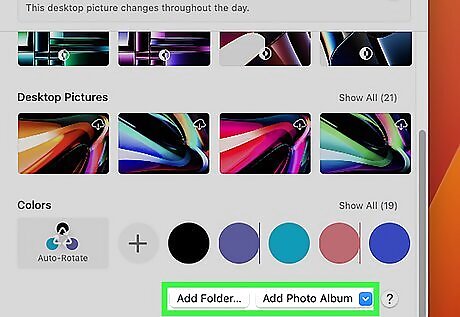
Choose a wallpaper from your own gallery (optional). Underneath Colors, you'll see Photos (Ventura) or Add Folder/Add Photo Album (Monterey or earlier). Click Add Folder to select a folder. Click Add Photo Album to select a photo album from your library. After adding a folder or photo album, select a photo.
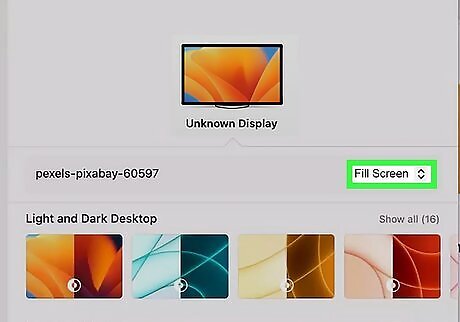
Adjust the display options (optional). Once you select a wallpaper to use, you can adjust how the image fits on your screen. Click the drop-down menu below the Built-in Display and select an option. Fill screen: Enlarges photo until screen is covered. This will cut off part of the photo if its size ratio is different from your screen. Fit to screen: Enlarges photo to fill the height of the screen. Narrow photos will have black borders on either side. Wide photos will have the sides cut off. Stretch to fill screen: Distorts photo to fill the entire screen with no cut-offs. Center: Places photo in the center of the screen surrounded by a solid color.




Comments
0 comment